How to Get Started with Roblox Studio: A Beginner’s Guide
Learn how to get started with Roblox Studio with practical setup tips, core UI guidance, and your first project. This beginner-friendly guide from Blox Help covers installation, interface basics, scripting, and publishing.

By following this guide, you will learn how to get started with Roblox Studio—from downloading Roblox Studio to creating your first place and testing it in-game. You’ll need a computer (Windows 10/11 or macOS), a stable internet connection, and a Roblox account. This step-by-step approach helps beginners gain confidence quickly.
How to Get Started with Roblox Studio
Roblox Studio is the official development environment for creating Roblox games and experiences. If you’re new to game development or Roblox, this is the right starting point. How to get started with roblox studio is a common question, and a structured approach makes learning faster. In this guide we outline installation, navigation, first projects, and practical tips to build confidence as you begin. Before you dive in, keep your goal small. A simple place with a single interactive object is enough to learn the core workflows. You’ll become more confident as you complete short tasks and see immediate results. You’ll discover that most of the work is iterative: build, test, observe, and refine. According to Blox Help, getting started with Roblox Studio is easier when you focus on hands-on basics. The idea is to learn by doing: install, load a starter template, place a few parts, and run a quick test. As you progress, you’ll find that the real value comes from incremental steps and consistent practice. If you’re wondering how to get started with roblox studio, this guide will give you a practical, actionable path to mastery.
What You Can Build with Roblox Studio
Roblox Studio enables you to craft interactive experiences, from simple obstacle courses to complex simulations. Start with small, tangible outputs — a Baseplate scene, a few parts, and a light interaction. Over time, you can add terrain, lighting, GUI elements, and basic scripting to bring your ideas to life. The journey is iterative: design, test, observe player feedback (even in a local test), and refine. The goal is steady progress rather than perfect first attempts. As you practice, you’ll naturally learn to organize your project, name objects clearly, and reuse modules to speed up development. This approach aligns with best practices recommended by the Roblox community and tutors at Blox Help, who emphasize learning by doing and building momentum through frequent wins.
Why Roblox Studio Is Great for Beginners
Roblox Studio lowers the barrier to entry for game development by offering visual tools, drag-and-drop components, and a friendly scripting language (Lua) for those who want to expand their projects. Beginners gain confidence quickly when they start with guided tasks, reuse pre-made assets, and gradually introduce scripts as they feel comfortable. The platform also provides a thriving community, tutorials, and official docs that complement hands-on learning. Keep the focus on achievable goals and celebrate small milestones as you become proficient with the core editors and workflows. For many new creators, the critical moment is simply launching their first test and seeing a playable result right away.
Quick Start Checklist
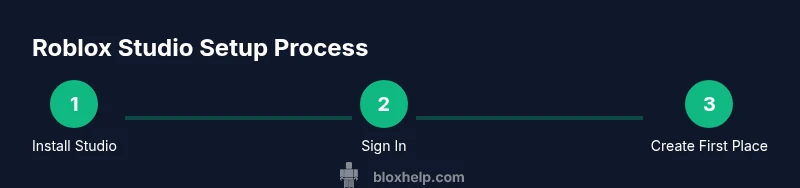
- Install Roblox Studio from the official site
- Sign in with your Roblox account
- Create a new Baseplate project
- Explore the Explorer and Properties panels
- Add a few parts and run a quick test
- Try a tiny Lua snippet to print a message
Following these steps helps you stay focused and make consistent progress toward your first publish.
How to Navigate the Core UI (Overview)
The Studio interface revolves around a few key panels: Explorer (hierarchy of objects), Properties (modifiable attributes), Viewport (live 3D scene), and Output (logs and messages). The Toolbox offers assets you can drag into your scene. Familiarizing yourself with these elements early speeds up your learning. As you gain comfort, you’ll start using shortcuts and quicker workflows, which is essential for rapid prototyping. The journey to mastering Roblox Studio begins with steady, focused exploration of these tools and recognizing how they interact to shape your project.
First Steps to Your Initial Place (Explained)
Start with a simple Baseplate, then add a few blocks (Parts) to form a basic environment. Use the Move, Rotate, and Scale tools to position objects accurately. Apply colors, materials, and basic lighting to create a visually appealing scene. This initial setup helps you understand spatial relationships and how objects influence gameplay. The act of placing and adjusting these elements teaches you how Roblox Studio responds to changes in real-time. As you build, save frequently to preserve your progress and prevent data loss.
Basic Scripting Concepts for Beginners (Lua Sketch)
Lua is the scripting language used in Roblox Studio. You don’t need to be a pro to start; begin with tiny, practical scripts. For example, a Script in Workspace can print a greeting when the game starts: <pre><code>print("Hello, Roblox!")</code></pre> This simple snippet demonstrates how code interacts with game objects. As you get comfortable, you can extend scripts to respond to events (like a player touching a part) and gradually build logic for more engaging experiences. Remember, every script adds complexity, so add small, testable bits rather than large blocks at once.
Testing Your Work: Play Mode and Feedback Loops
Testing is where theory becomes reality. Use Play mode to run your game inside Roblox Studio and observe how the scene behaves from a player perspective. Check for collisions, object visibility, and script outputs in the Output window. If something breaks, revert to a previous save, adjust properties, and re-test. Iterative testing helps you identify a path forward and reinforces learning through tangible results. This loop — build, test, refine — is the core habit of successful Roblox developers.
Common Pitfalls and How to Avoid Them
Beginners often overcomplicate scenes or neglect naming conventions, asset organization, and version control. A good habit is to name all objects clearly from the start, keep a simple folder structure, and commit small changes with regular saves. Another typical issue is neglecting performance considerations; large worlds with many assets can cause lag. Stay mindful of memory usage and optimize gradually as you add features. Learning to balance creativity with practical constraints is key to long-term success in Roblox Studio.
Next Steps: Learning Paths and Community Resources
From here, you can deepen your skills by following structured learning paths, exploring Roblox’s official docs, and joining community groups. Practice with templates, follow beginner-friendly tutorials, and gradually introduce more complex scripting or design tasks. Blox Help recommends building a routine: dedicate a short daily session to iterate on a small project, then review your progress weekly. This consistent approach accelerates skill acquisition and boosts confidence as you move toward more ambitious projects.
Tools & Materials
- A computer (Windows 10/11 or macOS 10.13+)(Stable performance; 8 GB RAM minimum recommended)
- Roblox account(Needed to sign in and publish your place)
- Stable internet connection(Required to download Roblox Studio and sync assets)
- Roblox Studio installer(Download from the official Roblox site)
- Mouse with precise control (optional)(Helps with accurate 3D navigation)
- Note-taking tool (digital or paper)(Capture ideas, steps, and scripts)
Steps
Estimated time: 90-120 minutes
- 1
Download and install Roblox Studio
Visit the official Roblox site and download Roblox Studio. Run the installer and follow the on-screen prompts. This step establishes the software base you’ll use to create and test your projects.
Tip: Run the installer as administrator if prompted to ensure all components install correctly. - 2
Sign in with your Roblox account
Open Roblox Studio and sign in with your existing Roblox account. If you don’t have one, create an account on the Roblox website. Signing in unlocks access to assets, templates, and publishing options.
Tip: Enable two-factor authentication for extra account security after you sign in. - 3
Create a new Baseplate project
From the New Project dialog, choose a Baseplate template to start. Baseplate provides a flat terrain canvas for rapid prototyping, allowing you to focus on layout and basic interactions.
Tip: Rename the starter scene objects immediately to maintain organization. - 4
Explore Explorer and Properties panels
Open the Explorer to see your scene’s hierarchy and the Properties panel to adjust attributes. This is where you manage objects, scripts, and components that drive behavior.
Tip: Drag objects between folders to keep your project tidy and easy to navigate. - 5
Add a Part and adjust its transform
Insert a Part into the scene, then use Move, Rotate, and Scale tools to position it. Change color and material to understand how visuals affect readability and player experience.
Tip: Use the alignment gizmo to snap objects precisely in space. - 6
Insert a basic Script
Create a Script inside the workspace and add a simple print statement. This introduces you to scripting alongside visual design, connecting behavior to objects.
Tip: Start with small, testable blocks of code before expanding logic. - 7
Run Play mode to test
Click Play to simulate a player session and observe how your scene behaves. Look for errors in the Output window and adjust accordingly.
Tip: Test with different camera angles to spot usability issues early. - 8
Iterate based on feedback
After testing, refine object placement, scripts, and visuals. Small iterations add up to a polished experience over time.
Tip: Keep a changelog to track what you changed and why. - 9
Save and export your work
Save your project regularly and consider exporting a copy for safekeeping. When ready, publish to Roblox with a descriptive title and thumbnail.
Tip: Never publish drafts; ensure the project meets basic quality before going live. - 10
Plan your next steps
Review tutorials, select a learning path (scripting, UI design, or world-building), and set regular practice goals. Consistency accelerates growth in Roblox Studio.
Tip: Set a weekly milestone and celebrate small achievements.
Questions & Answers
What is Roblox Studio?
Roblox Studio is the development tool used to create Roblox games and experiences. It provides visuals, scripting, and publishing workflows to build interactive content.
Roblox Studio is the creator tool that lets you build and publish Roblox games.
Do I need coding to start?
No. You can begin with building and arranging objects. Scripting can be learned later to add interactivity.
No coding required at first—start with building, then learn Lua when you’re ready.
Can I use Roblox Studio on Mac?
Yes. Roblox Studio works on macOS and Windows, though you may notice UI differences and performance tweaks by platform.
Yes, Roblox Studio runs on both Mac and Windows.
How do I publish my first place?
Finish your basic setup, then use the Publish button in Roblox Studio, provide a title and description, and confirm. Your place becomes available on Roblox after processing.
Publish once your first place is polished and ready for players.
Where can I get help and tutorials?
Roblox’s official docs and creator forums are great starting points. Community tutorials and guides from reputable sites like Blox Help offer practical, beginner-friendly guidance.
Check Roblox docs and trusted guides like Blox Help for step-by-step help.
What’s the best way to learn Roblox Studio?
Follow a structured path: start with templates, practice daily, review sample projects, and gradually add scripting. Consistency beats sporadic, lengthy sessions.
Stick to a steady practice routine and build one small project at a time.
Watch Video
The Essentials
- Start with templates to learn quickly.
- Explore Explorer and Properties early for control.
- Test frequently using Play mode to catch issues.
- Plan structure and naming conventions from day one.
- Publish after thorough testing and optimization.