How to Create a Roblox Birthday Invite: A Step-by-Step Guide
Learn to design and share a Roblox birthday invite with Blox Help. Create in-game invites, customize text and visuals, and send to friends inside Roblox.

By the end of this guide, you will be able to create a Roblox birthday invite that players can view and respond to inside-game or as a shareable image. We'll cover two paths: a simple in-game GUI invite built in Roblox Studio and a ready-to-send invite card you can post outside Roblox. Both approaches respect privacy and are beginner-friendly.
What is a Roblox birthday invite and why it matters
A Roblox birthday invite is a digital message that announces a birthday party or in-game event for Roblox friends. It can appear inside a game as a UI panel, or be shared as an image or link outside Roblox. A well-crafted invite fits Roblox’s playful aesthetic, keeps the event details clear, and invites players to join a celebration without breaking privacy rules. For players who are planning a real-world party tied to a Roblox celebration, a virtual invite can bridge your online and offline plans. In this guide, we focus on practical, beginner-friendly methods to create a Roblox birthday invite that your friends will notice and respond to, while teaching you the skills to customize future invites.
According to Blox Help, starting with a clear goal and a simple design helps new creators stay organized and avoid overwhelm when crafting a Roblox birthday invite.
Why this kind of invite matters
Invites shaped for Roblox tend to perform better than generic announcements because they match the game’s vibe and provide a clear call to action. A well-made Roblox birthday invite sets expectations about time, place (in-game location or server), and how to RSVP. It also reduces confusion by using consistent terminology and visuals that align with your party theme. For many players, a thoughtful invite is the first step toward building community around a shared celebration, whether it’s a casual hangout in a popular game or a private party in a custom experience. The best invitations balance fun with clarity and respect for other players' privacy.
A good invite can also serve as a learning project for beginners, helping you pick up basic UI concepts, learn about layout, and practice concise writing that works in the limited space of a Roblox screen.
Design options: in-game UI vs external image
When you design a Roblox birthday invite, you have two main paths. The first is an in-game UI invite that appears as a ScreenGui panel within your game. This option offers interactivity (buttons for RSVP, shortcuts to location details, etc.) and guarantees that every participant who opens the game can see it. The second option is a shareable image or poster created outside Roblox in a design tool, then distributed via chat, social apps, or forums. External images are easier to aesthetically polish and can be reused for multiple events, but they require a link or a screenshot for recipients to access in Roblox.
In most cases, a hybrid approach works best: an in-game invite for participants who join the game, plus a high-quality external card for promotion outside Roblox. This blend keeps your invite accessible to a wider audience while preserving Roblox’s visual identity and community-friendly norms.
Essential elements to include in every invite
Every Roblox birthday invite should convey core details concisely. Include:
- Event title and theme (e.g., “Join the Roblox Birthday Bash – Blaze Party”).
- Date and local time, plus time zone if necessary.
- Host name and contact method for questions.
- Platform or server where the party will take place, plus how to join.
- RSVP instructions and a deadline.
- A friendly, game-appropriate graphic or character that matches your theme.
Keep text short; use bullet points or short lines to maximize legibility on small screens. Make sure the color contrast is strong and the font sizes are readable in both mobile and desktop modes. For privacy, avoid including real-world addresses or phone numbers in public invites; provide a Roblox-specific contact method instead.
A solid invite also includes a simple call to action, like “Click RSVP” or “Join the party in-game now,” so players know exactly what to do next.
Path A: Building an in-game invite with Roblox Studio
Building an in-game invite gives you full control over the experience inside Roblox. Start by creating a ScreenGui that holds a Frame, TextLabel for the title, additional TextLabels for date/time, and a Button for RSVP. Use a color palette that fits the Roblox aesthetic and ensure the layout scales across devices. Add a small LocalScript to handle taps on the RSVP button, showing a confirmation message or opening a detail panel. Test the UI in a few resolutions to verify readability and accessibility. This path also keeps everything within Roblox, so no external links are required for participants who already play in your game.
Sticking to simple UI elements reduces complexity while teaching fundamentals like layout, typography, and basic scripting. For beginners, start with a single screen and a few interactive elements, then expand later.
Path B: Creating a shareable external invite image
External invitations are great for messaging apps and social media. Design a clean, high-contrast image that mirrors your in-game invite’s look and feel. Include the essential details (title, date/time, host, and a succinct RSVP instruction) and export in PNG or JPG for broad compatibility. Keep file sizes reasonable to avoid long download times on mobile connections. The image can be paired with a short Roblox-themed caption or a QR-like code that points to your game’s invite panel if you want to bridge online and in-game experiences.
If you’re distributing via chat, you can also paste a short text invite with the essential details and a link to your Roblox game. A well-crafted external invite helps reach players who don’t frequent the game but enjoy Roblox content overall.
Safety, privacy, and etiquette when inviting friends
Invites should respect privacy and consent. Avoid sharing personal contact information in public channels. When distributing inside Roblox, make sure your audience is limited to friends and players you know or who have asked to receive invites. If you’re sharing externally, consider a consent-based approach where kids or guardians know what is being shared and why. Always follow Roblox’s community guidelines and your own party’s rules for guest lists. With clear opt-out options and a simple way to mute or decline, your Roblox birthday invite stays friendly and inclusive.
Common mistakes and how to avoid them
Common pitfalls include cluttered text, low-contrast colors, and overcomplicated layouts. Avoid long sentences; use short phrases that fit within a single screen. Don’t embed links in in-game invites unless you’re sure the audience will access them safely. Missing RSVP instructions or failing to specify time zones leads to confusion. Test your invite with diverse devices and ask a friend to review for readability and tone. Finally, don’t reuse the same artwork for every event—refresh visuals to keep invites exciting and on-brand.
Quick-start templates you can adapt today
To help you hit the ground running, here are a few starter templates you can customize quickly:
- In-game UI: “You’re invited to the Roblox Birthday Bash! Host: [Name]. When: [Date] at [Time] [TimeZone]. Where: In-game server [ServerName]. RSVP by [Date]. Tap RSVP to confirm.”
- External image: “Roblox Birthday Bash” title, bold date and time, host name, a playful character illustration, and a single CTA: “Join the party in-game.”
- Hybrid: Combines a text invite card with a QR-code-like cue that references your game location.
Tools & Materials
- Roblox Studio(Install Roblox Studio and create a new project; test UI in a local session.)
- Graphic design software (optional)(Canva, Figma, or Photoshop for external cards.)
- Roblox account with publish rights(Needed to test the in-game invite in a live setting.)
- Event details(Host name, date, time, server/location, RSVP method.)
- Brand assets(Theme imagery, icons, and any party-specific visuals.)
- Screenshot tool(Capture and share your final invite visuals.)
Steps
Estimated time: 90-120 minutes
- 1
Define the invite goals
Clarify who is invited, the event theme, and how attendees will respond. Write down date, time, and in-game location to avoid last-minute edits.
Tip: Draft the essential details first; keep text concise and readable. - 2
Set up your Roblox Studio project
Open Roblox Studio and create a ScreenGui with a Frame to host the invite content. Arrange UI elements in a grid or stacked layout for clean alignment.
Tip: Use safe areas and test on multiple resolutions. - 3
Add UI elements for the invite
Insert TextLabel components for title and details; add a Button for RSVP. Apply Roblox-style colors and ensure high contrast for readability.
Tip: Keep font sizes consistent and avoid crowded text. - 4
Implement simple interactivity
Attach a LocalScript to the RSVP button to show a confirmation or reveal more details. Keep scripting minimal and robust.
Tip: Test the interaction with different screen sizes. - 5
Test in-game
Run a test session to verify layout, text readability, and interaction flow. Note any overlap or misalignment and adjust.
Tip: Iterate quickly, small tweaks improve UX. - 6
Prepare a shareable image
Create a PNG/JPG version mirroring the in-game invite. Ensure the image is clear and legible on mobile data connections.
Tip: Maintain consistent aspect ratio for easy sharing.
Questions & Answers
What is a Roblox birthday invite?
A Roblox birthday invite is a digital message that announces a birthday party or in-game event within Roblox. It can appear as an in-game UI panel or as a shareable image you distribute to friends. It should be clear, friendly, and free of sensitive data.
A Roblox birthday invite is a digital party announcement inside Roblox, either as an in-game panel or an image you share with friends.
Can I share invites outside Roblox?
Yes. You can export an invite image or poster and share it via messaging apps, social media, or copy-paste a text invite. Always respect privacy and avoid sharing personal data.
Yes, you can share invites outside Roblox, but be mindful of privacy.
Is Roblox Studio required for an in-game invite?
Using Roblox Studio is the most flexible way to build an in-game invite. If you prefer, you can use pre-made UI elements or external tools to craft a card that links to your Roblox game, but Studio gives you full control.
Studio makes it easier to implement an in-game invite, but you can work with pre-made assets if you prefer.
How do I test invites with friends?
Invite a friend to join your game in test mode, or use Roblox's Play Solo/Play with Friends options to verify how the invite looks and behaves in real conditions.
Test with a friend in-game to see how the invite works for real.
Can I customize fonts and colors safely?
Yes. Keep fonts legible and colors with high contrast. Use Roblox-style color palettes to ensure the invite looks native and loads quickly on all devices.
Yes, keep it readable and Roblox-like.
Watch Video
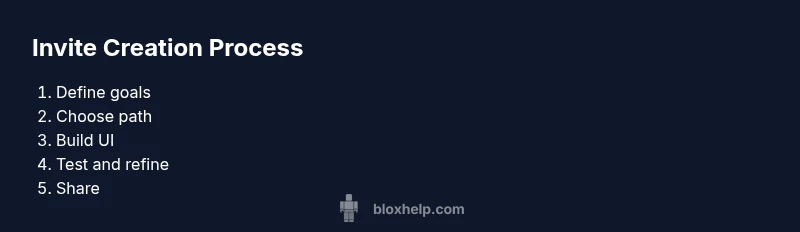
The Essentials
- Define the invite goals before design
- Choose between in-game or external paths (or both)
- Test across devices for readability
- Respect privacy and consent when sharing details