Blender Roblox: A Practical Guide to Creating Roblox-Ready Models
Learn to model in Blender for Roblox, export clean assets, and import into Roblox Studio. This step-by-step guide covers setup, modeling best practices, UVs, textures, and export settings for a smooth Roblox asset workflow.

Learn how to model in Blender for Roblox, export clean assets, and import them into Roblox Studio for gameplay-ready use. This step-by-step guide covers setup, modeling best practices, UVs, textures, and export settings to keep your Blender Roblox workflow smooth and efficient. Whether you’re a beginner or an aspiring developer, you’ll learn practical tips to optimize for performance and maintain compatibility with Roblox’s asset pipeline.
Why Blender for Roblox
blender roblox workflows offer a flexible and cost-effective path to create high-quality assets for Roblox games. Blender’s mesh tools, UV editors, and texture baking help you prototype quickly while keeping polygon budgets in check. For beginners, Blender provides a gentle learning curve with a thriving community, and for seasoned devs, it delivers robust scripting and automation options. According to Blox Help, Blender helps developers plan, model, and optimize assets before export, reducing in-game issues and speeding up iteration. Roblox Studio can then take these assets and integrate them into scenes with lighting, collisions, and physics tuned for performance. By starting in Blender, you retain full control over topology, edge flow, and texture maps, which translates into cleaner rigs, sharper silhouettes, and consistent materials when imported into Roblox. This blended workflow bridges creativity with performance and helps you scale from simple props to complex characters.
Getting Started: Tools and Setup
To begin, ensure your workstation meets the minimum requirements for Blender and Roblox Studio. Install the latest Blender from blender.org and the Roblox Studio client from Roblox’s official site. Set Blender’s units to metric and normalize scale so one Blender unit roughly corresponds to Roblox’s scale in studs. This alignment reduces downstream surprises when importing to Roblox Studio. A clean workspace, reference imagery, and a clear asset plan dramatically cut iteration time. The first pass should be a simple low-poly silhouette to nail proportions, followed by incremental adds of detail. As you prepare to export, confirm that you’ll be exporting in FBX format for the strongest compatibility with Roblox Studio.
Modeling Best Practices for Roblox Scale
When modeling for Roblox, keep the silhouette readable at small sizes and maintain a straightforward edge flow. Use simple geometry for primary features and reserve more detailed geometry for surfaces that will be heavily visible. Avoid overly complex micro-details that won’t read well in game lighting. Maintain clean topology with quad-dominant meshes where possible, which simplifies UV mapping and deformation testing. Always align the model’s origin and ensure the pivot point is positioned at a logical location for placement in Roblox scenes. Checking your model from multiple angles helps catch silhouette issues early. Remember to save incremental versions so you can revert if a refinement doesn’t pan out in Roblox Studio.
UV Mapping and Texturing Essentials
Unwrap with even texel density to keep textures crisp across different asset scales. Plan your texture atlas to minimize draw calls in Roblox, and bake any complex lighting effects into texture maps if necessary. For beginners, start with a basic diffuse texture to confirm color and shading reads correctly under Roblox lighting. If you plan on adding normal maps or roughness, test them in Roblox Studio to ensure they don’t cause unexpected shading. Always apply a neutral material first, then layer textures to achieve the final appearance. Keep texture sizes modest (e.g., 1024x1024 or 2048x2048 for larger assets) to preserve performance while preserving visual quality.
Exporting from Blender and Import into Roblox Studio
Apply all transforms (location, rotation, scale) before exporting to FBX. Choose FBX as the export format and configure the axis orientation to Blender’s Z-up vs Roblox’s Y-up convention; consider a small scale adjustment to match Roblox studs. In Roblox Studio, import the FBX file and verify the model’s size, pivot, and collision geometry. Check texture paths and re-link any missing textures after import. It’s often useful to import a simple test asset first to confirm the pipeline works end-to-end, then iterate on your main asset. Keep a consistent naming convention to simplify asset management in Roblox projects.
Importing, Placement, and Collisions in Roblox Studio
After importing, place your asset in a test scene and adjust the scale as needed to match in-game measurements. Verify collision boundaries and ensure the model doesn’t clip with nearby geometry during movement. If your asset includes multiple materials, consolidate textures where sensible to reduce draw calls. Test basic lighting and ambient occlusion to confirm the texture reads well under Roblox’s lighting environment. Iterate on the UVs and textures if there are visible seams or misalignments when placed in a typical Roblox scene.
Testing Performance and Optimization
Performance matters in Roblox games; optimize by keeping polygon counts reasonable for the asset’s role. Use Level of Detail (LOD) techniques for distant assets, bake textures for complex surfaces, and consider using texture atlases to reduce texture swaps. Test on multiple devices to gauge frame rate and load times, especially if your game targets lower-end hardware. If an asset underperforms, revisit its geometry density, texture resolution, and material complexity. Regular in-game testing helps you catch bottlenecks early and refine assets for a smooth player experience.
Authority Sources
- Blender Documentation: https://docs.blender.org
- Roblox Developer Hub: https://developer.roblox.com
- Blender Foundation: https://www.blender.org
Troubleshooting Common Issues
- Importing: If the model doesn’t appear in Roblox Studio, verify the FBX export settings and ensure textures are correctly linked.
- Texturing: Missing textures after import usually indicate path or packaging issues; re-pack textures and re-import.
- Scale: If the model is too large or small, adjust the export scale or Roblox import scale and re-check the result in a test scene.
- Shading: Non-uniform shading can indicate non-manifold geometry or inverted normals; fix these in Blender before export.
- Performance: Excessive polygons or heavy textures degrade frame rates; simplify meshes and use texture atlases where possible.
Tools & Materials
- Blender (latest stable)(Install from blender.org; ensure GPU acceleration is enabled if available)
- Roblox Studio(For importing assets and testing in-game)
- FBX/OBJ export(Export as FBX; apply transforms before export)
- Reference images(Helpful for maintaining proportions)
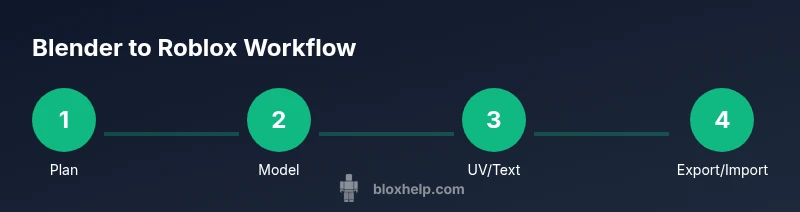
Steps
Estimated time: 1.5-3 hours
- 1
Plan your asset and constraints
Define the asset’s role in Roblox, compute a reasonable poly count, and determine the target Roblox scale. Gather reference images and create a quick block-out plan to guide modeling.
Tip: Start with a simple silhouette before adding detail. - 2
Block out the basic shape in Blender
Create the core volume using low-poly primitives. Focus on proportions and major features; avoid excessive detail at this stage.
Tip: Set the origin to 0,0,0 and align the model to Roblox units early. - 3
Refine topology and optimize
Add detail while maintaining clean topology. Use edge loops strategically, and remove hidden geometry to keep poly count low.
Tip: Check for non-manifold geometry and fix before unwrapping. - 4
UV unwrap and texture planning
Unwrap the model with even texel density; lay out UVs to minimize stretching. Plan textures in 2048x2048 or smaller depending on asset size.
Tip: Apply transforms before unwrapping to avoid distortion. - 5
Export to FBX and prepare textures
Apply scale and rotation, export as FBX with proper options for Roblox; bake or assign textures as needed.
Tip: Test export with a simple plane first to verify axis orientation.
Questions & Answers
What file formats does Roblox Studio accept from Blender?
Roblox Studio primarily accepts FBX for assets coming from Blender. OBJ can work for simple static models, but FBX preserves textures and transformations better.
Blender exports to FBX for Roblox; use FBX for the best compatibility.
Should I use PBR textures for Roblox assets?
Roblox supports texture maps. Start with diffuse textures and progressively add normal maps or roughness if required by the asset.
Start with diffuse textures; add normal maps only if needed.
How do I scale Blender units to Roblox studs?
Roblox uses studs for scale. Configure Blender units and the export scale so that 1 Blender unit aligns with your chosen Roblox unit, then verify in Roblox Studio.
Match Blender units to Roblox studs and verify in Roblox Studio.
What are common export issues from Blender to Roblox?
Axis orientation, scale inconsistencies, and missing textures are common. Apply transforms before export and check the import settings in Roblox Studio.
Axis and scale are the usual culprits; apply transforms first.
Do I need to optimize assets for Roblox?
Yes. Keep polygon counts reasonable, use texture atlases when possible, and test performance in-game to avoid lag.
Optimization is essential; test in-game frequently.
Watch Video
The Essentials
- Plan asset within Roblox's poly budget
- Export with transforms applied and correct axis
- Test imports early to avoid late corrections
- Optimize textures and geometry for performance