How to Make Roblox UGC: A Practical Step-by-Step Guide
Learn to design, texture, rig, and publish Roblox UGC items with a practical, beginner-friendly approach. This guide covers tools, steps, tips, and troubleshooting for creators.

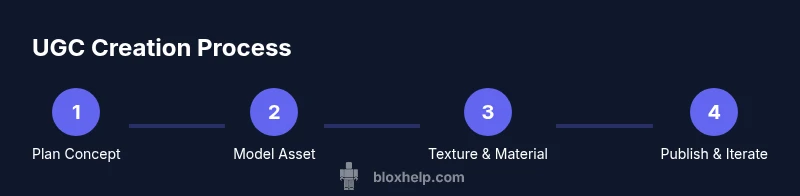
You’ll learn how to create and publish Roblox UGC items. This guide covers planning a compatible model, using Roblox Studio, texturing, rigging for wearables, optimizing polygons, and submitting to the catalog. You’ll also find tips on compliance, pricing, and iterating based on community feedback. It highlights essential tools, common mistakes, and a quick checklist to speed your first upload.
What is Roblox UGC and Why It Matters
Roblox UGC stands for user-generated content, items created by players that can be worn or used in Roblox experiences. UGC items such as hats, accessories, and apparel extend the platform beyond built-in assets and empower creators to monetize or showcase skills. As the name implies, UGC is community-driven; it relies on players to bring new fashion, functionality, and style to avatars. For aspiring developers, UGC can be a practical entry point into asset creation, game design, or brand collaborations, because it teaches you the pipeline from concept to catalog submission. When you start, focus on beginner-friendly wearables that fit common avatar proportions and perform well on mobile devices. Always review Roblox's guidelines to ensure your work remains compliant and publishable. If you’re wondering how to make roblox ugc, start with a simple concept and plan a single wearable that addresses a clear user need. This will minimize rework and create a solid foundation for future projects.
Planning Your UGC Item: Concept, Audience, and Constraints
Before you open any 3D software, map out what you want to create and who will use it. If you’re asking how to make roblox ugc, start with a wearable that solves a problem (e.g., a basic helmet with a colorway that matches common outfits). Define your target audience (new players, long-time collectors, or specific in-game themes) and tailor the design to their needs. Sketch several concept ideas, then pick one that balances originality with the platform’s constraints like polygon count and texture size. Check the Roblox catalog to see what similar items exist and how they’re styled, but avoid direct copies. Create a simple mood board, plus a quick checklist: fit to typical avatar rigs, readable textures at small scales, and a clear silhouette. Finally, set a realistic timeline and success criteria (e.g., number of textures, UV maps, or primary color palette) to guide your work and reduce rework. The more you plan, the faster you’ll bring your idea to life and stay aligned with community expectations.
Tools and Setup for Roblox UGC Creation
To begin, ensure you have the right tools ready so you can work efficiently. Roblox Studio is your primary development environment and should be updated to the latest version. A capable computer with a reliable internet connection helps, as does a basic external 3D tool if you prefer external modeling (e.g., Blender). Gather reference images and concept sketches to guide modeling and texturing. Organize your project with a clear naming convention for parts, textures, and rigs. Set up a local workspace for iterative testing and a simple versioning system to track changes. Finally, prepare a checklist for export formats, texture sizes, and file naming so you stay compliant with Roblox submission requirements.
Modeling, Texturing, and Materials Best Practices
Create a clean, avatar-friendly base mesh that adheres to Roblox’s avatar proportions. When modeling, keep your topology simple and avoid extreme polygon counts that could impact performance on mobile devices. For wearables, ensure the silhouette remains readable even at small scales and from different angles. Texturing should use baked maps where possible and avoid overlapping UVs that create seams or color bleed. Use consistent material definitions and test under multiple lighting conditions to verify realism without overcomplicating shading. If you’re new to texturing, start with a few colorways and gradually introduce details like small logos or trims. Finally, document texture maps (albedo, normal, metallic/roughness) so you can re-use assets efficiently in future projects.
Rigging Wearables and Animation Basics
Rig wearables to fit common avatar rigs so that they move naturally with the character. If your item is a hat, helmet, or accessory, confirm attachment points and ensure there’s no clipping with headgear or hair. For dynamic elements (flaps, banners), consider simple animations or idle movements that don’t tax performance. Test on multiple avatar sizes and body types to ensure compatibility across devices. When exporting rigs, maintain clean skin weights and consistent bone naming to ease future updates. Include a lightweight LOD (level of detail) plan to keep performance solid on low-end devices.
Uploading to the Catalog and Metadata
Prepare metadata that helps players find and understand your UGC item. Create a clear, descriptive name, a concise description, and a few keywords (tags) that reflect the design and intended use. Choose a few representative thumbnails and ensure the in-game preview looks appealing. Submit with appropriate asset properties (e.g., allowed wearables, accessibility notes) and verify that texture files meet size limits. After submission, monitor feedback for bug reports or misalignment issues, and be ready to adjust your asset. Maintain a changelog for updates and plan subsequent iterations.
Quality, Compliance, and Iteration
Quality control means not only aesthetics but also policy compliance and technical performance. Review Roblox’s asset guidelines to avoid copyright issues, inappropriate content, or deceptive pricing. Keep textures clean and avoid misleading branding; all assets should be safe for younger audiences. Conduct internal playtests, gather community feedback, and track reported issues. Use that feedback to guide iterations, improve compatibility, and release updated versions. A disciplined approach to iteration reduces rework and helps you build a portfolio of reliable UGC items.
Common Pitfalls and Troubleshooting
The most common problems include clipping with avatars, oversized textures, and mismatched UVs that create visible seams. Keep backups of multiple versions and test frequently in the Roblox Studio Play mode. If an item doesn’t publish due to policy concerns, review the guideline section again and adjust textures or naming. When things go wrong, break the task into smaller checks: verify scale, confirm attachment points, inspect UV maps, and re-test in multiple environments. Community forums and creator documentation are valuable resources for troubleshooting edge cases.
From Concept to Upload: A Quick Checklist
- Define a simple, avatar-friendly concept for roblox ugc.
- Build with clean topology and readable textures.
- Rig and test on multiple avatar sizes.
- Prepare metadata, thumbnails, and previews.
- Submit and monitor feedback for iterative improvements.
- Keep a version log and plan future updates.
Tools & Materials
- Roblox Studio(Install the latest version and sign in with a Roblox account.)
- A computer with adequate specs(Quad-core CPU, 8GB RAM or more, stable internet.)
- 3D modeling software (optional)(Blender (free) or Maya if you prefer external modeling.)
- Textures and reference images(Prepare PNG/JPG textures, organize UV maps.)
- Concept sketches or mood boards(Helps align the design with your idea and audience.)
- Rigs/Avatar templates (optional)(Useful for testing fit and movement.)
- Versioning system or checklist(Track iterations and changes.)
Steps
Estimated time: 2-6 hours
- 1
Define concept and constraints
Identify the wearables you’ll create and define avatar compatibility, scale, and texture limits. Write a one-page brief detailing colorways, target audience, and usage scenarios. This reduces rework by aligning expectations early.
Tip: Create a 2-3 sentence concept summary and save it as a reference. - 2
Model the base asset
Build a clean base mesh in your preferred tool or in Roblox Studio. Keep topology simple, with smooth edges and proper edge loops to support deformation. Ensure dimensions align with avatar proportions.
Tip: Use clean reference images and keep a single, consistent scale throughout the model. - 3
Texture and material setup
Unwrap UVs and create texture maps (albedo, normal, roughness). Apply textures in Roblox Studio and verify color accuracy at different lighting. Save textures at appropriate resolutions to balance quality and performance.
Tip: Test texture seams at multiple angles and light conditions. - 4
Rigging for wearables
Attach the asset to the avatar rig and verify movement, clipping, and alignment. If your item has moving parts, animate or simulate idle motion carefully. Keep weights clean to avoid jerky motion.
Tip: Test on several avatar presets to catch scale issues early. - 5
Import and assemble in Roblox Studio
Import your mesh and textures, then assemble the final wearable in Roblox Studio. Set up attachment points, ensure proper layering, and confirm there’s no unexpected geometry inside the model.
Tip: Label parts clearly and maintain a simple hierarchy for easy updates. - 6
Metadata and preview setup
Prepare a descriptive name, description, and keywords. Create thumbnails and an in-engine preview that clearly shows usage. Ensure metadata aligns with Roblox guidelines.
Tip: Choose 3-5 short tags that describe the asset accurately. - 7
Publish to catalog
Submit your asset for review with all required files and metadata. Monitor the review status and be prepared to respond to reviewer feedback. Prepare a quick iteration plan if changes are requested.
Tip: Keep a log of reviewer notes for future improvements. - 8
Iterate based on feedback
After publishing, collect community feedback and usage data. Update textures, fix issues, or adjust metadata to improve discoverability and satisfaction.
Tip: Plan a versioned update schedule to demonstrate ongoing improvement.
Questions & Answers
What counts as Roblox UGC?
UGC refers to items created by players that can be worn or used in Roblox games. These items must comply with Roblox policies and the platform's catalog rules.
UGC stands for user-generated content—player-made items you can wear or use in Roblox. They must follow Roblox rules and be submit-ready.
Can beginners make UGC?
Yes. Start with simple wearables and follow guided tutorials. Build foundational skills in Roblox Studio and iterate as you gain confidence.
Absolutely. Start small with simple wearables and learn through guided tutorials and practice.
What are the requirements to publish UGC?
You need a Roblox account with access to the Creator portal and compliance with asset guidelines. Some advanced features may require program eligibility.
A Roblox account and adherence to the asset guidelines are required; some features may require eligibility.
Why might my UGC be rejected?
Common reasons include policy violations, copyrighted textures, or content deemed inappropriate. Review guidelines and adjust textures or naming accordingly.
Rejections usually come from guideline violations or copyright issues; revise the asset and try again.
How long does a UGC submission review take?
Review times vary with backlog. Plan for several days and respond promptly to any reviewer notes.
Review times vary; plan for several days and address reviewer notes quickly.
Where can I find official guidelines?
Check Roblox's official documentation and Creator Portal for asset rules, naming, and submission steps.
See Roblox's official docs and Creator Portal for all rules and submission steps.
Watch Video
The Essentials
- Plan concept first, then model.
- Test fit across avatars early and often.
- Keep textures clean and optimized.
- Document metadata and publish with clear previews.
- Iterate based on community feedback.