Create a Roblox Place: Step-by-Step Studio Guide
Learn how to create a Roblox Place from concept to publish using Roblox Studio. This beginner-friendly guide covers planning, building, scripting basics, testing, and sharing your place with players.

You will learn to create a Roblox Place from start to publish using Roblox Studio. Requirements: a Roblox account, Roblox Studio installed, and a basic plan for your space. This guide covers planning, building, scripting simple interactions, testing, and publishing your place to Roblox. Along the way, you’ll learn best practices for layout, UI, and player flow.
Why Roblox Place Creation Matters
Creating a Roblox Place matters because it gives you a hands-on playground to express ideas, test mechanics, and share experiences with millions of players. For aspiring developers, a well-crafted place teaches spatial design, user interface layout, and basic scripting in a tangible, reward-driven way. If you’re curious about how to bring a concept to life, www roblox place create is a common starting point for learners who want a practical, iterative workflow. According to Blox Help, starting with a clear concept reduces rework and accelerates learning when you build your first space. This section explains why a good place matters beyond vanity projects: it becomes a sandbox for experimentation, collaboration, and feedback. A successful place can evolve into a mini-game hub with custom avatars, interactive NPCs, and themed environments that showcase your design thinking. The goal is to produce something usable, testable, and shareable, reducing friction as you grow your Roblox development skills.
Prerequisites and Setup
Before you dive into building, make sure your basics are in place. You need a Roblox account you can sign in with, Roblox Studio installed on your computer, and a stable internet connection. Check that your PC meets Roblox Studio’s recommended specs for smoother editing and testing, especially if you plan to include complex lighting or physics. Set aside a dedicated workspace and a distraction-free planning phase; a little prep saves hours later. For new creators, it helps to identify a simple, achievable concept first—such as a small hub, an obstacle course, or a themed showcase area. The initial setup should be compact enough to complete in a single session, yet expandable as you learn. Based on Blox Help research, starting with a minimal viable product keeps you focused on core functionality and iterates toward polish.
Planning Your Place: Layout, Theme, and Player Flow
A well-planned place reduces chaos during construction and makes testing faster. Begin with a one-page concept: what is the core experience, who is the target player, and what will the player do first? Sketch a simple layout showing entrances, key zones, and progression paths. Decide on a visual theme (futuristic, fantasy, urban, etc.) and map assets to the theme to maintain consistency. Consider player flow: where do players spawn, how do quests or objectives chain, and where will UI cues appear? A clear plan helps you prioritize assets, minimize wasted work, and create a cohesive experience that feels intentional. Throughout this phase, keep notes on intended interactions and any assets you’ll need to acquire or create. This aligns your build with your original concept, making the entire process more predictable.
Building Essentials in Roblox Studio
Roblox Studio is your primary toolkit. Start by configuring a clean workspace with grid snapping enabled to keep parts aligned. Use basic parts (blocks, wedges, cylinders) to form terrain and the building framework, then gradually replace placeholders with more polished assets. Pro Tips:
- Work in layers: base terrain, structural elements, and decorative details.
- Use groups to manage complex assemblies and keep the hierarchy tidy.
- Leverage Roblox’s built-in materials and textures to achieve a cohesive look quickly.
- Regularly save incremental versions to guard against accidental data loss. As you build, iterate on lighting and atmosphere to enhance mood and readability. A calm, readable environment helps players focus on gameplay rather than visual noise. Remember to test frequently in Play Solo to catch misaligned pieces or navigation issues early.
Adding Interactivity: Scripting Basics
Interactivity is where a Roblox Place comes alive. Start with simple scripts in Lua that respond to player actions. Common starting points include:
- ClickDetectors to trigger doors, chests, or puzzles when a player clicks an object.
- ProximityPrompts that invite actions when a player approaches an object.
- Basic UI scripts to show prompts, scores, or progress indicators.
- Optional: RemoteEvents for more complex, client-server interactions in multiplayer scenarios. Begin with small, safe scripts to avoid breaking the place. Document what each script does and why, then test to verify behavior. The goal is to create satisfying feedback loops—sound effects, animations, and visual cues—that reinforce player actions without overwhelming performance. If you’re new to Lua, pair simple scripts with comments explaining intent, and grow complexity as your understanding deepens.
Testing, Debugging, and Iteration
Testing is the lifeblood of a successful Roblox Place. Start with Play Solo to verify individual components in isolation, then test with friends to simulate multiplayer conditions. Use the Output window to catch errors and warnings, and keep a log of fixes and iteration notes. Pay attention to performance: high polygon counts, excessive physics, or heavy lighting can cause lag. Optimize by reducing unnecessary parts, using simple textures, and baking lights when appropriate. Iterate on feedback quickly: adjust layouts, improve prompts, and refine pacing. Consistent testing builds confidence that your place will feel polished when shared publicly. The more you test early, the fewer surprises you’ll face at publish time.
Publishing and Sharing Your Roblox Place
Publishing turns your concept into a discoverable place on Roblox. Prepare a clear title, thumbnail, and description that match the theme and gameplay. Check privacy settings to decide whether the place is open to everyone or limited to friends, and consider enabling basic moderation to keep interactions positive. Upload any final assets, ensure all scripts are robust, and publish. After publishing, promote your place through the Roblox community, friend networks, and relevant groups to gather feedback and build a player base. Documentation, a compelling thumbnail, and a simple, stable experience are often the difference between a place that feels unfinished and one that welcomes players. Remember to update your place as players report issues or as you add features, fostering a growing, engaged audience.
Common Pitfalls and Troubleshooting
Even polished projects stumble. Common issues include misaligned parts causing navigation problems, poorly optimized scripts causing lag, and missing assets after a publish. If your place loads slowly, check texture sizes, reduce particle effects, and limit real-time lighting. If interactions don’t trigger, verify that event listeners are connected and that scripts are enabled in game settings. Always keep a rollback plan: save incremental builds, log changes, and test each fix in a clean environment. When in doubt, revert to a known-good build and reintroduce changes one at a time. With careful planning and steady iteration, you’ll minimize setbacks and maintain momentum.
Quick Recap and Next Steps
As you wrap up, ensure you have a solid plan, a clean build, and reliable interactivity. The best places are those that balance aesthetics with smooth gameplay, supported by straightforward scripts and thorough testing. If you want more advanced features like networked multiplayer or data persistence, plan a staged learning path and build on your existing foundation. The journey from concept to publication is iterative: craft, test, refine, publish, and grow.
Tools & Materials
- Roblox account(Sign in and verify email; needed to publish your place)
- Roblox Studio(Install from Roblox’s official site; ensure it’s up to date)
- Computer with internet access(Windows or macOS; ensure stable connection during edits)
- Concept notes or sketches(Plan layout, key zones, and progression before building)
- Downloadable assets or marketplace models(Optional for speed; be mindful of performance limits)
- Screenshot tool or whiteboard app(Useful for documenting UI layouts and flow)
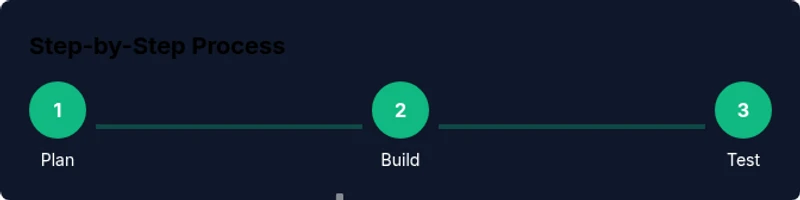
Steps
Estimated time: Total time: 2-6 hours
- 1
Define concept and goals
Outline the core experience, target players, and success criteria. Create a simple map and a list of required features. This ensures you build toward a concrete result rather than a scattered collection of assets.
Tip: Document at least three measurable goals (playtime, engagement, and clarity). - 2
Set up Roblox Studio and project
Launch Roblox Studio, create a new place, and configure grid snapping and units. Establish a naming convention for parts and folders to keep the project organized from day one.
Tip: Enable autosave and create weekly restore points. - 3
Build the core layout
Block out the map with simple primitives to establish the hub, pathways, and zones. Add collision-safe walls, floors, and anchor all parts to prevent drift during testing.
Tip: Use the grid to align walls and ensure even spacing between zones. - 4
Add visuals and atmosphere
Apply textures, lighting, and props that reinforce your theme. Keep visual noise low so players can focus on gameplay rather than distractions.
Tip: Bake lighting if your scene is static to improve performance. - 5
Implement basic interactivity
Add simple interactions with ClickDetectors or ProximityPrompts. Start with one feature, such as opening a door, and test its reliability before adding more.
Tip: Comment each script to explain its purpose and expected behavior. - 6
Test, iterate, and polish
Playtest in Solo mode, then invite friends for feedback. Triage issues, fix bugs, and re-check performance after each iteration.
Tip: Create a checklist for common issues (collisions, lag, missing assets). - 7
Publish and promote
Prepare a compelling title, thumbnail, and description. Publish to Roblox, set privacy preferences, and share the link with your audience for feedback.
Tip: Keep an update log and release small improvements regularly.
Questions & Answers
What is a Roblox Place, and how is it different from a game?
A Roblox Place is a location or space within Roblox where players can explore, interact, and play. It may be a hub, a mini-game, or a themed environment, and can be extended with scripts to add interactivity. A place can be part of a larger game experience but can also exist as a standalone space for exploration.
A Roblox Place is a space inside Roblox where players explore and interact. Think of it as a scene or level that can stand alone or be part of a bigger game.
Do I need coding to create a place?
No, you can create a functional place with basic building tools and UI. However, adding interactivity with Lua scripting enhances gameplay and allows more complex puzzles, quests, or dynamic events.
Coding isn’t required, but it helps you add interactive features and smarter behavior.
How do I publish my Roblox Place?
Publish from Roblox Studio by choosing File > Publish to Roblox, filling in the title and description, and selecting visibility. Once published, share the link and monitor feedback to guide future updates.
Publish from Roblox Studio, fill in details, pick visibility, and share your place with players.
Can I monetize my Roblox Place?
Monetization options exist through game passes and microtransactions within Roblox tools. This requires understanding Roblox’s monetization policies and privacy considerations, and it’s best explored after you have a stable, engaging place.
Roblox supports monetization strategies, but follow the platform rules and focus on a great player experience first.
What should I do if my place runs slowly?
Identify bottlenecks such as heavy textures or too many scripted interactions. Optimize by reducing asset counts, simplifying lighting, and testing on lower-end hardware to ensure a smooth experience.
If it runs slow, simplify assets and test on lower-end setups to improve performance.
Is there a recommended workflow for iterative design?
Yes. Start with a minimal viable product, test with real players, collect feedback, and implement small, frequent iterations. This keeps scope manageable and speeds up progress.
Start small, test with real players, then iterate in small steps.
Watch Video
The Essentials
- Plan first, build second.
- Keep interactions simple and reliable.
- Test early and often with real players.
- Publish with clear descriptions and visuals.