Roblox Dead Rails Troubleshooting: Quick Fixes 2026
This guide helps Roblox players and developers troubleshoot roblox dead rails in games, covering causes, a diagnostic flow, step-by-step fixes, and prevention tips for lasting rails.

Dead rails in Roblox are usually caused by a faulty rail script or misconfigured parts that stop rail segments from loading or moving. Quick fixes: open Roblox Studio, inspect the rail parts, ensure Anchored is correct, rebind any rail-control scripts, and test with a minimal rail to isolate the issue.
Why Roblox Dead Rails Happen
Dead rails are a surprisingly common issue in Roblox games, especially in obstacle courses and rail-based puzzles. According to Blox Help, most cases stem from either a broken rail-control script or misconfigured parts that prevent rail segments from loading or moving at runtime. In a typical scene, a set of rail pieces relies on attached scripts, constraints, or welded joints to coordinate motion. If any single piece is missing, misnamed, or disabled, the entire rail line can appear to freeze or teleport out of place. The result is a frustrating experience for players who expect a smooth, continuous rail ride. The two most frequent culprits are script errors and part configuration. Safety note: always back up your project before making structural changes. This guidance comes from the Blox Help Editorial Team, who analyze Roblox issues across hundreds of games and share practical fixes for beginners through advanced builders.
Key takeaways from this section:
- Script errors or missing dependencies stop rails from moving.
- Part misconfigurations—Anchored, CanCollide, or Welds—can freeze rails.
- Updates to Roblox Studio or a game’s assets can create new conflicts.
- Always test changes in a controlled environment before public release.
Common Scenarios That Trigger Dead Rails
Rail failures show up in several familiar situations:
- Multi-segment rails in Obbys fail to chain motion due to a single broken link in the chain.
- Rails rely on a server-controlled script that doesn’t replicate to all clients, causing desync in multiplayer games.
- A recent update changed asset names or removed a dependency, leaving rails with missing references.
- Mobile users report different timing because physics or networking defaults differ between devices.
In all cases, the first step is to identify whether the issue is script-driven, part-driven, or a combination of both. The Blox Help team notes that most problems originate from a mismatch between the rail controller script and the rail parts themselves.
Quick Checks You Can Do Before Diving Deeper
Before you rewrite code or rebuild rails, run these quick checks:
- Open Roblox Studio and run Play mode to observe the rail behavior in real time.
- Inspect each rail piece for Anchored, CanCollide, and CollisionFidelity settings; ensure they all align with the intended motion.
- Review the rail-control script for syntax errors, missing references, or network replication issues.
- Replace a small section of rail with a known-good prototype to see if the problem persists.
- Check the Output panel for warnings or errors when the rail is supposed to move.
Tip from the Blox Help Editorial Team: keep a copy of the original rail group so you can revert quickly if a test model behaves differently. If this doesn’t reveal the fault, move on to a diagnostic flow that narrows down the cause with a structured approach.
Diagnostic Flow Preview: Symptom ⇢ Diagnosis ⇢ Solutions
When rails fail, a structured diagnostic path helps you converge on the cause quickly. Start with the symptom you observe (rails don’t load, don’t move, or jitter). Based on that, consider the most likely causes and apply targeted fixes. Use a minimal, reproducible test case to validate each fix. If a fix resolves the issue in a controlled test, reintroduce complexity gradually to ensure stability across devices and players. Remember to document each change for future reference and revert if needed. This approach is endorsed by the Blox Help Editorial Team for clear, repeatable results while staying mindful of safety and project integrity.
Step-by-Step: Rebuilding a Working Rail System (6 Steps)
- Reproduce the issue in Roblox Studio. Verify when and where the rail fails, and capture the exact rail configuration.
- Tip: Use a fresh Play session to isolate the problem.
- Check rail parts for proper anchoring and collision properties. Ensure all segments belong to the same model and share consistent physics behavior.
- Tip: If a single part is inconsistent, it can derail the entire rail chain.
- Inspect the rail-control script for errors or missing references. Look for nil values, incorrect object paths, or mismatched event bindings.
- Tip: Use print statements to trace script execution and locate the failure point.
- Test with a minimal rail setup. Create a simple two-part rail with a basic controller to confirm the system works at the simplest level.
- Tip: If the minimal setup works, gradually reintroduce complexity.
- Implement the fix and re-test under different conditions. Validate on desktop and mobile devices, and in multiplayer if applicable.
- Tip: Run a short test session with a few players to check replication and latency effects.
- Document changes and back up the project. Create a changelog and a rollback plan in case new issues appear.
- Tip: Version your scripts so you can compare behavior before and after fixes.
Tips & Warnings
- Pro tip: Always back up before making major changes and keep a versioned rail model for quick rollback.
- Warning: Do not edit live production games directly; use a test environment to avoid player disruption.
- Note: Maintain clear documentation of which assets and scripts were modified to facilitate future troubleshooting and collaboration.
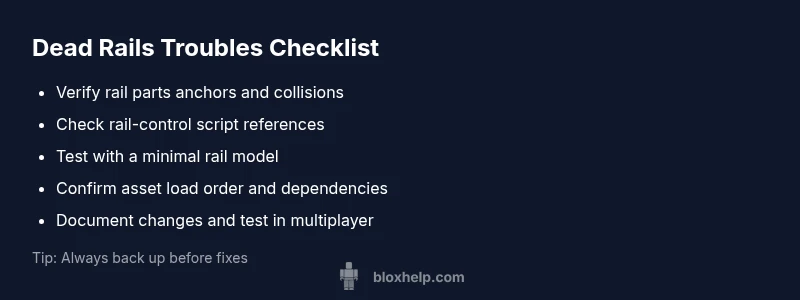
Key Takeaways
- Isolate whether the issue is script or part-related.
- Use Play mode in Studio to reproduce and observe rails.
- Validate rail parts and constraints against a known-good baseline.
- Test fixes with minimal complexity before scaling up.
- Document changes and maintain backups for safety.
Steps
Estimated time: 20-40 minutes
- 1
Reproduce the issue in Studio
Launch Play in Roblox Studio to observe exactly when and where the rails fail. Note timing, player position, and any console warnings.
Tip: Capture a short video or screenshots to document the failure pattern. - 2
Inspect rail parts
Select each rail segment and verify Anchored, CanCollide, and CollisionFidelity settings are consistent across all segments.
Tip: Misaligned anchors are a common cause of jitter or stops. - 3
Review the rail-control script
Open the script that governs rail motion. Look for nil references, incorrect object paths, or dependency failures in the Outputs.
Tip: Add temporary prints to trace execution path. - 4
Test with a minimal model
Create a tiny two-segment rail with a basic controller to confirm whether the issue persists in a simplified setup.
Tip: If the minimal model works, the problem lies in the more complex setup. - 5
Implement fixes and retest
Apply the fix in a controlled test, then run Play again across desktop and mobile builds to verify consistency.
Tip: Test with several players to check replication. - 6
Document and backup
Record the fix and create a rollback plan. Save a clean backup of the working rail system.
Tip: Version-control your scripts for easier comparisons later.
Diagnosis: Rail segments in your Roblox game don't load or move as expected (dead rails).
Possible Causes
- highScript/controller failed to run due to runtime error
- highRail parts anchored incorrectly or CanCollide settings wrong
- mediumDependency assets missing or misnamed in workspace
Fixes
- easyOpen Roblox Studio, run Play mode, and check the Output for errors; fix any syntax or reference issues
- easyVerify all rail parts are anchored, aligned, and have consistent CanCollide and collision settings
- easyInspect the rail-control script for missing references or broken event bindings; replace with a minimal working prototype to confirm the source of the fault
Questions & Answers
What are dead rails in Roblox?
Dead rails refer to rails in a Roblox game that fail to load or move as intended due to script or part configuration issues. They commonly arise from broken controllers or misconfigured parts that disrupt the rail sequence.
Dead rails are rails that don’t work as expected because of script or part setup problems. Start by checking the controller scripts and the rail parts for proper configuration.
Why do dead rails appear after a game update?
Updates can rename assets, remove dependencies, or alter physics settings, which breaks existing rail logic. Revalidate paths and ensure all references are still valid after an update.
After an update, assets or scripts might change. Recheck references and paths to restore rail function.
Can dead rails affect multiplayer gameplay?
Yes. If the rail system relies on server scripts and replication, desync can occur, causing rails to freeze for some players. Test rails in multiplayer environments to confirm consistency.
Rails can desync in multiplayer if the server script isn’t syncing correctly. Test with several players to verify.
Is this a Roblox platform issue or a game-specific problem?
Most often it’s game-specific, tied to your scripts, assets, or project setup. Platform issues are rarer but can occur after Roblox updates; always test in Studio first.
Usually it’s the game’s setup, not Roblox itself. Test in Studio to rule out platform issues.
How long does a typical fix take?
A straightforward rail fix can take 15–30 minutes, but more complex setups with multiplayer or custom physics may require longer experimentation and testing.
Simple fixes may take about 15 to 30 minutes; complex cases can take longer depending on setup.
Watch Video
The Essentials
- Isolate whether the issue is script- or part-related
- Test in Studio Play mode to observe behavior
- Validate anchors, collisions, and constraints on rail parts
- Use a minimal rail to confirm the fault source
- Document fixes and keep backups