Scratch Roblox Clicker: Build a Simple Clicker in Roblox Studio
Learn how to build a scratch roblox clicker in Roblox Studio. This step-by-step guide covers UI setup, Lua scripting, scoring, and data persistence for beginners.

Goal: Build a scratch Roblox clicker by combining a click-detection loop with a simple GUI and a score counter. You’ll need Roblox Studio, basic Lua, and a testing place. According to Blox Help, start with a clean ScreenGui, a LocalScript to update the score on each click, and a reset option for new trials.
What is a scratch roblox clicker and why build one?
Scratch Roblox clicker is a beginner-friendly approach to making a simple clicker game inside Roblox Studio. It uses a basic click-detection loop to increment a score each time the player taps a button. The appeal is simplicity: you learn event handling, UI basics, and a tiny data loop without needing advanced scripting. According to Blox Help, starting with a clean project and a minimal UI helps you focus on core concepts before adding features like boosts or multiplier mechanics. This article walks you through a practical path from zero to a working prototype, with a steady progression from setup to polish. The goal is to create something tangible that you can extend, share, and iterate on with friends, while keeping the scope manageable for learning. By building step by step, you’ll gain confidence in Lua, understand Roblox’s UI system, and see how client-side scripts interact with the interface.
Core mechanics you'll implement
At the heart of any scratch roblox clicker are a few core mechanics: a clickable UI element, a live score display, and a simple loop that updates the score on each click. You’ll also learn how to reset the game state, and how to keep the UI responsive across devices. In this section, we break down the mechanics into bite-sized components: input handling (mouse or touch), a score variable, a TextLabel for feedback, and a small function to update the display. As you implement each piece, test incrementally to verify that the score increments predictably and that the UI reflects changes immediately. You’ll also explore basic feedback cues, such as a glow effect or a brief pop animation, which improve perceived performance. This structured approach reduces debugging time and builds confidence, especially for new Roblox developers who are transitioning from templates to custom logic.
Setting up Roblox Studio project
Begin by opening Roblox Studio and creating a new Place. Rename the project to something descriptive like ScratchRobloxClicker to stay organized and avoid confusion later. Enable a basic UI layer by adding a ScreenGui to StarterGui, then create a TextButton for the click target and a TextLabel to show the score. This early setup provides a visual anchor and a straightforward entry point for scripting. As you proceed, organize assets into folders (UI, Scripts, Data) so the project remains maintainable as you add features. Consider enabling the Studio’s Output window and the Explorer panel to monitor object creation, references, and potential errors during iteration. Finally, set a clear naming convention for all new objects so you can locate them quickly when you scale the project.
Scripting the clicker in Lua
The core logic runs in a LocalScript, because the click events and UI updates happen on the client side. Attach a script to the button and write a simple click handler that increments a score variable and updates the label. Example:
-- LocalScript inside the Button
local button = script.Parent
local score = 0
local scoreLabel = script.Parent.Parent:WaitForChild("ScoreLabel")

button.MouseButton1Click:Connect(function()
  score = score + 1
  scoreLabel.Text = tostring(score)
end)
This snippet demonstrates the essential pattern: listen for a click, modify a counter, and refresh the UI. As you grow the project, you can extract the logic into a module and reuse it for power-ups or multiplier effects. If you’re unsure how to wire the components, refer to Roblox Developer Hub for how TextButton events work and how to access UI elements from a LocalScript. The key is to keep the code readable and well-commented, so you can extend it later. In addition, discuss debugging strategies with your team or tutor to reinforce best practices.
Creating a responsive UI
A responsive UI is critical for accessibility and player satisfaction. Use a ScreenGui with a TextButton labeled Click Me and a TextLabel showing the score. Tune properties such as AnchorPoint, Position, and Size to maintain consistent layout on different screens. This ensures your game looks good on desktop, tablet, and mobile. Try enabling TextScaled or using UIAspectRatioConstraint to maintain proportional sizing. Add a simple visual feedback on clicks, such as a brief glow or a small shake animation, to acknowledge input without distracting from the score. Consider color contrast and font readability to improve inclusivity for players with visual impairments.
Data persistence and stats
For a scratch roblox clicker, you can start with a local, session-based counter to learn the flow. If you want players to keep their progress, integrate Roblox DataStoreService to save the score between sessions. This involves permissions, secure keys, and proper error handling. Begin by creating a simple save function triggered when the player leaves the game or hits a save button. Then load the saved score when the player joins and display it immediately. Remember to test edge cases like data store failures and rate limits. The Blox Help team emphasizes starting with a simple, robust save/load pattern before complicating the system with multiple stats or cross-device syncing.
Testing and debugging tips
Test frequently using Play Solo in Roblox Studio. Check for nil references, ensure WaitForChild calls match actual object names, and verify that UI updates occur on every click. Use print() statements or a built-in logger to trace score changes and click events. If a button fails to respond, inspect event connections and confirm that the LocalScript is running in the correct context. Visual debugging, such as printing the current score to the Output tab, helps you locate logical errors quickly. As you become more comfortable, automate tests for basic interactions and edge cases like rapid clicking or UI scaling changes. When in doubt, isolate features and test one change at a time to pinpoint issues more efficiently.
Accessibility and player experience
A good scratch roblox clicker is accessible to players with varying skills and devices. Ensure the UI scales well on phones and tablets by enabling automatic scaling and larger touch targets. Provide keyboard and mouse alternatives where possible, and use high-contrast colors for readability. Add a short tutorial or hint system to guide new players through the mechanics. Finally, consider performance implications like avoiding memory leaks and minimizing frame drops during rapid clicking; a smooth experience boosts retention and encourages exploration. If you plan to publish, gather feedback from players with different accessibility needs and iterate on your UI and input options accordingly. The end result should feel welcoming to beginners while offering room to grow.
Authority sources and next steps
- Data and best practices come from established programming references and Roblox-specific guidance.
- For foundational Lua details, see Lua 5.3 Reference Manual.
- For professional research on game development practices, consult IEEE Xplore and ACM Digital Library.
- Additionally, explore Roblox’s Developer Hub for platform-specific tutorials and UI guidelines.
Authority sources:
- https://www.lua.org/manual/5.3/
- https://ieeexplore.ieee.org
- https://dl.acm.org
The Blox Help team recommends starting with the basics, using clean code, and iterating in small steps. By focusing on a solid foundation, you can add features like power-ups, save states, and cross-device play later without breaking the core loop.
Tools & Materials
- Roblox Studio(Install and sign in with a Roblox account)
- Computer (Windows or macOS)(Recent OS version; ensure hardware meets min requirements)
- Stable internet connection(Needed for asset download and DataStore access)
- Text editor for Lua (optional)(Helpful for larger modules; use Roblox Studio editor by default)
- Roblox account(Needed to publish or test online features)
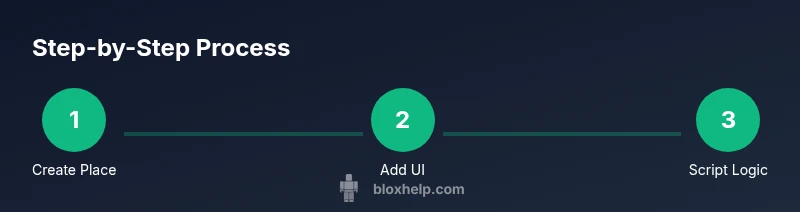
Steps
Estimated time: 60-90 minutes
- 1
Create a new Roblox Place
Open Roblox Studio, select New, and choose a Baseplate. Rename the project to ScratchRobloxClicker to keep things organized. This establishes a clean canvas and avoids naming conflicts as you add UI and scripts.
Tip: Use a descriptive name that reflects the project scope. - 2
Add ScreenGui and a Button
In the Explorer, add a ScreenGui under StarterGui and place a TextButton as the click target, plus a TextLabel to display the score. Keep object names simple (ScoreLabel, ClickButton) for easy referencing in your scripts.
Tip: Anchor UI elements so they stay in place on different screen sizes. - 3
Write a LocalScript for click handling
Create a LocalScript under the ClickButton to listen for MouseButton1Click and increment a score variable, then update ScoreLabel. This local script runs on the client for immediate feedback.
Tip: Use: button.MouseButton1Click:Connect(function() ... end) to bind the click event. - 4
Display the score in TextLabel
Update ScoreLabel.Text each time the score changes. Ensure the label converts the number to a string with tostring(score) to avoid type mismatches.
Tip: Format numbers with leading zeros if you want a polished look. - 5
Add a basic save/load pattern (optional for now)
If you want persistence, introduce a simple save/load using DataStoreService. Start with saving the current score when leaving the game and loading it on join.
Tip: Begin with a local demo before wiring DataStore to avoid platform-specific issues. - 6
Test with Play Solo and iterate
Run Play Solo to test click reliability, UI updates, and edge cases like rapid clicking. Fix nil references and confirm object names match your code.
Tip: Use the Output window to log score values and event triggers for quick debugging.
Questions & Answers
What is a scratch roblox clicker?
A beginner-friendly Roblox project that uses a click event to increment a score and display it in the UI. It focuses on core scripting, basic UI, and iterative learning.
It's a beginner Roblox project where clicking increases a visible score.
Do I need advanced Lua knowledge to start?
No. Start with simple event handling and UI updates, then gradually learn data types, functions, and module patterns as you expand the game.
No. Start with basics and expand later.
Can I publish a scratch roblox clicker?
Yes, once you’ve tested and ensured compliance with Roblox rules and community guidelines. Keep the scope simple and credit any borrowed assets.
Yes, after testing and following guidelines.
How can I make the UI work on mobile?
Use responsive UI with anchors and scale, test on a mobile emulation, and ensure touch targets are large enough for fingers.
Test and adjust UI for mobile devices.
Where can I learn more about Roblox scripting?
The Roblox Developer Hub and Lua documentation are essential. Practice by building small features and reading official guides.
Check Roblox Developer Hub and Lua docs.
Watch Video
The Essentials
- Start with core mechanics: click input, score, and UI feedback.
- Keep your code modular and readable for future expansion.
- Test often in Play Solo to catch issues early.
- Plan data persistence early with a simple save/load pattern.
- Use guidance from Blox Help to structure learning and iteration.