What to Do with Bricks in Grace Roblox: A Practical Guide
Learn how to use bricks effectively in Grace Roblox with step-by-step building tips, troubleshooting, and creative techniques for beginners to advanced builders. This guide covers brick placement, snapping, aesthetics, and performance considerations.

Learn what to do with bricks in grace roblox: place, snap, and customize bricks to build sturdy structures in Grace Roblox. This guide covers necessary setup, practical steps, and troubleshooting tips, so you can plan and execute brick-based builds with confidence. You will learn best practices, common mistakes to avoid, and how to adapt bricks for different Grace Roblox maps.
What bricks in Grace Roblox are and why they matter
In Grace Roblox, bricks are the fundamental building blocks players use to craft environments, mechanisms, and obstacle courses. Understanding how bricks behave—how they snap, align, and connect—gives you control over your creativity and reduces common mistakes. If you’re wondering what to do with bricks in grace roblox, you’re about to learn practical, repeatable steps that apply across maps and game modes. According to Blox Help, mastering brick behavior accelerates learning and boosts success on both beginner and advanced builds. Start with a clear plan, then experiment with different brick orientations to see how they affect stability and aesthetics. Even small changes in alignment can dramatically improve the feel of a structure. The goal is to build not just for looks, but for reliability under in-game movement and tool interactions. In Grace Roblox, bricks can be combined to create ramps, walls, supports, and traps, so knowing their limits helps you design safer, more interesting experiences. For new players, think of bricks as modular ideas you can copy, adapt, and reassemble as you test ideas in the actual game environment. The more you practice, the faster you’ll recognize which brick types suit each challenge.
Preparing your Grace Roblox setup
Before you start handling bricks in Grace Roblox, ensure you have a stable setup. You need a Roblox account with access to Grace Roblox, a basic understanding of in-game building tools, and a plan for what you want to build. In this section we outline practical prerequisites and a simple prep routine. For beginners, start by loading a blank map or a low-stakes test area to avoid losing progress. Ensure your internet connection is reliable to prevent lag during placement. Gather reference images or sketches of your intended structure, so you can translate your ideas into bricks with accuracy. As you prepare, consider your device’s performance: a slower PC or mobile device benefits from simpler, modular builds. The Blox Help team emphasizes planning up front and testing your layout in segments. Once you’re ready, map an editing area with visible gridlines and set your snapping to the nearest 0.5 studs to keep consistency across bricks.
Brick types, snapping, and grid behavior
Bricks in Grace Roblox come in several shapes and sizes, including standard rectangular bricks, wedges, arches, and specialty connectors. Each brick type behaves differently when you snap it to the grid. Enable grid snapping to maintain consistent alignment, especially on larger builds. Use a light rotation to explore different angles, then lock your choice once you’re satisfied. The grid helps keep edges clean and joints tight, reducing gaps that can ruin both aesthetics and stability. When you snap bricks, think in layers: base foundations first, then walls, then decorative features. This layered approach prevents drift and wobble as your structure grows. If you’re unsure about how a particular brick will behave, place a quick test row and examine joins before committing to the full design.
Step-by-step: placing bricks cleanly
Successful brick placement follows a clear sequence. Start by selecting the base brick and aligning it with the grid. Place subsequent bricks in a straight line to form a foundation. Use anchor blocks at corners to keep edges square during assembly. Continue adding bricks along the planned path, checking alignment after every few placements. If a brick won’t snap correctly, rotate it slightly and reattempt. Finish each section with a quick verification pass to ensure there are no gaps or misaligned joints. Pro tip: build in mirrored halves for symmetry and use the grid as a mental ruler to keep scales consistent.
Aesthetic and structural considerations
Beyond function, the look and feel of brick builds matter in Grace Roblox. Balance form and function by choosing color palettes that reflect the map’s theme and by texturing bricks for depth. Structural decisions—like where to place thicker supports or how to stagger joints—improve stability and reduce wobble during movement. Consider accessibility: ensure pathways are wide enough for avatars to pass smoothly and that ramps have gentle inclines. Lighting and shadow can highlight or hide joints; plan lighting to avoid glaring seams where bricks meet. Remember that cohesion between shape, color, and texture helps your project feel intentional rather than ad hoc.
Troubleshooting common brick issues
Brick placement problems are common when you’re still learning Grace Roblox. If bricks won’t snap, check your grid size and actively re-align your camera to the grid. Floating bricks often indicate a missing support or a slight misalignment; place a supporting brick underneath or adjust its position. If joints crack or gaps appear, re-check the join type and ensure you’re using compatible bricks. Lag and performance drops can also affect placement accuracy; reduce the number of bricks in a single section or split the build into stages. Test your design by walking around and applying light stress to confirm stability.
Interactive projects you can try now
To reinforce what you’ve learned, try a simple practice project: a small bridge across a pretend gap, then a compact wall with two arch-like openings. These projects teach core skills: grid-aligned placement, join consistency, and texture variation. Once comfortable, escalate to more complex structures like a multi-room modular house or a ramped obstacle course that tests timing and precision. Keeping a notebook of brick counts and orientations helps you replicate successful patterns quickly on new maps. Each project builds confidence and expands your toolkit for Grace Roblox builds.
Performance and optimization tips for larger builds
As builds grow, performance becomes a practical concern. Use modular sections you can load and unload to test parts without overloading your client. Keep the base footprint lean by avoiding unnecessary bricks and optimizing for collision efficiency. If you notice frame rate drops, simplify textures and reduce the number of joints per section. Group related bricks with invisible supports to maintain structure without visually cluttering the build. Regularly save incremental versions so you can revert if a new approach introduces instability. Staying mindful of performance ensures your builds remain accessible to players across devices.
Practice projects and next steps
Consolidate your skills with weekly practice goals. Start with a basic shelter, then design a small courtyard with a few ramps and steps. Expand to a bridge, a tower, or a puzzle room that requires precise brick placement. Document your process, noting which brick types and snapping settings produced the best results. Share progress with the Grace Roblox community or friends and solicit feedback on alignment, proportions, and aesthetics. The more you iterate, the quicker you’ll recognize patterns that lead to quick, polished builds.
Tools & Materials
- Roblox account with Grace Roblox access(Essential for loading Grace Roblox maps and saving builds)
- In-game bricks and building tools(Use standard bricks, wedges, arches, and connectors available in Grace Roblox)
- Reliable internet connection(Prevents lag during placement and snapping)
- Reference sketches or map layout(Helpful to translate ideas into brick layouts)
- Optional: Roblox Studio(Useful for exporting or planning complex builds, not required to build in-game)
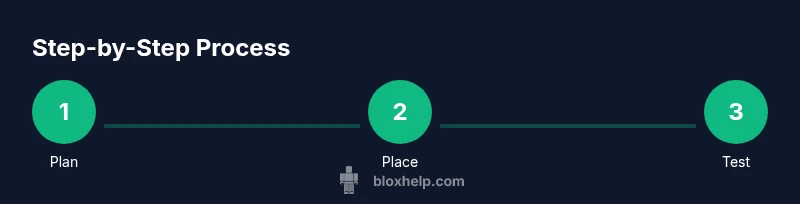
Steps
Estimated time: 60-90 minutes
- 1
Open Grace Roblox and choose a test area
Launch Grace Roblox and navigate to a blank or low-stakes map. This keeps your primary projects safe while you practice placement, snapping, and alignment. Confirm your camera is centered and the grid is visible to aid precise work.
Tip: Use a flat area and enable grid snapping before placing your first brick. - 2
Select brick types and set grid
Pick a baseline brick type (a standard rectangle works well for bases) and set the grid to a comfortable size, typically 0.5 studs. Consistent grid settings keep joints tight as your build grows.
Tip: Stick to one or two brick types early to learn their behavior before mixing complex shapes. - 3
Enable snapping and alignment
Turn on snapping and adjust rotation increments to explore achievable angles. Snap each brick to the grid as you place them to maintain uniform gaps and straight edges.
Tip: Test a short line of bricks to verify alignment before expanding your base. - 4
Place anchor bricks for a base
Anchor bricks at the corners of your planned base to establish a stable frame. This reduces drift as you add more bricks and makes subsequent layers easier to align.
Tip: Mark corners with distinct bricks to act as visual cues during expansion. - 5
Build out in layers
Add bricks layer by layer, checking joints frequently. When growing height, alternate joints between layers to improve stability and reduce weaknesses.
Tip: Work in 2-3 brick-wide sections to keep control over alignment. - 6
Edge finishing and joints
Finish edges by carefully aligning the final bricks to close seams. If gaps appear, backtrack a brick or two and reinsert with a slight adjustment.
Tip: Avoid forcing bricks; if they don’t snap, rotate and reattempt rather than forcing fit. - 7
Test readiness with a quick walkthrough
Move around the build to test for stability and reach. Look for wobbly sections and verify that joints hold under movement.
Tip: If something rattles or shifts, reinforce from the inside with additional bricks. - 8
Texture and color refinement
Apply textures and colors to distinguish sections and improve readability. Aesthetics improve user experience and can help you spot issues more easily.
Tip: Use contrasting colors to emphasize structural features without overwhelming the design. - 9
Save, review, and iterate
Save incremental versions of your build. Review older versions to identify what changes improved stability or appearance, then iterate with new ideas.
Tip: Document the changes you make to replicate successful configurations later.
Questions & Answers
What is Grace Roblox and how do bricks work there?
Grace Roblox is a platform where players build and navigate custom maps using brick blocks. Bricks snap to a grid, connect to form structures, and can be textured for aesthetics. Understanding snapping, alignment, and stacking is essential to create stable, usable builds.
Grace Roblox lets you build with bricks that snap to a grid. Focus on snapping, alignment, and layering to create stable, visually appealing structures.
Do I need Roblox Studio to build in Grace Roblox?
Roblox Studio is optional for many in-game builds. Grace Roblox supports in-game building with its tools. Studio can help with planning and exporting larger designs, but you can achieve most builds directly within Grace Roblox.
Studio is optional for Grace Roblox; you can build in-game, and Studio is mainly for planning or exporting larger projects.
How can I fix bricks that won't snap?
First, verify the grid size and snap settings. If a brick won't snap, rotate it slightly or adjust its alignment. Ensure there are no overlapping bricks that obstruct the snap path.
If bricks won't snap, check grid settings, rotate slightly, and make sure no bricks block the snap path.
What is the best practice for beginners?
Start with simple base shapes, keep builds modular, and test frequently. Use anchor bricks at corners, and plan symmetry to ease placement and reduce mistakes.
For beginners, start simple, test often, and plan symmetry to ease placement.
How can I improve performance on larger builds?
Limit the number of bricks in any one section, use modular components, and reduce texture complexity where possible. Save versions as you go to avoid losing progress.
To improve performance, use modular parts and simpler textures, and save progress frequently.
Where can I find more Grace Roblox building tutorials?
Look for official Grace Roblox guides and community tutorials. Joining Roblox forums and the Blox Help community can provide updated tips and project ideas.
Check Grace Roblox guides and the Blox Help community for more tutorials and ideas.
Watch Video
The Essentials
- Plan your build before placing bricks
- Use snapping for precise alignment
- Anchor foundations to improve stability
- Test frequently to catch issues early
- Iterate with incremental saves