Roblox decal ids: find, apply and manage decals effectively
Learn how Roblox decal ids work, how to locate them, and how to use them in Roblox Studio and GUIs. This guide covers best practices for organizing decal assets, performance considerations, and troubleshooting common issues.

Roblox decal ids are numeric identifiers for image decals you can apply to surfaces, GUI elements, and in-game objects. To find an ID, view the decal’s asset page or URL, then copy the number after the 'id=' or '/asset/' segment. Use these IDs in Roblox Studio scripts or in-game GUIs, while respecting copyright and community guidelines.
What Roblox decal ids are and why they matter
Roblox decal ids are the numeric identifiers assigned to image decals uploaded to Roblox. These IDs act as a stable reference to a particular image asset, allowing developers to attach decals to surfaces, panels, signs, and even GUI textures. Understanding how decal ids work is essential for consistent visuals across games and experiences. In practical terms, a decal id lets you reuse a single image in multiple locations without embedding the image data directly into scripts or GUI components. This keeps your projects lighter and easier to update. For beginners, the key concept is that the id is a pointer: a small number that tells Roblox exactly which image to render wherever you reference it. When you see a URL ending with an asset id, you’re looking at the decal’s unique identifier, not the image file itself.
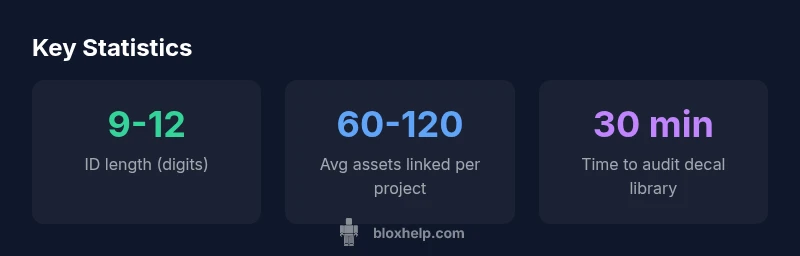
An essential caveat is licensing. Only use decals you are authorized to deploy in your Roblox projects. Respect creators’ rights and Roblox’s terms of service. The best practice is to curate decals from trusted sources, maintain attribution where required, and avoid embedding copyrighted material without permission. Since decal ids tie directly to assets, removing an asset can break references if your game relies on that image. Regular audits of your decal library help prevent missing textures in production builds.
For the Roblox community, decal IDs are also a bridge between the asset catalog and live gameplay. They enable rapid iteration, enabling designers to swap visuals quickly without changing core logic. This decoupling of assets from code makes version control easier and supports collaborative workflows where team members contribute different visual assets.
In summary, decal ids matter because they provide a stable, reusable handle to assets that power visuals in both 3D environments and 2D interfaces. They offer a practical path to consistent branding across scenes, while also requiring careful asset management and licensing awareness.
How to locate decal ids efficiently
Locating the decal id for a specific image is straightforward once you know where to look. The most reliable method is to open the decal’s asset page on Roblox and copy the numeric id from the URL. If you’re exploring in-game assets via scripts, you’ll often see the id embedded in a reference string or in the decals section of a texture or material. The steps:
- Navigate to the decal’s asset page on the Roblox website.
- Copy the numeric value that appears after the last slash or after the query parameter often labeled id or
Using decal ids in Roblox Studio and in-game GUIs
Decal ids unlock a versatile set of use cases in Roblox Studio and in-game interfaces. In practice, you’ll apply IDs to textures applied to 3D surfaces, signage, or in-game billboards, as well as to UI textures for panels, buttons, or decorative elements. The typical workflow:
- In Roblox Studio, select the object you want to texture and locate its texture or decal property.
- Enter the decal id as part of the asset reference, often in the form of texture or decal URL components that Roblox parses.
- In scripts, you can reference the id to dynamically switch textures based on game state, player choices, or events.
When working with UIs, IDs are especially useful for dynamic menus where visuals should reflect player status or achievements. For performance, avoid loading many decals at once; opt for texture atlases or lazy loading when possible. Regularly validate that each id still points to a valid asset, because owners can remove or replace decals, causing broken textures if not updated.
Practical uses for decal ids across Roblox games
Decal ids appear in a variety of contexts beyond aesthetic textures. They can drive branding across environments, label in-game objects with consistent icons, or mark areas with informative signage. You might use a single decal in multiple places to reinforce a theme, such as a uniform emblem on banners, crates, and store displays. In UI design, decal ids feed textures for frames, icons, and progress indicators that must stay coherent across different screens.
The most productive workflows combine decal references with a well-documented asset library. By tagging each decal with usage notes, you keep your team aligned about where a given image is used, which reduces confusion during rapid iteration. Be mindful of texture resolution and compression settings; lower-res decals load faster and are friendlier to players on older devices. Maintain a balance between visual fidelity and performance.
Best practices for organizing and reusing decal ids across projects
A clean decal management system pays dividends as projects scale. Start with a centralized decal library containing: id, name, usage context, source, license, and a last-verified date. Tag decals by project, theme, and asset type to enable quick filtering. Use version control notes to track when decals are swapped or updated. Regular reviews ensure that references stay valid and that outdated assets are isolated or retired.
Color-coding or category-based folders in your asset library can help analysts and artists locate decals faster. When reusing decals across games, ensure that usage aligns with licensing terms and that assets meet platform guidelines. Document any changes in a changelog so teammates know when an asset was updated or deprecated. Finally, consider building minor tooling that can auto-check references and report broken decal ids in a staging environment.
Performance considerations and potential pitfalls
Decal textures can impact rendering performance, especially on devices with limited graphics capabilities. Use decals with appropriate resolution—high-res images look great but may cause long load times. Prefer texture atlases or compressed formats when feasible to reduce memory overhead. If you notice frame drops or stuttering, review the number of decals loaded simultaneously and consider lazy-loading assets or swapping to placeholder textures during heavy scenes. Always ensure the decal ids you use point to active assets; a removed decal can cause missing textures in your game, which harms player experience.
Another pitfall is inconsistency. Mixing decal ids with varying compression formats or color spaces can produce a jarring look. Strive for a cohesive visual language across assets by standardizing texture settings and maintaining a shared color profile. Monitoring tools can help you identify textures that disproportionately contribute to draw calls, enabling targeted optimization without sacrificing art direction.
Step-by-step integration example for a decal-driven UI
To illustrate a practical workflow, imagine you’re building a status panel that uses a banner texture to reflect player health. Step one is selecting a health indicator decal from your library and noting its id. Step two is binding that id to the UI texture property in a ScreenGui frame. Step three is creating a script that updates the texture id when health changes, ensuring a smooth, responsive experience. Step four is testing in both Studio and a live session to confirm proper rendering on all target devices. Step five is documenting the change in your decal library with a brief note about health status visuals and where the asset is used. This example demonstrates how decal ids can support dynamic, data-driven interfaces without embedding image data directly into UI scripts.
Accessibility and licensing considerations
Accessibility is an important aspect of decal use. Ensure that textures remain legible at smaller sizes and high-contrast for players with visual impairments. When applying decals in interfaces or game worlds, test contrast ratios and consider including alt-text or descriptive labels for non-visual cues where possible.
Licensing matters: use decals you own or have permission to use, and respect licenses that require attribution. Roblox’s policies govern asset usage, so verify that your decals comply with terms and that any user-generated content is properly credited. Keeping a transparent, well-documented decal policy helps prevent legal or distribution issues later in a project.
Structured overview of decal id usage and best practices
| Aspect | Details | Where It Applies | Notes |
|---|---|---|---|
| ID format | Numeric digits (9-12 typical) | Decal assets and URL references | Copy exact digits from URL |
| Usage context | Textures, UI textures, signs | All in-game visuals | Check licensing first |
| Asset management | Centralized decal library | Team workflows | Regular audits recommended |
| Performance | Texture size and draw calls | UI and 3D scenes | Use atlases when possible |
Questions & Answers
Do decal IDs stay the same across games?
Decal IDs are persistent for a given asset, and they typically remain valid across games. Owners can remove or replace decals, which may break references, so always verify IDs before publishing.
Decal IDs usually stay the same, but assets can be removed or updated, so double-check before release.
Can decal IDs change or expire?
Decal IDs themselves do not expire, but an asset can be deleted or renamed by the owner or Roblox updates policies. Always verify the asset status when updating your game.
Decal IDs don’t expire, but assets can be removed or renamed. Check status before updates.
How can I safely test decals in a live game?
Test decals in a staging or preview environment before pushing to production. Use a small batch of IDs, monitor for missing assets, and revert changes if a texture fails to load.
Test decals in a staging build first, then rollout gradually.
Is there a limit to decals per GUI?
There is no published hard limit on decals per GUI, but performance depends on texture sizes and how many assets load simultaneously. Optimize by using atlases and lazy loading where possible.
No hard limit published, but keep performance in mind with textures.
Do decal IDs work on mobile and console devices?
Decal IDs generally work across platforms, but performance and rendering can vary on older devices. Test across target devices during development.
They mostly work everywhere, but test on target devices for performance.
Where can I find official decal documentation?
Official Roblox documentation on decals is available in the Roblox Developer Hub under Assets and Decals. Refer to licensing and asset usage guidelines there.
Check Roblox Developer Hub for decals docs and licensing.
“Decal IDs are a practical bridge between asset catalogs and live gameplay, making consistent visuals across scenes possible.”
The Essentials
- Identify the decal id from the asset URL first
- Use IDs in Roblox Studio or in-game scripts
- Organize IDs in a central reference
- Respect licensing and asset usage guidelines