Roblox to Blender: Practical Asset Transfer Guide
Learn how to move Roblox assets into Blender, preserve geometry and textures, and render polished scenes with a beginner-friendly, step-by-step workflow for 2026.

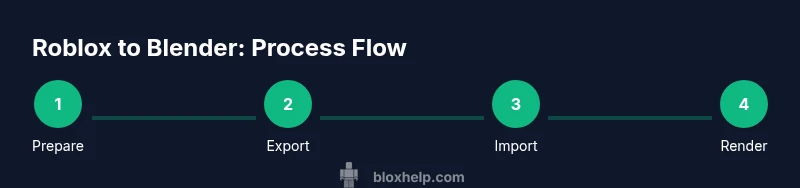
Today you’ll learn how to go from roblox to blender: exporting Roblox Studio models, converting textures, and setting up Blender materials for realistic renders. This guide covers mesh export, texture mapping, scaling, and lighting so assets look correct in Blender. No advanced scripting is required for the core steps, making the process accessible to beginners while offering tips for intermediate tweaks.
Understanding the Roblox to Blender Pipeline
For artists and developers, the journey from roblox to blender starts with clear planning and an understanding of export formats. According to Blox Help, the typical pipeline involves selecting usable assets in Roblox Studio, exporting them in a compatible format like FBX or OBJ, and then importing into Blender where you’ll reassign materials, adjust scales, and refine lighting. A key reality is that Roblox assets aren’t guaranteed to carry all materials perfectly into Blender, so expect texture re-mapping and shader setup. The goal is to preserve the mesh geometry while re-creating the look with Blender’s PBR shaders. This approach minimizes surprises during rendering and keeps the workflow efficient for both beginners and seasoned artists. Throughout this guide, you’ll see practical tips and caveats that align with the standards Blox Help uses for Roblox Blender workflows in 2026.
Planning and scope matters
Before you export anything, decide which assets you actually need in Blender. Focus on models that will benefit from higher-resolution lighting, shadows, and materials. If your Roblox scene includes many small components, consider exporting only the key props to keep the Blender file manageable. This planning step saves time and reduces the risk of oversized files that slow down your workstation.
Core decisions you’ll face
Choose FBX when dealing with rigged assets or objects that rely on hierarchical structure; OBJ works well for static meshes without bones. In Blender, you’ll typically re-create textures and connect them to the Principled BSDF shader to achieve a look closer to your Roblox project. This section emphasizes a practical, non-destructive workflow so you can iterate quickly without losing your original Roblox data.
Tools & Materials
- Roblox Studio(Used to prepare and export Roblox assets)
- Blender(Install latest stable version; use Eevee or Cycles for rendering)
- FBX/OBJ export option(FBX for rigged assets; OBJ for static meshes; check export options)
- Texture files (PNG/JPG)(Have textures ready for re-map in Blender)
- Scale reference(Keep a consistent scale between Roblox and Blender)
Steps
Estimated time: 60-120 minutes
- 1
Prepare Roblox assets
Open Roblox Studio, curate the assets you want to transfer, and clean up the scene. Remove hidden parts or unnecessary geometry to reduce export size. Group related parts and clear any non-essential textures before export to keep the subsequent Blender import clean.
Tip: Document your asset names to help map them in Blender later. - 2
Export in a compatible format
Export the selected assets using FBX for rigged models or OBJ for static meshes. Check export options to embed textures where possible, and ensure axis orientation matches Blender defaults to minimize orientation fixes after import.
Tip: If textures aren’t embedded, plan to locate them after import and re-link in Blender. - 3
Import into Blender
In Blender, use the corresponding importer (FBX or OBJ). Enable automatic scale and orientation adjustments if available, then inspect the import to confirm all meshes, bones, and uv maps are present.
Tip: Rotate the model to verify normals and ensure there are no inverted faces. - 4
Set up scene scale and origin
Adjust the asset scale to align with Blender units and reset the origin to a logical pivot point. This step prevents misaligned assembly in multi-object scenes and helps with animation if needed.
Tip: Apply transforms (Ctrl+A) after scaling to lock in changes. - 5
Rebuild textures and materials
Create Blender materials using the Principled BSDF shader. Reconnect textures (albedo, normal, roughness) and adjust roughness and metalness to approximate the Roblox look, testing with a quick render.
Tip: Use image textures with high resolution and ensure color spaces are correct (sRGB for albedo). - 6
Lighting and camera setup
Add lighting that mimics Roblox’s look or lean into Blender’s HDRI for realistic lighting. Position cameras to frame your asset as in-game or for a gallery render, and set up basic shadows to confirm depth.
Tip: Experiment with a few key light setups to find the most flattering look for your asset. - 7
Render a test pass
Switch to Eevee for quick previews or Cycles for realism. Run a low-sample render to check shading, texture alignment, and geometry, then iterate on materials and lighting as needed.
Tip: Enable denoise in Cycles if noise becomes an issue during high-sample renders. - 8
Refine UVs and mesh cleanup
Inspect UV maps for stretched textures, fix any overlapping UVs, and clean up normals if shading looks incorrect. Small UV tweaks can dramatically improve texture quality on import.
Tip: Use a separate UV layout for each object to avoid texture bleed. - 9
Organize and save workflow
Create a dedicated project folder structure with separate assets, textures, and renders. Save Blender files with clear names and maintain a log of export settings for future updates.
Tip: Back up your Blender project regularly to avoid losing revisions.
Questions & Answers
Can I export Roblox animations into Blender?
Roblox animation data is not exported directly with geometry. You can export the mesh and re-create or import animation inside Blender for custom scenes.
Animation data from Roblox isn’t exported with models; you’ll need to animate in Blender to reproduce motions.
Is exporting Roblox assets to Blender legal?
Only export assets you own or have permission to use. Always respect Roblox’s terms of service and copyright guidelines when transferring assets.
Make sure you have rights to export assets and follow Roblox’s terms of service.
Which Blender render engine should I use?
Cycles offers realistic lighting and materials, while Eevee provides faster previews. Choose based on the balance between speed and quality you need.
Use Cycles for realistic renders and Eevee for quick previews.
What if textures look wrong after import?
Re-map textures in Blender, verify UVs, and adjust the shader network. Sometimes re-importing with different settings helps.
If textures don’t look right, re-map and re-link in Blender.
Do I need to code to complete this workflow?
No coding is required for the core Roblox to Blender workflow. Advanced automation can use scripts, but the basics rely on built-in import/export tools.
No coding needed for the basic transfer and setup.
What file formats are best for Blender imports?
FBX is preferred for rigged assets; OBJ is solid for static meshes. GLTF can work for future pipelines but may require additional setup.
FBX for rigged, OBJ for static; GLTF is an option but may need extra steps.
Watch Video
The Essentials
- Plan asset export before starting.
- Choose FBX for rigged assets and OBJ for static meshes.
- Textures often require re-mapping in Blender.
- Test renders early to catch shading issues.