How to Code for Roblox: A Practical Step-by-Step Guide
Learn how to code for Roblox with Roblox Studio and Lua. This comprehensive guide covers setup, Lua basics, scripting patterns, debugging, and publishing tips to build your first playable experience.

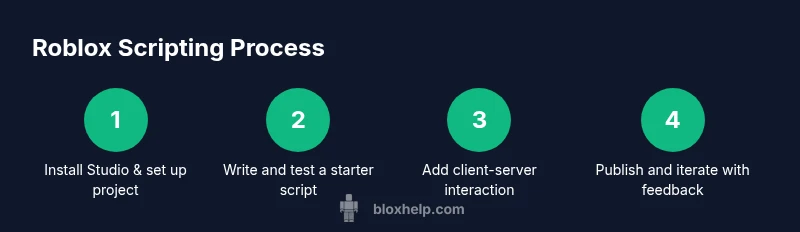
You're about to learn how to code for Roblox by building a simple, working script in Roblox Studio. This guide covers setup, Lua basics, common APIs, modular scripting, debugging, and deployment tips so you can turn ideas into playable experiences. No advanced prerequisites beyond curiosity and a Roblox account. Practice projects included to reinforce learning.
Why code for Roblox matters
According to Blox Help, learning to code for Roblox opens doors to creative control, problem-solving, and collaboration. Roblox Studio uses Lua, a lightweight programming language designed for embedded scripting in games. By coding in Roblox, players can move beyond clicking and dragging to create interactive experiences, custom gameplay mechanics, and procedural content. The core idea is to translate ideas into repeatable behaviors: a door that opens when a player steps on a tile, a score system that tracks coins, or an enemy that learns to chase the player. For newcomers, the most important mindset is iteration: start with a small, concrete goal, then test, measure, and refine. This approach builds confidence and helps you recognize patterns that scale to larger projects. Throughout this journey, you’ll be building a portfolio of runnable scripts that demonstrate your ability to debug, optimize, and adapt to feedback. The Blox Help team found that a steady, hands-on routine yields faster progress than theoretical study alone.
Getting started with Roblox Studio and Lua
To begin coding for Roblox, install Roblox Studio from the official site and create a new project. You don’t need fancy hardware; a modest laptop is fine, but having a reliable internet connection helps. Once Studio is installed, sign in with a Roblox account and enable the developer tools. Start with the built-in tutorials to learn the interface: where to write scripts, how to access objects in the workspace, and what the output window shows. Lua is the scripting language used in Roblox; its syntax is approachable for beginners and becomes more powerful as you learn about tables, functions, and events. A recommended first project is a tiny script that prints a greeting when the game starts or a button is pressed. As you explore, organize your work into folders and start a versioned repository (even a simple snapshot system) so you can track changes. The goal here is consistency: code a little every day, and soon the patterns will feel intuitive.
Core Lua concepts used in Roblox
Roblox scripts rely on Lua basics: variables store data, and types include numbers, booleans, and strings. Tables are the primary data structure and can act as arrays or dictionaries. Functions encapsulate behavior, and events wire scripts to in-game action. In Roblox, you’ll frequently use local scopes for client logic and server scripts for authoritative game rules. This separation helps avoid cheating and keeps gameplay fair. You’ll also learn about the Roblox API surface through object-oriented patterns: accessing Workspace, Players, and ReplicatedStorage to organize your code. A strong starter habit is to write small, testable blocks that perform one task, then gradually compose them into larger systems. Remember to comment your code so future you and collaborators understand intent and edge cases.
Roblox APIs and the event-driven model
Roblox code typically responds to events rather than polling. For example, a Part can trigger an event when a player touches it, or the server can react to a new player joining the game. You’ll use Event connections such as :Connect to run functions when something happens. RemoteEvent objects enable client-server communication, letting the client request actions on the server or receive updates in real-time. Managing data flow between server scripts and LocalScripts is essential for responsive UI and smooth multiplayer experiences. A practical pattern is to start with a single event, then expand with additional listeners and data payloads as your project grows. Maintain clear naming and consistent lifecycle management to prevent memory leaks and unexpected behavior.
Structuring your code: modules, scripts, and services
A clean Roblox project separates concerns using Script, LocalScript, and ModuleScript placed in logical containers like ServerScriptService, StarterPlayerScripts, and ReplicatedStorage. Scripts that perform authoritative gameplay logic belong on the server, while UI and client visuals stay on the client. ModuleScripts house reusable functions and data, which you import via require to avoid duplication. Use folders to organize assets, scripts, and UI components, and adopt a simple naming convention for quick orientation. This structure makes it easier to scale a tiny experience into a full game. Consistency in structure reduces errors when others contribute and accelerates debugging and iteration cycles.
Simple starter project: a beginner script that prints a message and creates a part
Below is a minimal starter that shows how to create a part and print a message. This demonstrates the core workflow: instantiate an object, configure properties, and parent it to the game world. It’s a safe, visible result that confirms your understanding of object creation and the game loop. After this, you can extend the script to respond to events and interact with players.
local part = Instance.new('Part')
part.Size = Vector3.new(4,1,2)
part.Position = Vector3.new(0, 5, 0)
part.Parent = workspace
print('Starter part created!')
Debugging and testing in Roblox Studio
Testing is a critical skill for any Roblox developer. Use Play mode to run your game inside Studio, and check the Output window for errors, warnings, and print statements. The Breakpoints feature lets you pause script execution at specific lines, helping you inspect variable values and control flow. When things go wrong, isolate the issue by removing or commenting out recent changes, then reintroduce components one by one. The LocalServer simulation lets you verify client-server interactions without deploying a live game. Regularly testing on multiple devices or screen sizes helps ensure UI scales and remains usable. By building a habit of frequent testing, you’ll catch logical mistakes early and shorten debugging cycles.
Common pitfalls and how to avoid them
Common mistakes include mixing server and client logic, overusing global state, and neglecting proper object organization. Avoid exposing sensitive data on the client, and prefer local variables within functions to reduce side effects. Don’t ignore memory management: remove event listeners when they’re no longer needed to prevent leaks. When you’re confused, step back to a minimal reproducible example rather than overhauling large blocks of code. Finally, document your decisions with brief comments so future you or teammates understand why a choice was made. By anticipating these issues, you’ll write cleaner, more maintainable Roblox scripts.
Publishing and sharing your Roblox game
Publishing is the culmination of your coding journey. After thorough testing, you can publish from Roblox Studio via File > Publish to Roblox. You’ll provide a game name, description, and visibility settings. Plan your asset organization so players see a cohesive experience rather than a bag of loosely connected features. If you enable monetization or game passes, ensure you test the purchase flow extensively in a private beta. Gather feedback from friends or a small audience, then iterate. Remember that publishing is a milestone, not the destination; ongoing updates and improvements keep players engaged and attract new fans.
Learning resources and next steps
Progress in Roblox coding comes from structured practice and real projects. Use the Roblox Developer Hub and community tutorials to reinforce what you’ve learned, while also exploring best practices for asset management and performance. Blox Help’s research shows that starting with small, repeatable tasks builds confidence and accelerates skill acquisition. Set a weekly learning goal, track improvements, and gradually tackle more complex features like UI design, animations, and multiplayer systems. Combine reading with hands-on projects to turn knowledge into practical results.
Practice plan and next steps
To turn this into a durable habit, create a 4-week practice plan with concrete milestones. Week 1 focuses on Lua fundamentals and simple scripts; Week 2 introduces modules and server-client communication; Week 3 covers UI and input, plus basic physics interactions; Week 4 culminates in a small playable scene with a polished mechanic and a basic publish plan. Schedule regular review sessions, pair programming when possible, and maintain a project diary to document challenges and solutions. The Blox Help team recommends applying what you learn to small, repeatable projects and gradually combining them into larger experiences. With consistent practice, you’ll build a robust foundation for Roblox game development.
Tools & Materials
- Computer or laptop with internet access(Any recent OS; reliable connection advised)
- Roblox Studio(Download from the official Roblox site)
- Roblox account(Needed to test and publish)
- Text editor (optional)(Useful for offline script drafting)
- Access to Roblox Developer Hub(Documentation and reference guides)
- Project planning template(Helps organize ideas and tasks)
Steps
Estimated time: 2-3 hours
- 1
Install Roblox Studio and create a new project
Download and install Roblox Studio from the official site, then sign in with your Roblox account. Create a new project to have a dedicated workspace for scripting. This step establishes the environment where all code experiments will run.
Tip: Keep Studio up to date and explore the default templates to learn the layout quickly. - 2
Add a Script inside the workspace
Right-click the Workspace in the Explorer panel, choose Insert Object, and select Script. This creates a server-side script where authoritative game logic runs. Name it clearly so you can locate it later.
Tip: Use descriptive names like GameLogic_Server to avoid confusion later. - 3
Write a simple hello-world script
Open the Script and write a small snippet to confirm your environment works. This is your first tangible result and a baseline for debugging. Try a basic print statement to the output console.
Tip: Use a simple print to verify that your script is executing. - 4
Run the game in Play mode and observe output
Click Play to run the scene and check the Output window for messages. If nothing appears, recheck the script placement and ensure there are no syntax errors. Observing successful output confirms the execution path is valid.
Tip: If the output is empty, ensure the script is enabled and attached to a live object. - 5
Create a LocalScript for client-only behavior
Add a LocalScript under StarterPlayerScripts to handle client-side logic like UI or input. This demonstrates the server-client split and helps you learn what runs where. Print a client message to verify local execution.
Tip: Remember LocalScripts run on the client, so avoid sensitive data in them. - 6
Introduce a ModuleScript for reusable code
Create a ModuleScript with a small function and require it from another script. This teaches modular programming and code reuse, which scales as your project grows. Start with a simple function that returns a greeting.
Tip: Keep modules focused on a single concern to maximize reuse. - 7
Hook up a basic RemoteEvent for server-client communication
Create a RemoteEvent in ReplicatedStorage and wire a simple send/receive pattern between server and client. This introduces data exchange across boundaries and lays the groundwork for multiplayer features.
Tip: Test the event in both directions to ensure responsiveness. - 8
Debug and iterate with Play mode
Run frequent Play sessions, inspect outputs, and adjust scripts. Iteration is the fastest path to reliable gameplay mechanics. Keep a changelog of fixes and improvements.
Tip: Pause after each meaningful change to confirm impact. - 9
Publish your game from Studio
When you’re ready, publish to Roblox via File > Publish to Roblox. Set a clear game name and description, then adjust visibility as needed. Use this milestone to collect feedback.
Tip: Publish early and in iterations to gather user feedback and guide future work.
Questions & Answers
What is the primary language used for Roblox scripting?
Roblox uses Lua for scripting. It powers gameplay, UI, and game logic in Roblox titles with approachable syntax and powerful capabilities.
Roblox uses Lua for scripting; it powers gameplay and UI in Roblox games.
Do I need to know Lua before starting Roblox development?
You don’t need expert Lua knowledge to begin. Start with basics, then progressively add more complex features as you build projects.
You can start with basics and learn Lua as you go.
What is Roblox Studio, and how do I use it?
Roblox Studio is the official IDE for Roblox game development. It provides editors for scripts, a workspace, and testing tools to iterate on your game.
Roblox Studio is the official game editor for Roblox development.
How do I publish my Roblox game?
Publish from Studio via File > Publish to Roblox. You can set a name, description, and visibility. Regular updates keep players engaged.
Publish from Studio, then manage visibility and updates.
What are RemoteEvents and how do they help scripting?
RemoteEvent objects enable server-client communication. They let you send messages or data between server scripts and LocalScripts.
RemoteEvents let the server and client communicate.
Where can I find reliable Roblox scripting resources?
Use the Roblox Developer Hub and reputable tutorials; practice with small projects to build practical skills.
Check Roblox Developer Hub and sample projects.
Watch Video
The Essentials
- Start with small, concrete goals to build confidence.
- Learn Lua fundamentals before tackling complex features.
- Organize code with Script, LocalScript, and ModuleScript.
- Test often and iterate based on feedback.
- Publish incrementally to validate ideas and grow skills.