Roblox Create: A Practical Guide to Roblox Studio and Lua
Learn how to Roblox create using Roblox Studio and Lua. This step-by-step guide covers setup, scripting basics, testing, and publishing your first Roblox game.

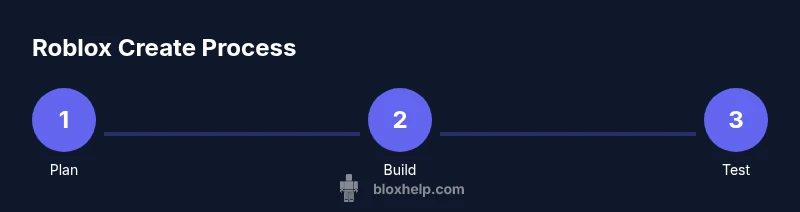
Roblox create starts with Roblox Studio setup, a new place, and simple Lua scripts to add interactivity. Build, test, and publish your game with iterative improvements. This guide helps beginners through a clear, step-by-step workflow, including planning, basic scripting, testing, and publishing. By following the steps, you’ll gain a solid foundation for creating playable Roblox experiences.
Getting started with Roblox create
If you’re ready to Roblox create, the first steps matter. This section covers setting up accounts and Studio, choosing a simple project, and planning your approach before typing a line of Lua. According to Blox Help, starting with clarity reduces confusion and fosters momentum. The Blox Help team found that students who outline their game concept before building save time during debugging and playtesting. Begin by logging into Roblox, installing Roblox Studio, and creating a new Baseplate project. Take a moment to name your place, set a reachable scope, and sketch a rough flow of gameplay. As you prepare, gather essential resources like a local text editor for notes, and a tiny asset pack to prototype visuals without overloading your system. This planning phase isn’t glamorous, but it pays dividends when you actually build. Keep your goals small (one mechanic at a time) and reserve time for frequent testing. The habit of incremental progress is what separates hobbyists from makers who ship.
Roblox Studio: Interface and essentials
Roblox Studio is the central workspace where you build, test, and publish. Familiarize yourself with the Explorer, which lists all objects in your place, the Properties panel for tweaking attributes, and the 3D Viewport for placing and editing parts. Use the Output window to catch errors and print messages during development. A productive workflow begins with organizing assets into folders (Models, Scripts, GUIs) and naming them clearly. Turn on the Settings to adjust performance and editing preferences, especially if you’re on a modest computer. For beginners, start with a simple Baseplate and a few basic parts: a block, a wedge, a seat, and a spawn location. Learn how to group objects, anchor them, and set collisions to prevent unintended physics interactions. Roblox Studio also offers built-in templates for racing, obbies, and simulate platforms—these are great to study how professional games are structured. As you explore, experiment with basic properties like Color, Size, Anchored, and CanCollide. A well-organized project reduces frustration when scripts start interacting and many objects exist at once.
Creating your first place and terrain
A strong Roblox create project starts with a simple, focused place. Create a new place and start with a baseplate, then sketch a tiny game loop: spawn an obstacle, respond to a player action, and trigger a victory condition. Build a basic terrain using the Terrain tools—add hills, water, and a flat area for performance testing. Keep assets minimal at first; prioritize playability and clarity over showmanship. As you assemble, name critical components such as “SpawnLocation,” “Obstacle01,” and “Checkpoint”. Learn how to clone templates to accelerate prototyping and how to create reusable modules for different levels. Consider color-coding sections for quick visual navigation and set up a simple teleport mechanic to move players between scenes. Test frequent with friends to gather feedback on pacing, difficulty, and fun factor. The goal is a stable, small loop you can expand later rather than a sprawling, untested map.
Scripting basics: Lua fundamentals
Lua is Roblox’s scripting language, and you don’t need to be fluent to begin roblox create additions. Start with variables, functions, and basic event listeners. A typical script runs in the Script or LocalScript context, with important differences in who executes the code. Learn to print messages to the Output window to trace the flow of execution, and use if-then-else logic to control game behavior. Simple interactions include touching objects (Touched event), clicking GUI elements (MouseButton1Click), and responding to player input. Use Roblox’s API references to learn available objects and methods, but avoid copying large scripts. Instead, decompose behaviors into small, testable chunks. Experiment with a simple script that moves a part when a player triggers a button, then extend it gradually. The key is to practice with concrete tasks and revisit failing cases with fresh tests.
Adding interactivity: Events, GUIs, and scripting patterns
Interactivity is what makes Roblox create feel alive. Attach event handlers to objects and connect them to responsive UI. Create a simple ScreenGui with a button that prints a message or spawns a particle effect. Use BindableFunctions or remote events to begin multi-script communication if you’re planning multiplayer experiences. Organize your code with modular patterns: place scripts in ServerScriptService for server-side logic and LocalScripts for client-side interactions. Build small, reusable modules (e.g., a health system, a score counter) that can plug into multiple games. Remember to guard against race conditions by structuring event order and avoiding heavy processing on the client. The goal is to deliver a polished, reactive experience without overloading the client.
Testing, debugging, and iteration
Testing is essential for any Roblox create project. Use Play (F5) to simulate a local player and Play Here for multi-character testing. Test on different devices if possible to catch performance issues, network delays, and UI scaling problems. Use breakpoints and print statements to diagnose where logic fails, then fix and re-test quickly. After each loop, document what changed and what remains uncertain. Gathering feedback from friends or a small beta group can reveal edge cases you didn’t anticipate. Maintain a changelog and track issues in a simple table. Regularly prune unused assets and scripts to reduce loading times. The most successful projects iterate in small, frequent cycles rather than one long burst of work.
Publishing, sharing, and safety considerations
Publishing makes your Roblox create project accessible to players worldwide. Set appropriate privacy options, understand monetization and in-game purchases, and ensure your game complies with Roblox’s community guidelines. Before publishing, test all critical paths—startup, gameplay loop, and exit paths—and ensure there are no exploitable gaps. Create a compelling game description, thumbnails, and validation checks for accessibility and readability. Engage the community with updates and note changes in the patch notes. As you publish, consider age-appropriate content and enforce parental controls where necessary. Remember to review safety guidelines and report abusive behavior to maintain a healthy player experience.
Common pitfalls and optimization tips
Almost every Roblox create project hits common stumbling blocks. Avoid over-optimistic scope—start small and expand. Don’t copy scripts without understanding them; rebuild logic from first principles. Minimize network calls, reduce the number of expensive assets, and test frame rate on weaker devices. Use object-oriented-like design by organizing code into modules and avoid global variables where possible. Leverage Roblox Studio’s diagnostics to catch memory leaks and lag causes. Finally, document your decisions so future you or teammates can pick up where you left off. With careful planning, even a modest machine can deliver a smooth and enjoyable Roblox experience.
Tools & Materials
- Roblox account(Required to access Roblox Studio and publish games)
- Roblox Studio installed(Download from Roblox website and keep updated)
- A computer with internet access(Recommended: 8GB RAM or more for smooth editing)
- Lua reference or tutorial resource(Helpful for scripting basics)
- A simple game concept(Idea to prototype during the guide)
Steps
Estimated time: 2-4 hours
- 1
Create a new place in Roblox Studio
Open Studio, click New, choose Baseplate or a template, name your place, and save. This establishes a clean canvas for your Roblox create project.
Tip: Name your project and assets clearly to avoid confusion later. - 2
Plan your game design
Outline core mechanics, goals, and progression. Define a single primary loop (e.g., obstacle, respond to input, reward).
Tip: Keep milestones small; plan 2-3 features per iteration. - 3
Add basic terrain and assets
Use Baseplate, Terrain tools, and lightweight models to prototype visuals without slowing down your PC.
Tip: Limit high-poly assets until gameplay is solid. - 4
Write your first Lua script
Create a Script or LocalScript to implement a simple interaction, like moving a block when a button is pressed.
Tip: Print to Output during development to verify script flow. - 5
Test in Play mode and iterate
Run Play mode, check mechanics, fix bugs, and note any performance issues observed.
Tip: Test with a friend to reveal edge cases you miss solo. - 6
Publish and gather feedback
Publish with appropriate settings, collect player feedback, and plan follow-up updates.
Tip: Document patch notes to communicate progress.
Questions & Answers
What is Roblox Studio and how do I install it?
Roblox Studio is the official development environment for Roblox. Install via the Roblox website, log in, and open Studio. You'll see templates and a place to start.
Roblox Studio is the official tool for building Roblox games. Install from roblox.com, log in, and open Studio.
Do I need programming experience to Roblox create?
No prior programming experience is required to start. You can begin with basic building blocks and gradually learn Lua as you add interactivity.
You don’t need prior coding experience to start; begin with building and learn Lua as you go.
How long does it take to learn Roblox scripting?
Learning speed varies by effort and practice. Start with the fundamentals, build small projects, and progressively tackle more complex scripts.
It varies, but consistent daily practice with small projects accelerates learning.
What is publishing a game on Roblox?
Publishing makes your place accessible to others. Review privacy, permissions, and monetization settings before making it public.
Publishing makes your game accessible to players; configure privacy and permissions first.
Which resources help me improve faster?
Use official Roblox docs, community tutorials, and frequent practice in a sandbox to reinforce learning and experimentation.
Official docs plus community tutorials help you learn faster; practice regularly.
How do I test for bugs effectively?
Run Play Mode, simulate multiple players if possible, and use breakpoints or prints to identify logic errors.
Test in Play Mode and use debugging prints to locate issues.
Are there safety guidelines I should follow when publishing?
Yes. Adhere to Roblox community guidelines, implement age-appropriate content, and use parental controls when needed.
Follow Roblox guidelines and ensure age-appropriate content.
Can I reuse scripts from other projects?
You can reuse patterns and modular designs, but always understand and adapt code to your project context.
You can reuse patterns, but make sure you understand and adapt it to your project.
Watch Video
The Essentials
- Plan your concept before building
- Master Roblox Studio basics for a solid foundation
- Test early and often to catch issues
- Publish with clear intent and iterate from user feedback
- Keep code modular and efficient