How to Remove Clothes in Roblox: A Beginner's Guide
Learn how to remove clothes in Roblox safely, from accessing the Avatar Editor to troubleshooting locked items. A beginner-friendly guide with clear steps, tips, and best practices for avatar customization.

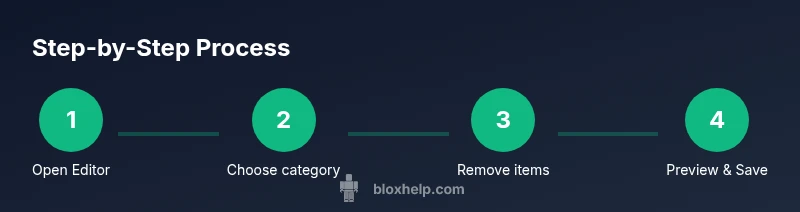
By following these steps, you will remove clothing from your Roblox avatar and reset its appearance. You’ll need a Roblox account, a device with internet access, and the Roblox app or browser. This guide walks you through opening the Avatar Editor, selecting clothing items, and confirming changes to ensure your avatar looks exactly how you want.
What removing clothes in Roblox entails
Removing clothing from your Roblox avatar is essentially reverting to a base appearance or swapping to different items. This can be useful when you want to test new looks, troubleshoot display issues, or simply start fresh. It's important to understand what can be removed and what cannot, since some outfits are part of a bundle or tied to a group. According to Blox Help, understanding the basics helps players stay within Roblox's rules while customizing their avatar. For those asking how to remove clothes in roblox, the process usually involves the Avatar Editor and a few taps or clicks, depending on your device. The key is to distinguish between clothing items you can remove (shirts, pants, accessories) and items that are locked to a game pass, a promotion, or a group, which may require different steps or permissions.
This section will lay the groundwork: what you can safely remove, how to access the editor, and what to expect after you confirm changes. You’ll learn which categories to focus on, how to avoid accidentally removing essential items, and how to document changes for later reference. The goal is to give you a clear mental map of where clothing lives in Roblox and how to navigate it without causing unintended issues.
Eligibility and safety considerations
When you remove clothes in Roblox, you should always respect community standards and Roblox's terms of service. Some clothing items are part of partnerships, promotions, or group-owned assets that may have restrictions on appearance changes. The safety aspect isn’t only about following rules; it’s about avoiding scenarios where an unintended change could affect your in-game experience, especially in multiplayer games or groups with specific dress codes. If you manage younger players’ accounts, discuss privacy and consent with guardians and ensure you’re not attempting to alter someone else’s avatar. This section clarifies what you can safely remove and how to proceed without risking account security or compliance with Roblox policies.
By staying informed about these boundaries, you’ll be better prepared to customize within accepted limits and avoid unnecessary warnings or penalties. Remember: your changes apply to your own avatar unless you have explicit permission to edit another user’s avatar in a shared game or group setting.
Accessing the Avatar Editor: where to start
To begin removing clothing, you first need access to the Avatar Editor. On PC, open Roblox and sign in, then navigate to Menu > Avatar. On mobile, tap the Roblox icon, open the Menu, and select Avatar. In both cases, you’ll land on a screen showing your current avatar with categories for Clothing, Accessories, and Hairstyles. The Avatar Editor is where you manage what your avatar wears, including removing items you no longer want. If you’re using a console or TV app, the steps are similar but adapted to controller navigation. Once you’re in the Editor, you’ll see items categorized by type, rarity, and whether they’re worn or owned. This is where the process of removing items begins.
Understanding the layout—shirts, pants, hats, hair, and other accessories—helps you plan your changes without accidentally removing essential items you don’t want to lose. As you explore, consider using the Preview feature to see how changes look in different lighting and environments, so you’re confident before saving.
Quick-access checklist for removing clothing
- Review your current avatar: identify which items you want to remove and why.
- Verify item types: shirts and pants are separate from accessories and hair.
- Use Preview to visualize changes before saving.
- Remember that some items may be locked to a group or game pass.
This section provides practical guidance to minimize mistakes when removing clothing items and ensures a smooth transition to your desired look.
Special cases: locked outfits and limited items
Not all clothing can be removed freely. Some outfits are linked to bundles, promotions, or group assets that are locked or require specific permissions. In such cases, attempting to remove may not change your avatar’s appearance or may revert after rejoin. If an item cannot be removed, you’ll typically see a lock icon or the option disabled. When this happens, try toggling visibility, replacing the item with a non-locked alternative, or consulting the group’s rules to understand why it’s restricted. The key is to recognize whether the constraint is item-based or account-policy-based and adjust your plan accordingly.
Dealing with locked items often means selecting a substitute clothing option that’s free to remove, then testing the look in-game before finalizing any changes.
Common mistakes and how to avoid them
Mistakes happen when users rush through the Avatar Editor without double-checking changes. A frequent error is removing essential accessories or accidentally removing items that cannot be fully restored. To avoid this, create a quick baseline snapshot of your current appearance before making changes. Use the Preview feature to ensure you’re satisfied with the new look before hitting Save. If you accidentally remove something you want back, re-open the editor, navigate to the appropriate category, and re-equip the item if you still own it. If a non-owned item was removed, you can re-purchase or rationally replace it with something similar.
By taking your time and verifying each change, you’ll minimize regrets and feel confident about your avatar’s appearance.
Best practices for avatar customization
Consistency is key when customizing. Start with a theme (color palette, style, or era) and select clothing items that align with that theme. Keep it simple for clarity, especially in new games where mis-matched outfits can distract other players. Consider saving multiple outfits as presets, so you can switch between looks quickly without repeating the entire removal process. Document your changes with short notes in a personal guide so you can recreate the look later if needed. Regularly review your avatar’s appearance in various lighting and in-game environments to ensure it remains appealing and appropriate for the communities you engage with.
For players who value experimentation, schedule periodic avatar refreshes while staying within Roblox’s community guidelines to avoid administrative issues. A planned approach keeps changes intentional and reduces the likelihood of accidental removals.
Testing and troubleshooting after clothing removal
After you’ve removed clothing, take time to test your avatar in different games and lighting conditions. Check how the new look interacts with accessories, hats, and gear that you commonly wear. If something looks off, revisit the Avatar Editor and make small adjustments. If items disappear unexpectedly after rejoining a game, verify whether the game uses its own avatar system or overrides Roblox’s default appearance. In most cases, changes persist across places, but some games may apply their own skins or cosmetics. If issues persist, restart the game or re-login to ensure the editor is syncing correctly with your account.
The end goal: a balanced, compliant avatar
Your aim is to achieve a clean, intentional look that reflects your style while staying within Roblox’s rules. Removing clothes should be a deliberate part of a broader customization plan, not a rash change made in haste. By following the steps above and leveraging the Avatar Editor effectively, you can craft a satisfying, compliant avatar appearance that works well across most Roblox experiences. Remember, consistent branding and a thoughtful look can help you stand out in the community without compromising safety or policy compliance.
Tools & Materials
- Roblox account(You must be logged in to access the Avatar Editor)
- Device with internet(PC, tablet, or smartphone)
- Roblox app or web browser(Use the Avatar Editor to manage clothes)
- Optional: parental controls awareness(If applicable to accounts under guardianship)
Steps
Estimated time: Total time: 5-12 minutes
- 1
Open the Avatar Editor
Launch Roblox and sign in, then navigate to the Avatar Editor from the main menu. Use the platform’s controls to reach clothing options. This step is essential to access any removal actions.
Tip: If you don’t see Avatar Editor, update the app or clear cache for a fresh interface. - 2
Choose the clothing category
In the editor, select the category for the item you want to remove (shirt, pants, or accessory). This helps you target specific pieces without affecting unrelated items.
Tip: Start with shirts or pants first if you want a full reset look. - 3
Select the item to remove
Tap or click on the item you want to remove. The editor will present an option to unequip or remove. Confirm that you want to detach the item from the avatar.
Tip: Preview before removing to ensure you’re removing the correct item. - 4
Unequip or remove the item
Use the unequip/remove button to detach the item from your avatar. The change should reflect immediately in the preview window.
Tip: If the item is owned by you and you want it back later, keep track of what you removed. - 5
Repeat for other categories
If you want a full reset, repeat the process for other categories (e.g., accessories, hats). Focus on items you want to alter to avoid accidental removals.
Tip: Work in small batches to minimize mistakes. - 6
Preview changes
Use the Avatar Editor’s preview feature to see how the new look appears in different environments and lighting. This helps you gauge final appearance.
Tip: Take screenshots for personal records of your preferred looks. - 7
Save changes
Once satisfied, save or apply the changes. Ensure you are connected to the internet so the changes update across Roblox.
Tip: If you can’t save, check your connection or try again later. - 8
Test in a game
Join a Roblox game to verify the appearance holds in practice. Some games apply their own skins or overlays, which can override Roblox defaults.
Tip: If the look reverts, check if the game has its own customization rules. - 9
Revert if needed
If you dislike the changes, re-open the Editor and revert the last adjustments, or re-equip items you previously removed.
Tip: Keep a log of changes to make reversion easier.
Questions & Answers
Can I remove clothes from another player's avatar?
No. You can only customize your own avatar. Interacting with or changing someone else’s avatar requires their explicit permission and special scenarios, which are generally restricted. Stick to editing your own avatar to avoid issues.
No, you can only customize your own avatar. It’s not allowed to edit someone else’s avatar without permission.
Do I need to remove items one by one or can I remove multiple at once?
You can remove multiple items, but doing it one category at a time helps you keep track of what’s changing. Use the Avatar Editor’s batch options if available, but verify appearance after each group removal.
You can remove multiple items, but it’s safer to do it one category at a time and preview after each change.
What if an item is locked or unavailable to remove?
If an item is locked to a group, promotion, or game pass, you may not be able to remove it directly. Consider replacing it with a similar free item or checking the group rules for alternatives.
If an item is locked to a group or promo, you might not be able to remove it directly. Look for alternative free items.
Will removing clothes affect my inventory or Robux balance?
Removing clothes from your avatar only affects appearance. It does not cost Robux, and items typically remain in your inventory for future use if you choose to re-wear them.
It only changes appearance and won’t affect your Robux balance; items stay in your inventory.
How can I revert changes if I don’t like the result?
Open the Avatar Editor again and re-equip items you removed or reset to a previous outfit preset. You can also keep a log of changes to simplify reversion.
Open the Avatar Editor again, re-equip items, or reset to a previous preset to revert changes.
Watch Video
The Essentials
- Identify removable clothing by category before editing
- Use Preview to validate appearance prior to saving
- Understand that some items are locked to groups or promotions
- Save outfits as presets for quick future edits