Roblox Draw: Textures and Art for Roblox Studio
Master Roblox draw techniques to create textures for Roblox Studio. This practical, beginner-to-intermediate guide covers tools, workflows, and tips to elevate your in-game visuals.

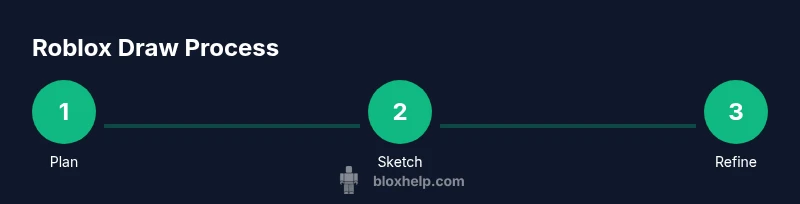
Master Roblox draw with a practical, step-by-step workflow for Roblox Studio textures. This ultra-compact answer points you to the full guide for detailed steps, tips, and examples. You’ll learn how to sketch, apply textures, test in-game, and iterate for better visuals. Whether you’re a beginner or polishing your art pipeline, this page covers fundamentals and advanced tricks.
What Roblox Draw is and Why It Matters
Roblox draw refers to creating 2D textures, decals, and surface art that players see on in-game objects. It blends sketching concepts with pixel-art techniques within Roblox Studio’s asset pipeline. Mastery of roblox draw helps you craft unique skins, logos, emblems, and UI textures that load efficiently and look consistent across devices. According to Blox Help, a strong Roblox draw practice starts with clear planning and lightweight assets, avoiding heavy textures that slow games. A thoughtful approach also keeps your ideas flexible, so they translate well when you iterate during testing. By understanding how textures wrap around 3D surfaces, you can anticipate seams, tiling, and lighting interactions that define the final look of your game.
Tools and Setup for Roblox Draw
Before you start, assemble a small, reliable toolkit. You’ll need Roblox Studio installed, plus an image editor (like a raster or vector program) to sketch and export textures as PNGs. A drawing tablet helps, but a mouse works too if you work at a higher zoom level. Keep a folder of tested canvases at multiple resolutions (e.g., 256x256, 512x512) so you can swap textures without reworking core art. Based on Blox Help analysis, keeping textures lightweight and using decoupled decals improves performance across devices while preserving detail. You’ll also want a clear naming convention and versioning so you can revert to earlier iterations if needed.
Basic Techniques: Sketching, Outlining, and Texturing
Start with a quick concept sketch on paper or in your editor. Translate the idea into sharp outlines and flat base colors, then add midtones for depth. In Roblox draw, decals are applied to surfaces as flat textures, so plan your edges to avoid seams. Build your texture in layers: base color, shading, highlights, and subtle texture noise to break smooth areas. Save iterative versions to compare changes and avoid accidental overwriting. The goal is to create a recognizable, scalable asset that looks good when tiled on a surface in 3D space. Remember: your first draft is a blueprint, not the final piece.
Color, Lighting, and Material Tricks
Color choice defines mood and readability in Roblox draw. Use palettes with high contrast between primary areas and edges to keep the design legible at small sizes. When lighting changes in-game, you want materials that respond well to ambient light, so avoid overly glossy surfaces unless that’s your intent. If you’re texturing a character face or emblem, use subtle shading to imply curvature without heavy gradients. Test your textures under different lighting presets to ensure the art holds up across scenes. The trick is balancing color harmony with the constraints of Roblox’s rendering pipeline.
Importing, Testing, and Iterating Your Drawn Textures
Export your finished texture as PNG with transparency if needed, then import it into Roblox Studio as a Decal or Texture. Apply the asset to a test Part and inspect tiling, seams, and color accuracy. Use in-game lighting to spot problems you can’t see in edit mode, then adjust the texture in your editor and re-upload. Create a short feedback loop: test, note issues, revise, and retest. This iterative approach helps you refine how roblox draw assets feel in the actual game environment.
Ethical and Creative Considerations for Roblox Draw
Respect original artwork and community guidelines when creating roblox draw assets. Do not copy someone else’s work without permission, and credit sources when using external textures or references. When designing for public games, optimize textures for performance and accessibility (clear contrast, readable icons, and scalable sizes). The Blox Help team emphasizes building a personal style while adhering to the platform’s rules. By keeping your art original and considerate, you’ll contribute to a healthier Roblox ecosystem and raise your own profile as a creator.
Tools & Materials
- Roblox Studio(Essential for testing textures in-game)
- External image editor (PNG export)(Needed for sketching and exporting textures)
- Drawing tablet (optional)(Helps with precision but not required)
- High-contrast color palette reference(Guides color decisions for readability)
- Organized asset folders(Important for version control and iteration)
Steps
Estimated time: 60-90 minutes
- 1
Prepare your workspace
Set up a quiet workspace and open Roblox Studio with a simple scene. Gather your external editor, reference images, and a consistent canvas size. This prevents wasted edits and helps you judge texture detail accurately.
Tip: Keep a dedicated iteration folder and use a 512x512 canvas for decals that balance detail and performance. - 2
Create a new texture or decal
In Roblox Studio, create a new Decal or Texture object and name it clearly for the project. Decide the surface area it will map to, so you design with the right aspect ratio in mind.
Tip: Name assets with a project prefix to avoid confusion as your library grows. - 3
Sketch your design externally
Draft the concept in your image editor. Start with a rough silhouette, then lock in key colors and shapes. Export a clean PNG to preserve transparency if needed.
Tip: Work in layers: base colors, midtones, shadows, highlights, and texture noise. - 4
Import and place the texture in Studio
Upload the PNG to Roblox Studio, attach it to the Decal/Texture, and verify the alignment on a test object. Adjust the image resolution if seams appear.
Tip: Check edge bleeding by tiling a few repeats on a plane. - 5
Apply and test tiling on a test object
Apply the texture to a basic Part and inspect how it tiles. Tweak padding, margins, and color balance to ensure consistency across scales.
Tip: Test under default lighting to catch color shifts. - 6
Iterate and finalize
Make refinements based on in-game behavior and player feedback. Re-upload and re-test until the result feels cohesive with the game environment.
Tip: Keep a changelog for each iteration.
Questions & Answers
What is Roblox draw?
Roblox draw is the process of creating 2D textures, decals, and surface art used on parts and UI within Roblox Studio. It combines sketching with pixel art to produce assets that fit the game’s style and performance constraints.
Roblox draw involves creating textures and decals for in-game surfaces. It blends sketching with pixel art to produce assets that look good and run smoothly.
Can I draw in Studio without external tools?
Yes, you can produce simple textures using built-in editors and external assets. However, many creators prefer external editors for finer control over color, shading, and resolution.
You can do basic textures in Studio, but external editors give you more control and quality.
What texture formats work best in Roblox?
PNG is commonly used for decals due to transparency support. For performance, keep textures reasonably sized and avoid overly large files when possible.
PNG decals are common because they support transparency, and you should keep file sizes reasonable for performance.
How do I optimize textures for performance?
Use smaller canvases, minimize color depth where possible, and test on target devices. Reuse textures across multiple objects to reduce memory load.
Make textures smaller where you can, test on devices you care about, and reuse assets to save memory.
Is Roblox draw beginner-friendly?
Yes. Start with simple shapes and colors, then gradually add shading and details. Practice with short loops of design, test frequently, and learn from examples.
Absolutely. Start simple, test often, and build up complexity as you gain confidence.
Where can I find inspiration for Roblox draw designs?
Look at popular games, Roblox communities, and artist showcases. Collect references that match your target style, and adapt ideas to fit Roblox’s art direction.
Check out popular games and artist showcases for ideas, then tailor them to Roblox style and performance needs.
Watch Video
The Essentials
- Plan your texture before drawing to save iterations.
- Test under different lighting and surfaces for consistency.
- Iterate with feedback to refine visuals.
- Export optimized, transparent textures for best performance.