How to Draw Roblox: A Complete Step-by-Step Guide
Learn how to draw Roblox characters with a beginner-friendly, step-by-step approach. Master blocky anatomy, color palettes, shading, and poses in a Roblox-friendly style with practical tips.

According to Blox Help, learning to draw Roblox characters begins with mastering the blocky avatar language and practicing with simple shapes. This guide gives you a clear, beginner-friendly path: study Roblox proportions, build a solid blocking plan, apply bold colors, and practice consistently. By the end, you’ll create recognizable Roblox-style characters with confidence.
Roblox Anatomy: The Roblox Avatar Language
Roblox characters rely on a simplified, blocky vocabulary that makes their silhouettes instantly recognizable. Start by focusing on three core shapes: a squared head with rounded corners, a rectangular torso, and cylindrical limbs with simple joints. The goal is not to copy real anatomy but to capture the distinctive Roblox look: bold, clean lines and clear shapes. When you draw, sketch loose guidelines first: a light vertical centerline, a horizontal eye-line, and a baseline for the torso. Then block in the head, torso, and limbs using cubes and rounded rectangles. As you study various Roblox avatars, note how features stay compact and faces stay minimal. Keep your lines light at first so you can refine the silhouette without committing too early. The more you practice these primitive forms, the more confident your final drawing will be. The key to mastery is consistency: aim for uniform shapes, smooth curves, and readable negative space.
Tools, Materials, and Workspace Setup
A comfortable workspace helps speed up learning. Gather a pencil (HB or 2B), an eraser, a ruler (optional), sketch paper or a digital tablet with layers, and a few color swatches. If you’re drawing traditionally, use a light pencil to keep final lines clean. A kneaded eraser is handy for lightening lines and shaping edges. For color practice, prepare a small palette with three primary Roblox-style colors plus a neutral shade for shading. Reference images of Roblox avatars are indispensable; collect several from different poses. Finally, set up a quiet, well-lit area, and consider creating separate layers or pages for head, torso, limbs, and accessories to stay organized.
Color Theory for Roblox: Palette Choices
The Roblox aesthetic leans on bold, flat colors with minimal gradient. Start with a limited palette—three or four core colors plus one neutral for shading. A strong blue or red for clothing, a skin-tone or neutral hue for the face, and a contrasting color for accessories keep characters cohesive. What matters most is color harmony and readability: avoid tiny color shifts that blur the silhouette. Practice pairing colors with enough contrast against dark or light backgrounds. Keep lighting simple: most Roblox art uses a single light source from the top-left, guiding shading decisions. Reserve white highlights sparingly to maintain a cartoon-like look. If unsure, test swatches on a separate layer to compare how they read on screen or print.
Blocking in the Head: Proportions and Shape
Begin with a rounded square for the head, adjusting the corners to resemble Roblox’s signature cube with soft edges. Keep the width roughly equal to the height to maintain a compact, friendly silhouette. Draw the central vertical axis and a horizontal eye line to guide feature placement. Roblox eyes are simple shapes—often small ovals or dots—set above the midline. Place the ears at about halfway down the head’s height. For a neutral expression, keep the mouth as a small line or a tiny curve; for character, tilt the mouth slightly. The goal is clean readability; avoid extraneous detail that obscures the silhouette.
Blocking the Torso and Limbs: Constructing the Body
The torso in Roblox art is a blocky rectangle with soft edges. Position it under the head, matching the head’s width or narrowing slightly to suggest perspective. Attach the arms at the mid-torso height using rounded rectangles or cylinders; elbows can be gentle curves where the arm bends. For legs, use two connected blocks with soft rounding at the joints. Decide the character’s pose early and adjust the limbs to reflect weight and balance. Keep joints proportional—arm and leg lengths should feel like they belong to the same character without becoming overly long. Use light guidelines to test pose before refining lines.
Refining Shapes: Clean Edges and Proportions
With the initial block-in complete, switch to refining the outer silhouette. Erase extra construction lines, then go over the final shapes with a slightly darker line weight to enhance readability. Check the symmetry of the face and body by folding the drawing along the vertical axis or using a mirror. Roblox characters aren’t anatomically detailed; they rely on consistent line thickness and uniform shapes. If something looks off, compare against reference avatars and adjust proportions accordingly. A strong silhouette should read clearly at small sizes, even without color. Keep your edges smooth and firm, avoiding jittery lines that break the blocky look.
Shading and Lighting for Roblox Style
Roblox shading is intentionally simple. Determine a single light source (top-left is common) and apply a light-to-dark value on major surface planes. Use flat shading for clothing and skin, reserving a lighter edge highlight to suggest volume without overcomplicating the image. In digital art, work with layers: base color, shading, and highlights on separate layers for easy editing. For traditional media, use a soft pencil to render gradual transitions, then sharpen edges with a chosen color. Remember that Roblox art prioritizes bold shapes; avoid heavy gradients that muddy the blocky look. Compare your shading with reference characters to ensure consistency.
Accessories and Expressions
Add personality with simple accessories: hats, glasses, backpacks, or small jewelry—but keep them in the same blocky spirit. Facial expressions in Roblox are often minimal; eyes may be simple ovals or dots, and the mouth is a small line or curve. Place features along the midline and align them with the center of the face to maintain balance. For hats or hair, simplify the silhouette to avoid overlapping lines that clutter the head. The key is readability: accessories should be legible at small sizes and not obscure essential shapes.
Practice Drills and Short Projects
Structured drills accelerate learning. Try three quick sessions: Session 1, three different Roblox heads with varied expressions; Session 2, a torso with four pose variations; Session 3, a small character with an accessory. Repeat these drills weekly, gradually increasing variation. Save each practice piece and compare side-by-side to measure improvement. After two weeks, you should notice more consistent shapes, cleaner lines, and faster turnaround. Keeping a routine helps turn practice into genuine skill.
Common Mistakes Beginners Make and How to Fix Them
Common errors include over-detailing faces, forcing realistic shading, and misaligning limb joints. To fix these, rely on simple guidelines: measure head-to-torso width, keep joints proportional, and maintain a consistent line weight. Another frequent issue is uneven feature spacing; always use a baseline and grid to test alignment. If your drawing begins to look off, step back, compare with references, and redraw the silhouette rather than patching it. Finally, avoid rushing through steps; Roblox art rewards deliberate practice, not speed.
Final Tips for Consistency and Progress
Develop a routine that blends study, practice, and critique. Keep a small portfolio of Roblox drawings, noting what worked well and what needs improvement. Revisit older pieces to measure progress and implement improvements. Engage with the community by sharing work and seeking feedback; constructive critique accelerates growth. When you’re satisfied with a drawing, scan or photograph it, save it in high resolution, and consider exporting clean line art as a PNG. Regular practice plus thoughtful review is the fastest path to mastery.
Next Steps: From Sketch to Roblox Artwork
Now that you’ve built the foundation, push your skills further by experimenting with dynamic poses, color palettes, and pose variations. Try drawing a small set of characters in a single scene to learn composition and storytelling within the Roblox universe. If you’re serious about Roblox art, start organizing your workflow with consistent file naming, layered files, and version control. For ongoing improvement, bookmark helpful tutorials and set a monthly project goal to maintain momentum.
Tools & Materials
- Pencil (HB or 2B)(For initial sketch; keep lines light for easy erasing)
- Eraser (kneaded preferred)(Lighten lines and adjust shapes without leaving marks)
- Ruler or straightedge(Helpful for clean horizon lines and proportional checks)
- Sketch paper or digital drawing tablet with layers(A larger canvas helps manage proportions; use layers for digital work)
- Color swatches or palette(Limit to 3-4 core Roblox-style colors plus a neutral for shading)
- Reference Roblox avatars(Gather multiple poses and outfits to study shapes)
- Optional markers or colored pencils(Great for quick color notes and practice swatches)
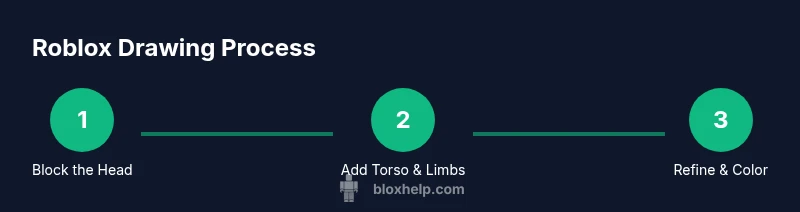
Steps
Estimated time: 60-75 minutes
- 1
Draw the blocky head
Start with a rounded square for the head, keeping width roughly equal to height. Add a vertical centerline to guide facial placement and a horizontal eye line to position eyes. Keep lines light and build the head shape first before adding features.
Tip: Use light construction lines to adjust proportions before finalizing. - 2
Add the neck and torso block
Draw a short neck, then a rectangular torso beneath the head. Keep the torso width close to the head's width for a balanced silhouette. Refine the edges to be slightly rounded, not sharp.
Tip: Maintain consistent spacing between head and torso to avoid a top-heavy look. - 3
Attach the arms
Create simple rounded rectangles or cylinders for the arms. Place the shoulders around the mid-torso height, with a subtle bend at the elbows. Keep joints simple and proportional.
Tip: Test several arm angles to find a natural, Roblox-friendly stance. - 4
Block the legs
Draw two leg blocks connected to the bottom of the torso. Use gentle curves at the knees and connect to the feet with clean lines. Pose freely but stay within Roblox’s characteristic chunky proportions.
Tip: Decide pose first; legs should match the character’s weight and balance. - 5
Refine the silhouette
Erase construction lines and reinforce the outer contour with a slightly darker tone. Check symmetry and ensure the silhouette reads clearly at small sizes.
Tip: Compare with reference avatars to confirm balance and shape consistency. - 6
Add facial features
Place simple eyes and a minimal mouth along the eye line or midline. Roblox faces are intentionally uncomplicated; keep details sparse to preserve the blocky aesthetic.
Tip: Avoid over-scoring facial details; simplicity reads clearly. - 7
Incorporate hair and accessories
Add hair, hats, or glasses as simple shapes that align with the head’s silhouette. Avoid intricate overlaps; maintain the chunky style for readability.
Tip: Limit accessories to avoid cluttering the head area. - 8
Apply color and texture
Choose a limited Roblox-style palette, fill base colors, then add flat shading from the chosen light source. Keep shading crisp and avoid heavy gradients.
Tip: Layer colors to keep edits non-destructive. - 9
Finalize and export
Review line quality, confirm pose consistency, and export the drawing as a high-resolution PNG. If digital, save a layered version for future edits.
Tip: Save backups with different version numbers to track progress.
Questions & Answers
What is the best way to study Roblox character anatomy?
Study blocky shapes and practice by replicating simple Roblox avatars, then adapt them into your own poses. Build a routine around repeating basic shapes.
Study blocky shapes and practice daily with simple Roblox avatars to build familiarity.
Can I draw Roblox characters digitally?
Yes, digital drawing with layers makes it easy to adjust form and color. Start with a rough sketch on one layer, then add color and shading on separate layers.
Absolutely—digital tools with layers are great for Roblox art.
What colors are typically used for Roblox characters?
Roblox art relies on bold, flat colors with limited gradients. Use a small, cohesive palette (3-4 main colors) and reserve shading for depth.
Roblox colors are bold and simple—stick to a few core colors.
How long does it take to draw a Roblox character?
For a simple pose with practice, expect roughly 20-30 minutes once you’re familiar with the shapes.
With practice, a basic Roblox character can take about half an hour.
Should I copy Roblox characters exactly?
Use existing Roblox characters to study shapes, but create original variations to develop your own style.
Copy for learning, then create your own variations to build style.
What are common mistakes beginners make?
Over-detailing features, misplacing joints, and rushing line work. Use guidelines and slow, deliberate lines.
Common mistakes include too much detail and misaligned joints; slow down and use guides.
Watch Video
The Essentials
- Start with simple shapes and build up
- Keep the Roblox aesthetic: bold shapes and colors
- Practice with references to improve proportions
- Use layers and guidelines to stay consistent