How to Make a Group in Roblox: A Step-by-Step Guide
Learn how to make a group in Roblox with a clear, beginner-friendly, step-by-step guide. Create, customize, invite members, and manage roles—perfect for organizing players and events. Blox Help provides practical tips for safe, active Roblox groups.

Goal: learn how to make a group in roblox. You’ll start from the Groups page, click Create Group, and then customize the name, description, and emblem. After that, set privacy and roles, invite members, and establish basic rules. This quick answer flags the essential steps and safeguards you’ll need to launch a thriving Roblox community by following these steps.
What is a Roblox Group and Why Create One
A Roblox group is a shared space that lets players coordinate activities, assign roles, and collaborate on projects or events. If you’re asking how to make a group in roblox, you’re aiming to centralize recruitment, communication, and governance for your community. According to Blox Help, well-organized groups attract more active members and create a sense of belonging. A group also gives you a dedicated group wall for announcements, a configurable emblem, and a moderated member list. Starting a group is a practical step for creators, moderators, and players who want to run events like jogos, build challenges, or fan-run servers with consistent leadership. As you plan, keep in mind your group’s purpose, tone, and audience to set a solid foundation from day one.
Planning Your Group: Name, Description, and Emblem
Successful groups begin with a clear identity. Choose a memorable name that reflects your theme, a concise description that explains goals and rules, and an emblem that visually represents the group’s vibe. A strong identity helps new players recognize what your group stands for and whether they want to join. Write the description with keywords that explain activities, schedule, and eligibility, so potential members know what to expect. If you have a logo or icon you enjoy, prepare a square or circular image that looks good at small sizes. Consistency matters: ensure the emblem, banner, and description align with your group’s mission and style. For beginners, keep the initial scope manageable and plan future expansion.
Thematic Setup: Colors, Tone, and Rules
Before you launch, define your group’s color palette and the tone you’ll use in posts and messages. A friendly, welcoming tone encourages participation, while a strict but fair policy helps moderation. Draft basic rules covering behavior, posting guidelines, and member responsibilities. Decide on the minimum activity level or contribution you expect from members and how you’ll handle disciplinary actions. This planning stage reduces confusion later and makes growth smoother.
Prerequisites and Setup You’ll Need
To create and manage a Roblox group, ensure you have a Roblox account with access to the Groups feature. Have a reliable internet connection and a compatible device (PC, tablet, or mobile) to navigate to the Groups page and complete the creation form. Prepare your group name, description, and emblem in advance to speed up the process. If you already have ideas for roles (e.g., Leader, Moderator, Member), write them down so you can configure permissions during setup. Finally, consider a simple onboarding guide so new members know how to get started.
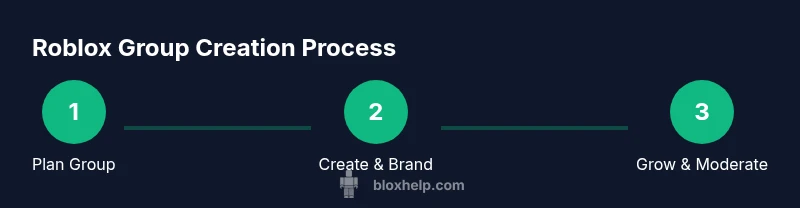
Step-by-Step Overview: Create Your Roblox Group
This section provides a high-level map of the creation process. You’ll start by navigating to the Groups page, then click Create Group, and fill in the essential fields (name, description, and emblem). Next, you’ll set privacy options, create initial roles, and draft basic moderation rules. Finally, you’ll invite members and publish your group. The detailed, step-by-step instructions follow in their own section, but this overview helps you visualize the workflow before you begin.
Managing Roles and Permissions
Groups rely on role-based access to stay organized. Define a small set of roles with specific permissions: who can invite members, who can post on the wall, who can approve join requests, and who can promote others to higher ranks. Start with a basic trio (Leader, Moderator, Member) and adjust later as your group grows. Clear roles prevent power struggles and help automate moderation by assigning trusted members to shared duties. Document the responsibilities of each role so every member understands expectations.
Growing Your Community: Invitations and Moderation
Inviting members is a core growth activity. Share your group link on social channels, Roblox forums, and in-game events to reach interested players. Maintain a balance between welcoming new members and preserving a positive culture by moderating conversations and enforcing rules. Use simple onboarding content: a welcome message, a short guide to roles, and a link to the group rules. Regular check-ins with moderators keep the community healthy and active.
Best Practices: Branding, Events, and Collaboration
Leverage consistent branding across the group page, emblem, and group wall to build recognition. Host regular in-game events, build challenges, or co-create projects with members to sustain interest. Collaborate with other groups or developers for cross-promotions, joint events, and resource sharing. Document a calendar of planned activities and assign a point of contact for each event to streamline execution. A well-planned event calendar keeps members engaged over weeks and months.
Common Pitfalls and How to Avoid Them
Avoid vague rules or ambiguous onboarding that confuses new members. Don’t grow too fast without scalable moderation or a clear escalation path for issues. Avoid banning or muting users without explanation; always provide a chance to appeal. Keep the group page updated with current rules and events; stale descriptions or missing moderators can erode trust. Finally, remember to check Roblox policies to ensure your group stays compliant with platform rules.
Tools & Materials
- Roblox account(Must have access to the Groups feature on the account)
- Device with internet(PC, tablet, or smartphone; stable connection recommended)
- Group emblem image(Upload a square image or use an existing emblem)
- Group planning document(Draft name, description, rules, and roles)
Steps
Estimated time: 15-25 minutes
- 1
Open Roblox and sign in
Launch Roblox and sign in with your account. Confirm you have access to the Groups feature on your current profile. If you don’t see Groups, try refreshing or check for feature availability in your region.
Tip: If you don’t see Create Group, ensure your account is in good standing and try a different device. - 2
Navigate to the Groups page
From the Roblox homepage, open the menu and select Groups, then choose the option to create a new group. This page is where you’ll manage all group-related settings.
Tip: Bookmark the Groups page for quick access during future edits or promotions. - 3
Click Create Group
Click the Create Group button. You’ll be prompted to enter the group name, description, and an emblem. Keep the name concise and descriptive.
Tip: Prepare a short, clear description before you start typing to speed up the process. - 4
Enter name and description
Type a memorable group name and a concise description outlining goals, activities, and member expectations. This text helps prospective members decide whether to join.
Tip: Use keywords that match your group’s purpose to improve discoverability. - 5
Upload emblem and customize visuals
Upload a clean emblem and adjust the group banner visuals if available. Visual identity reinforces branding and recognition.
Tip: Ensure the emblem looks good at small sizes and aligns with your tone. - 6
Set privacy and create initial roles
Choose your privacy level and define roles (Leader, Moderator, Member). Assign permissions for inviting members, posting, and moderating content.
Tip: Start with 3 roles and expand later as the group grows to avoid confusion. - 7
Invite members and assign roles
Invite trusted players to join as initial moderators or core members. Assign roles to ensure responsibilities are well-distributed.
Tip: Prepare a quick onboarding guide for new members to reduce first-week questions. - 8
Publish and monitor activity
Publish your group page and begin posting announcements, events, and welcomes. Monitor interactions and adjust rules as needed.
Tip: Set up a simple moderation log to track decisions and keep accountability.
Questions & Answers
Do I need to pay to create a Roblox group?
Creating a Roblox group is possible from the Groups page, but there may be platform costs or requirements. Check your account status and the Groups page for the latest policy. This guide provides practical steps, not price specifics.
You’ll find the group creation option on the Groups page; pricing varies, so check Roblox’s current rules.
Can I rename a group after creating it?
Yes. You can edit the group name and description from the group’s settings at any time. Changes update for current and prospective members.
Yes, the group name and description can be edited from the group settings anytime.
How do I transfer ownership of a group?
Ownership transfer is done through the group settings by promoting another member to owner. The previous owner can step down, but confirm the new owner’s readiness to manage the group.
To transfer ownership, promote a trusted member to owner in the group settings.
What if my group becomes inactive?
Roblox groups aren’t automatically deleted for inactivity. You can refresh activity by posting events, inviting new members, and updating rules to re-engage participants.
Inactive groups aren’t automatically removed; try new events to re-engage.
How do I invite members to my group?
Use the group page’s Invite Members feature to send invitations or share a join link. You can also promote events to attract players.
From the group page, click Invite Members or share the join link to bring people in.
The Essentials
- Define a clear group identity and rules before launch
- Use simple, scalable roles to manage growth
- Engage members through regular events and updates
- Moderation consistency prevents community issues