How to Create on Roblox: A Step-by-Step Guide
Learn how to create on Roblox from setup to publishing. This beginner guide covers Roblox Studio, Lua basics, building, testing, and sharing your first game.

According to Blox Help, you can create a Roblox game by using Roblox Studio, learning basic Lua, and publishing your project. This quick guide outlines setup, building a simple experience, testing, and sharing your creation. You’ll need a Roblox account and Roblox Studio installed to begin, plus a plan for your first playable world.
Getting Started: What you’ll build and prerequisites
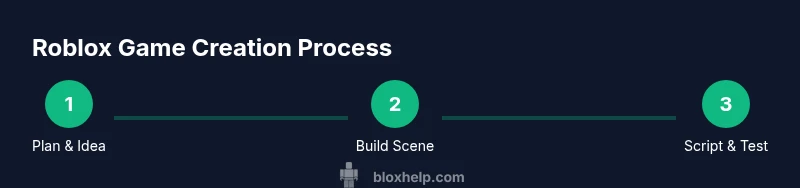
If you’re asking how to create on roblox, start with a clear idea and a small scope. A simple obstacle course or a basic platformer is perfect for beginners. According to Blox Help, the first milestone is to define core mechanics and the rough layout before touching Studio. You will publish later, but you should practice iteration: make a tiny playable chunk, test it, refine, then expand. Roblox projects succeed when you plan a handful of interactive features, not a sprawling world from day one. Gather your aims: number of levels, a single mechanic (jump, collect, or trigger), and a simple score system. This framing helps you stay focused while learning the Studio tools and Lua scripting.
- Start with a concrete goal (e.g., a 1-level obstacle course or a small platformer).
- Write down the core interactions you want players to experience.
- Keep scope small to learn the pipeline end-to-end: build, script, test, publish.
Prerequisites and setup
Before you dive into building, ensure you have the essential setup: a Roblox account, Roblox Studio installed on Windows or
Navigating Roblox Studio: Interface essentials
Open Roblox Studio and you’ll see a busy but logical interface. The main panels include Explorer (lists all parts, models, and scripts), Properties (adjusts settings for the selected item), Viewport (the 3D scene), and the Ribbon with tools. Learn the purpose of Move, Rotate, and Scale, and how to switch between selection modes. Use the Ctrl/Cmd key to duplicate items and align tools for precision. Small habits—like renaming objects as you create them and organizing into folders—save time later when your game grows. Remember, a clean hierarchy makes debugging easier, so set up a simple StarterPack and a few basic parts to begin.
- Explorer and Properties are your primary controls.
- Use Move/Rotate/Scale for quick edits.
- Rename and organize objects early for easier debugging.
Building your first environment
Your first scene should be simple and functional. Start with a Baseplate, add a few basic blocks to form platforms, and place a start point and finish line. Use colored parts to create visual cues for players. Learn to group related items (e.g., all obstacle blocks) into folders in Explorer. Physics basics matter: ensure parts aren’t overlapping in ways that create invisible walls and test collisions frequently. This phase trains you to translate a plan into tangible space, a critical skill in Roblox game development.
- Build a compact level with 3-5 platforms.
- Use color and lighting to guide players.
- Test collisions to avoid unfair gaps or glitches.
Scripting basics: Creating interactivity with Lua
Lua scripting is the engine behind Roblox gameplay. Start with tiny scripts attached to a part to respond to events like Touched or ClickDetector. A common first script changes color when a player touches a block or awards a point when a button is pressed. The key is to keep scripts small and modular; as you learn, move logic into Functions and avoid long monolithic scripts. Blox Help emphasizes breaking problems into small, testable units, which makes debugging much easier. Practice basic events, conditions, and simple state changes to see immediate results in-game.
- Learn how to locate and edit scripts in Explorer.
- Start with an event-driven, small script before expanding.
Testing, debugging, and optimization
Regular testing is essential. Use Play Solo to run the scene inside Studio, or Play Here for in-scene testing. Watch for errors in the Output window and use print statements to trace what happens when a player interacts with objects. If a bug appears only on certain devices, adjust physics properties or scripts to be robust across platforms. Performance matters: avoid heavy assets early and test frame rates in the test environment. Iterative testing builds confidence and helps you surface edge cases you might not anticipate in plan.
- Test early and often to catch logic errors.
- Use Print() statements to trace code flow.
- Consider performance impact of models and textures.
Publishing and sharing your creation
Publishing takes your locally built experience into the Roblox ecosystem. Before publishing, give your project a memorable name, engaging description, and cover image. Configure privacy settings (Public or with friends) and decide whether the game requires a Roblox account to play. When you publish, Roblox provides an icon and thumbnail template—use these to attract players. After publishing, collect feedback from friends or the Roblox community and plan iterative improvements. Documentation and tutorials on the Roblox Developer Hub offer guidance for setting up monetization, permissions, and updates.
- Prepare a basic store of assets and description for discoverability.
- Set appropriate permissions and test in a separate account.
- Gather early feedback and schedule updates.
Next steps: learning paths and community resources
Once you’ve published a basic game, you can level up by exploring more advanced topics: scripting more complex interactivity, networking, and creating better UI. Join Roblox developer communities, watch tutorials, and study published games to see different approaches. A structured learning path—covering Lua fundamentals, Roblox APIs, and game design principles—helps you grow faster. Remember, consistency matters more than perfection in early projects, and each iteration teaches you valuable lessons. The Roblox community and official docs are rich resources to accelerate your progress.
Tools & Materials
- A computer (Windows/macOS)(Roblox Studio runs on Windows 10/11 or macOS 10.12+)
- Roblox account(Create for free at roblox.com)
- Roblox Studio(Download from Roblox official site)
- Stable internet connection(Needed for assets, updates, and publishing)
- Mouse and keyboard(Precise transforms and scripting interaction)
- Optional: Roblox asset library access(Speed up development with pre-made models)
- Screen capture/notes tool(Document your progress for tutorials or portfolio)
Steps
Estimated time: 2-4 hours
- 1
Prepare your account and install Studio
Create a Roblox account and download Roblox Studio. Complete any on-screen setup prompts and sign in to access the Studio workspace. This establishes your development environment and saves time later.
Tip: Check system requirements before install to avoid performance issues. - 2
Create a new project and choose a template
Open Studio, start a new project, and pick a simple template (Baseplate). This gives you a ready-made scene to begin adding parts and scripts.
Tip: Rename the project file and organize into folders for scalability. - 3
Add basic parts to build your scene
Place blocks, platforms, and starting points to form a tiny level. Use Move/Rotate/Scale to arrange them and test collision to ensure a fair play area.
Tip: Keep the layout compact at first to speed up testing. - 4
Attach a script for interactivity
Insert a Script into a part and write a small Lua snippet that responds to events (e.g., touch, click). Start with a simple color change or score increment.
Tip: Break logic into functions to keep code modular. - 5
Test your game with Play modes
Run Play Solo to test locally. Use Play Here for more contextual testing with the current scene. Fix errors shown in the Output window.
Tip: Use Print statements to trace code flow during testing. - 6
Publish and set basic settings
Prepare a clear game name, description, and thumbnail. Choose Public or Friends-only visibility and publish to Roblox.
Tip: Preview the game page to ensure it looks appealing before sharing. - 7
Gather feedback and iterate
Ask friends or community members to play and provide notes. Plan updates to fix bugs and add improvements based on feedback.
Tip: Maintain a changelog to track your progress. - 8
Expand your knowledge with docs
Refer to Roblox Developer Hub for APIs, advanced scripting, and UI design guides to level up your skills.
Tip: Schedule regular practice sessions to build momentum.
Questions & Answers
What is Roblox Studio and why should I use it?
Roblox Studio is the official development environment for creating Roblox games. It provides tools for building, scripting in Lua, testing, and publishing experiences to the Roblox platform. Beginners can start with basic parts and simple scripts to learn the workflow before expanding to complex projects.
Roblox Studio is the creator’s toolkit for Roblox games, including building, scripting, testing, and publishing.
Do I need to code to create a Roblox game?
You can start with no-code elements and simple building, but learning Lua scripting unlocks interactive features, custom mechanics, and more complex gameplay. Even basic scripts can dramatically improve your project.
Coding isn’t mandatory at first, but Lua scripting unlocks more gameplay options.
Can I publish a game for free or does it require a Premium plan?
Publishing a game on Roblox is free; you can share your game publicly or with friends without a paid plan. Premium features exist for monetization and advanced development, but basic publishing is accessible to everyone.
Publishing is free, though monetization features may require additional steps.
How long does it take to learn Roblox Studio as a beginner?
Learning time varies by effort, but a focused starter project can take a couple of hours for fundamentals, with weeks to become comfortable with Lua and game design concepts. Practice consistently to accelerate progress.
A few hours for basics, with ongoing practice to master Lua and design.
Where can I find free assets and templates?
The Roblox library and developer resources offer free models, textures, and templates. Use assets responsibly, credit authors when required, and modify assets to fit your game's needs.
Roblox's library has free assets you can adapt for your project.
What are common mistakes beginners make?
Common mistakes include overscoping a project, neglecting testing, and skipping documentation. Start small, test frequently, and keep a simple changelog to track improvements.
Overambitious scope and infrequent testing are typical beginner pitfalls.
The Essentials
- Plan a focused project to learn core tools.
- Master Studio basics: parts, transforms, and basic scripting.
- Test early, debug often, and iterate based on feedback.
- Publish with clear goals and a simple description to attract players.
- Use community resources to deepen knowledge and skills.