How to Create Roblox Game Pass: A Practical Step-by-Step Guide
Learn how to create a Roblox game pass to monetize your game, from planning perks to publishing and testing. This practical guide from Blox Help covers assets, scripting, pricing, and launch considerations.

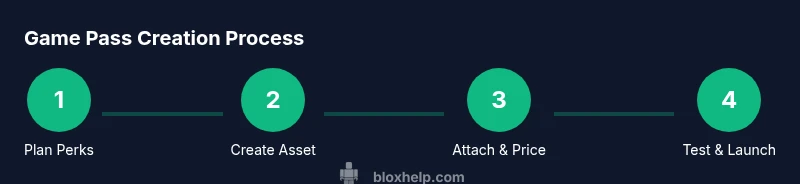
You will learn how to create a Roblox game pass by planning perks, creating the pass asset, pricing it in Robux, attaching the pass to your game, and scripting the grant flow. This guide covers assets, scripts, testing, and launch considerations. Prerequisites: a Roblox account with creator access and a game to attach the pass to.
What is a Roblox Game Pass?
A Roblox game pass is a one-time purchase that unlocks perks in a specific game. It is different from a developer product, which is typically consumed or used up after a single action. Game passes grant ongoing benefits to the buyer and are a popular way for developers to monetize their creations without gating core gameplay. As the Blox Help Editorial Team notes, well-designed game passes align with your game’s core loop and offer genuine value rather than cosmetic bragging rights. In practice, a game pass might unlock access to a private area, grant a permanent in-game bonus, or provide a unique ability. Keep perks clear, fair, and easy to understand, and document them in your pass description so players know exactly what they are purchasing.
Why Creators Use Game Passes
Game passes provide a predictable monetization channel that scales with your game’s popularity. According to Blox Help, analysis in 2026 shows that passes perform best when perks are clearly defined, beneficial, and not easily gameable or exploitative. Perks should complement gameplay rather than replace core content. A well-communicated value proposition also strengthens community trust, reduces refund requests, and improves player retention as players come back to use their earned perks. Use passes to reward ongoing players (e.g., access to a new color, an exclusive item, or a permanent boost) while ensuring balance in your overall economy.
Planning Your Game Pass: Perks, Pricing, and Limits
Before you create assets or publish anything, map out the perks and how they feel in gameplay. Aim for 1–3 meaningful perks that enhance, not dominate, the experience. Decide how the perks will be distributed in-game (are they stored per-player, or earned each time a pass is purchased?). Pricing should reflect the perceived value and your audience’s expectations. Roblox players respond best to clear, tangible value with honest descriptions. Consider offering a low-cost introductory pass to attract new players and a premium option for deeper engagement. As a rule of thumb, structure pricing tiers around perceived value and test different options with a small subset of your audience to gauge reception.
Creating the Game Pass Asset and Store Setup
Create the pass asset from your game’s page in Roblox Creator. You’ll upload a square image (512x512 PNG or similar), give the pass a name, and write a concise description of the perks. Then set the price in Robux and publish the pass. Be sure to preview how the pass appears in-game and in the store on multiple devices. A well-branded image and a precise perk list improve click-through and reduce confusion after purchase. After publication, players will see the pass option in your game’s store interface, and you can link the pass to your in-game systems.
Scripting Purchases: Granting Perks In-Game
To grant perks after purchase, your game needs to recognize ownership of the pass and apply effects accordingly. In Roblox, you typically check ownership with MarketplaceService and apply the perk when a purchase is confirmed. Use PromptGamePassPurchase to start the flow and PlayerOwnsGamePassAsync to verify access, then apply the perks (e.g., unlock a player ability or area). It’s important to separate the purchasing action from the perk activation so you can handle refusals, refunds, or revocations gracefully. Test thoroughly with multiple user accounts to ensure the perks persist correctly across sessions.
Testing, Monetization, and Compliance
Before going live, test the purchase flow in a closed environment with several accounts that represent different player roles (new players, seasoned players, and moderators). Verify that perks unlock immediately upon purchase and persist after rejoin. Ensure your description, pricing, and perks comply with Roblox policies and community guidelines to avoid policy violations. Consider updating the pass with new perks over time to maintain ongoing interest and justify re-purchases only for future players (not existing buyers). Keep records of changes to help with player support and transparency.
Launch Checklist and Next Steps
Create a launch plan that includes a marketing message, a changelog for upcoming perks, and a simple feedback mechanism. Publish the pass alongside a short in-game announcement to alert existing players. Monitor social channels and in-game analytics to gauge uptake and player sentiment. After launch, iterate on perks based on player feedback and performance metrics. A thoughtful, well-documented pass can become a stable revenue stream when paired with clear perks and regular updates.
Troubleshooting Common Issues
If players report missing perks or delayed unlocks, re-check the ownership logic and ensure the pass ID is correctly associated with the in-game systems. Confirm that your pass image and description are accessible in all supported devices and locales. If purchases fail, verify that your game’s store is functioning, push updates to the pass metadata, and confirm Robux pricing is not being blocked by regional settings. Always provide clear, user-friendly support steps and update your documentation after each fix.
Tools & Materials
- Roblox Account with Creator Access(Must have permission to publish assets for the target game.)
- Your Roblox Game(The game to attach the pass to.)
- Game Pass Asset Image (512x512 PNG)(Clear, non-copyrighted visuals that represent the perks.)
- Pass Name and Description(Concise perks list and honest value statement.)
- Roblox Studio (optional for testing in-editor)(Helpful for testing complex perks and in-game integration.)
- Test Accounts / Private Server(Use multiple accounts to verify purchase flow and persistence.)
Steps
Estimated time: 60-90 minutes
- 1
Define perks and value
Decide 1–3 meaningful perks that enhance gameplay without breaking balance. Document how each perk changes player progression and why it matters.
Tip: Start with a simple perk to validate the flow before adding more. - 2
Create the pass asset
In Roblox Creator, create a new Game Pass asset. Upload the 512x512 image, give it a clear name, and write a precise description of perks.
Tip: Use high-contrast visuals that read well on small screens. - 3
Set the price
Choose a Robux price that reflects perceived value and audience expectations. Avoid underpricing or overpricing relative to the perks.
Tip: Consider a low entry tier to attract new players and a mid-tier for dedicated fans. - 4
Attach to the game
Link the Game Pass to your Roblox game so it appears in the in-game store. Ensure the pass ID is correctly associated with the game.
Tip: Preview on mobile and desktop to confirm visibility. - 5
Implement in-game grants
Implement code to grant perks when a purchase is confirmed. Use MarketplaceService:PromptGamePassPurchase and PlayerOwnsGamePassAsync to verify.
Tip: Separate purchase flow from activation logic for easier maintenance. - 6
Test purchases
Test with multiple accounts to confirm immediate unlock, persistence, and no broken states after relaunch.
Tip: Test edge cases like revoking access or refunds. - 7
Publish and announce
Publish the pass and make a short in-game announcement. Provide a 1–2 sentence changelog for the first update.
Tip: Collect early feedback and monitor reviews closely. - 8
Iterate and support
Review player feedback, adjust perks, and consider updates to maintain interest. Keep documentation up to date.
Tip: Schedule periodic perk refreshes to keep motivation high.
Questions & Answers
What is a Roblox game pass and how does it differ from a developer product?
A game pass is a one-time purchase that unlocks perks within a specific game, unlike a developer product which can be consumed multiple times or repeatedly. Game passes provide ongoing benefits to the buyer and are a common monetization strategy for Roblox games.
A game pass is a one-time buy that gives players perks in a game. It’s different from a consumable item, which can be used up. Think of it as permanent access to benefits for that game.
Can I change perks or price after publishing?
Yes, you can adjust perks and update the pass description after publishing. Pricing changes are also possible, but plan carefully to avoid confusion. Communicate updates clearly to players to maintain trust.
Yes, you can update perks or price after publishing. Just make sure to clearly announce the changes to players.
How should I price a game pass?
Price should reflect perceived value and audience expectations. Start with a modest tier to attract new players and consider a mid-tier for more engaged users. Use player feedback to refine pricing over time.
Price should reflect value and what your players are willing to pay. Start small, then adjust based on feedback.
Should I create multiple game passes for different perks?
Multiple passes can offer tiered value, but avoid fragmentation. Ensure each pass has distinct perks and a clear progression path to prevent player confusion.
You can have several passes, as long as each offers distinct perks and stays easy to understand.
How do I test the game pass before launching?
Use test accounts and a private server to simulate purchases, verify unlocks, and confirm persistence across sessions. Include both success and failure scenarios in your tests.
Test using different accounts in a private server to verify purchases and unlock behavior before launch.
How can I track sales and revenue for my game pass?
Use Roblox analytics and custom in-game logging to monitor purchases, user engagement, and perk redemption. Regularly review data to optimize perks and pricing.
Use analytics to monitor purchases and perk redemption, then use the data to optimize your passes.
Watch Video
The Essentials
- Plan perks before asset creation.
- Keep pricing aligned with perceived value.
- Test the purchase flow thoroughly.
- Monitor feedback and iterate perks.
- Stay compliant with Roblox policies.