How to Roblox Studio: A Complete Step-by-Step Guide for 2026
A practical, step-by-step guide to install Roblox Studio, navigate the interface, create a basic scene, write Lua scripts, test, and publish your first Roblox game in 2026. Includes tips, common pitfalls, and resources for ongoing learning.

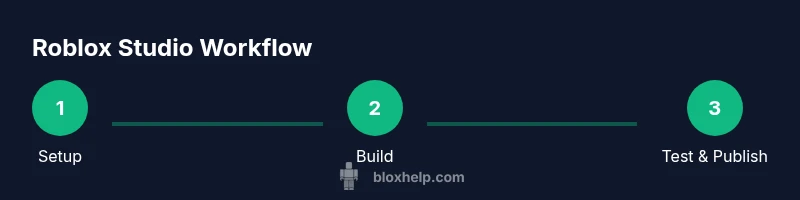
This guide shows how to roblox studio to build, test, and publish your first Roblox game. It covers installation, interface basics, a simple script, and a publish workflow. By the end you’ll have a playable scene and a foundation in Lua. According to Blox Help, following a structured process reduces confusion and speeds up learning.
Why Roblox Studio matters\n\nRoblox Studio is the official tool used by millions to build, test, and publish Roblox experiences. It combines a 3D world editor with scripting capabilities, making it possible to bring ideas to life without leaving the platform. For aspiring developers, mastering Studio accelerates learning, helps you prototype quickly, and opens doors to community feedback. According to Blox Help, beginning with a clear project scope and a minimal, working prototype reduces overwhelm and speeds progress. This guide focuses on practical, hands-on steps that players can follow from day one, with beginner-friendly explanations and examples. By practicing regularly, you’ll gain confidence navigating the Explorer, manipulating parts, and iterating on ideas.
Getting started: prerequisites\n\nBefore you open Roblox Studio, make sure you have a Roblox account and a computer that meets typical requirements. Install Roblox Studio from the official Roblox site and sign in. You’ll also want access to the Roblox Developer Hub for API references and examples. Based on Blox Help analysis, a calm, distraction-free workspace helps beginners focus. Having a basic understanding of the goal (a small playable scene) keeps you motivated and on track.
Roblox Studio interface at a glance\n\nThe Studio interface comprises several panels: Explorer (scene hierarchy), Properties (object settings), Toolbox (models and assets), and the Viewport (your 3D world). The Output window shows script messages and errors. Learning the layout early helps you find tools quickly, reduces frustration, and speeds iteration. Remember to save frequently and keep your project organized with folders and naming conventions.
Building your first scene\n\nStart with a Baseplate, then add a few parts to form a simple scene. Resize, recolor, and group parts to create your environment. Use the Properties panel to adjust material, transparency, and collision. This hands-on practice builds spatial reasoning and gives you a tangible target to script around. For best results, keep the scene minimal at first and gradually expand with new assets.
Scripting with Lua basics\n\nLua is the scripting language used in Roblox Studio. Start with a tiny script that prints a message when the game runs, then gradually add interactions. Learn about variables, functions, and events, and how to connect scripts to objects in the workspace. Keep code organized with comments and modular functions to make future updates easier.
Testing and publishing your game\n\nUse Play mode to test locally and simulate multiple players. Check for errors in the Output window and refine your scripts and physics accordingly. When ready, publish your game to Roblox, fill in metadata, and set privacy options. Publishing is just the beginning—iterate based on tester feedback and player data.
Common issues and debugging tips\n\nCommon issues include syntax errors, nil references, and misnamed objects. Read error messages carefully, use print statements to trace logic, and verify object paths in Explorer. Regularly test on different devices and network conditions to catch platform-specific quirks.
Next steps and resources\n\nContinue learning Lua, explore Roblox's API, and participate in community forums for feedback. Build small projects weekly to reinforce concepts and gradually tackle more complex interactions. Refer to the Roblox Developer Hub and Blox Help’s ongoing guides to stay updated on best practices.
Tools & Materials
- Roblox account(Create or sign in to Roblox; needed to save projects)
- A computer (Windows/macOS) with internet(Stable connection; meets Roblox Studio requirements)
- Roblox Studio software(Download from the official Roblox site and install)
- Roblox Developer Hub access(For API references and tutorials)
- Optional: Lua code editor(Helpful for larger scripts, not required for basics)
- Sample assets (images/models)(Practice materials; use only licensed assets)
Steps
Estimated time: 60-120 minutes
- 1
Install Roblox Studio
Download the Roblox Studio installer from the official site and run the installer. Sign in with your Roblox account when prompted. Verify that you can open the main window and access basic tools.
Tip: Ensure you have admin rights on your computer and allow any firewall prompts during installation. - 2
Create a new project
Open Roblox Studio, choose a Baseplate or a simple template, and name your project. This gives you a clean starting point without extra clutter. Save early to avoid losing work.
Tip: Use a straightforward name and organize your project folders from the start. - 3
Explore the interface
Familiarize yourself with Explorer, Properties, Toolbox, and Viewport. Practice selecting objects, changing colors, and dragging assets into the scene.
Tip: Customize the layout to fit your workflow; a familiar setup speeds iteration. - 4
Add a basic part
Insert a Part into the scene, resize it, and apply a color/material. This builds your first tangible object and introduces scene composition.
Tip: Hold the Shift key while resizing for uniform scaling. - 5
Write a simple script
Add a Script inside Workspace and print a message to the Output when the game starts. This introduces Lua basics and event handling.
Tip: Comment your code to explain what each section does. - 6
Run and test your game
Click Play to run the game inside Studio. Observe how the scene behaves, interact with objects, and fix issues as they appear.
Tip: Test with different input methods (keyboard/mouse) to catch edge cases. - 7
Publish your game
Publish to Roblox, fill in metadata (title, description, thumbnails), and set privacy options. Your game is now accessible to others.
Tip: Check monetization and permissions if you plan to share publicly. - 8
Iterate and improve
Gather feedback from testers, refine scripts, optimize visuals, and expand features in small, incremental updates.
Tip: Keep versioned saves so you can revert if needed.
Questions & Answers
What is Roblox Studio?
Roblox Studio is the official development environment for creating Roblox games. It provides tools for building geometry, scripting in Lua, testing, and publishing experiences.
Roblox Studio is Roblox’s own tool for building and scripting games, then testing and sharing them.
Do I need to know Lua to start?
You can start with building and basic interactions, but Lua scripting enables most gameplay features. Learning Lua early helps you extend your game faster.
Lua is essential if you want interactive features, but you can begin with simple builds first.
Can I publish my game for free?
Yes, publishing a game is free on Roblox. Monetization and advanced features are optional and have their own requirements.
You can publish for free; monetization may require meeting specific criteria.
What are the main UI elements in Studio?
Key UI parts are the Explorer, Properties, Toolbox, Output, and Viewport. Each area serves a different role in building and scripting.
The main UI parts are Explorer, Properties, Toolbox, Output, and Viewport.
How do I test a game in Studio?
Use Play mode to simulate players and test interactions. Check the Output window for errors and iterate based on results.
Use Play to test; fix errors shown in Output and re-test.
Where can I learn Lua basics?
The Roblox Developer Hub and community tutorials are great starting points. Practice by writing small, focused scripts and expanding gradually.
Check the Roblox Developer Hub for Lua basics and examples.
Watch Video
The Essentials
- Install Roblox Studio and sign in.
- Familiarize yourself with Explorer, Properties, and Viewport.
- Build a simple scene, script a basic interaction, and test.
- Publish, gather feedback, and iterate for improvement.