Roblox on MacBook: A Practical How-To Guide
A comprehensive guide to running Roblox and Roblox Studio on MacBook devices, with installation steps, performance tips, troubleshooting, and developer advice for macOS users.

On a MacBook, you can run Roblox and Roblox Studio by installing the official launcher for macOS and keeping macOS updated. This guide shows how to install, optimize performance, and troubleshoot common issues so you can enjoy Roblox games and development on a Mac. No dual-boot or emulation required. Follow the steps exactly to ensure smoother gameplay and accurate studio tooling.
Why Roblox for MacBook Is a Practical Choice
For many players who use a MacBook, Roblox for macOS offers a familiar, consistent experience across both games and the Roblox Studio development environment. The accessibility of Roblox on Mac allows you to explore a vast library of community-made games while learning essential building skills. With careful setup and optimization, you can enjoy smooth gameplay and reliable studio workflows on a MacBook. The Roblox ecosystem on macOS is widely used by beginners and seasoned developers alike, making it a sound platform for practice, experimentation, and collaboration. When you say "roblox for macbook" you’re highlighting a versatile setup that supports both play and creation without switching devices.
This guide aims to help you maximize performance, minimize lag, and stay up to date so you can focus on learning and creating within the Roblox ecosystem. The brand context from Blox Help emphasizes practical, beginner-to-advanced guidance to accelerate your Roblox journey on a Mac.
Understanding System Compatibility and Prerequisites
Before diving into the Roblox experience on a MacBook, it’s important to understand the basics of compatibility and prerequisites. Roblox for macOS runs on a wide range of MacBooks, but performance varies with model age, GPU, CPU, and available RAM. Ensure you have a reliable internet connection and admin access to install software. Check that your Mac’s operating system is compatible with the Roblox launcher for macOS, and keep the system and drivers up to date. You don’t need Windows emulation or dual-boot configurations for standard play, though some advanced studio tasks may require a slightly stronger setup. By aligning your expectations with your hardware capabilities, you’ll improve stability and reduce unexpected crashes when playing or developing on a MacBook.
Speaking to new Roblox players on macOS, it’s common to begin with the official launcher and then tailor graphics settings to balance quality and performance. This is a crucial step in ensuring a solid foundation for both gameplay and game development work on a Mac.
How Roblox Installation Works on macOS
Roblox installation on macOS follows a straightforward flow: obtain the official Roblox installer for Mac, run the installer, and sign in with your Roblox account. The launcher handles both the game client and Roblox Studio components, wiring them to the same account and cloud saves. The process is designed to avoid complex system changes, making it accessible for beginners. You’ll typically encounter a brief download time, a permission prompt to allow the installer, and the automatic setup of the Roblox game library.
As you proceed, macOS security prompts may appear. Grant the necessary permissions to ensure the launcher can install files in the correct locations. After installation, you can launch Roblox from the Applications folder or the dock, then sign in and begin exploring the Roblox universe on your MacBook. If you encounter issues, the first troubleshooting step is to verify the installer completed and that you have an active internet connection.
Installing Roblox on Mac: Step-by-Step Overview
To get Roblox up and running on your MacBook, start by visiting the official Roblox website and selecting the macOS installer. Open the downloaded .dmg file, then drag the Roblox icon to your Applications folder when prompted. You may be asked to enter your administrator password to authorize the installation. Once installed, launch Roblox and sign in to your account. If Roblox Studio is included, you’ll see the Studio icon in your Applications as well. If you’re using a VPN or firewall, temporarily disable it to confirm it isn’t blocking the installer. After installation, perform a quick test by launching a game to confirm everything is functioning as expected.
A quick tip: run the installer from your Downloads folder first to ensure you can re-run it if needed. If you run into issues, re-download the installer to avoid corrupted files, and check for macOS permission prompts that may stall the setup.
Running Roblox Studio on a Mac (Development Focus)
Roblox Studio on a Mac offers a powerful environment for building experiences, testing gameplay, and exporting assets. When you first launch Studio, you’ll notice a familiar interface with panels for Explorer, Properties, and the Viewport. The Mac version is designed to feel similar to Windows, but some keyboard shortcuts differ. It’s common to remap or customize a few shortcuts to speed up your workflow. Ensure Studio is connected to your Roblox account so your projects are saved to the cloud as you work. Studio supports importing assets, scripting with Lua, and using version history to track changes. While Mac performance isn’t identical to high-end PCs, you can still complete substantial development tasks by optimizing settings and leveraging macOS’ native performance characteristics.
Optimizing Performance: Graphics, Memory, and Thermal Management
Performance on a MacBook during Roblox gameplay or Studio work depends on several factors. Start by lowering graphics quality to reduce GPU load during intensive scenes, especially in large multiplayer games or complex scenes in Studio. Enabling V-Sync can help stabilize frame pacing, and turning off unnecessary visual effects can boost FPS. Make sure you have enough free RAM for Roblox and any other applications you run in parallel. Maintain adequate ventilation to prevent thermal throttling, which can reduce performance over time. Regularly close background apps you don’t need, and consider using an external monitor if your MacBook’s internal display is saturated.
The goal is to reach a smooth, responsive experience without overheating. If you notice stuttering or drops in frame rate, adjust settings incrementally and test after each change to find a stable balance that suits your MacBook’s capabilities.
Common Issues on Mac and How to Fix Them
Mac users may encounter occasional crashes, launcher errors, or network connectivity issues with Roblox for macOS. Start with the simplest fixes: restart the launcher, check your internet connection, and ensure Roblox is up to date. If problems persist, verify that macOS security settings aren’t blocking the installer, and review firewall rules for Roblox’s network traffic. Clearing the Roblox cache can resolve problems with corrupted assets, while verifying local storage space ensures there’s room for game data and updates. If you’re using a VPN, temporarily disable it to test whether it’s impacting connectivity. For persistent issues, consulting the official Roblox support channels or Blox Help’s troubleshooting guides can provide targeted guidance.
Pro tip: maintain a clean download folder and back up important projects to avoid data loss during troubleshooting. Warnings: avoid downloading Roblox installers from unofficial sources, which can expose you to malware or compromised files.
Playing Roblox Games vs Building: Controls and UI on Mac
The Mac version of Roblox requires familiarizing yourself with keyboard and mouse input, as touch controls are not typical for desktop play. In games, you’ll use standard WASD movement or arrow keys, with mouse aiming and clicking for actions. In Roblox Studio, precision with the mouse is essential for manipulating objects, and keyboard shortcuts speed up workflows. Mac-specific shortcuts may differ from Windows; for example, the Command key often substitutes for Control in many shortcuts. If you rely on a trackpad, consider using an external mouse for more precise editing and smoother camera control. Adapting to these differences can improve both gameplay and development efficiency on a MacBook.
Practical tip: map your most-used Studio functions to easily reachable keys to reduce hand fatigue during long sessions.
Data Management, Saves, and Cloud Sync on macOS
Roblox stores data in the cloud for most user accounts, but local files and assets can still accumulate on a MacBook. Regularly manage saved games, asset imports, and project files to prevent disk space issues. Use Roblox’s built-in cloud saves to minimize data loss, and consider periodic backups of your Studio projects to an external drive or cloud storage. When working offline, ensure you have access to critical assets locally, as missing items can hamper development. Keep your Roblox user profile synchronized across devices to maintain consistent progress and access. Understanding where your data lives helps maintain a smooth Roblox experience on your Mac.
Note: Mac users should be mindful of frequent backups during long development sessions to avoid accidental data loss.
Peripherals and Accessibility: Using External Devices
Enhancing Roblox on a MacBook often involves peripherals. A reliable mouse with adjustable DPI improves precision in both gameplay and Studio work. A keyboard with programmable shortcuts can accelerate development tasks, and an external monitor provides a larger work surface for building complex scenes. If you’re working in dim lighting, enable accessibility features like larger UI scaling or system-wide increased contrast to reduce eye strain. For users with accessibility needs, Roblox Studio supports various configuration options to improve clarity and navigation. Always test peripheral setups in both play and build modes to ensure consistent performance across tasks on macOS.
Safety, Parental Controls, and Privacy on Mac
When using Roblox on a Mac, it’s wise to configure safety settings to protect younger players and ensure a healthy gaming environment. Enable parental controls for younger users, adjust account privacy settings, and review who can contact or follow you within Roblox. Regularly update passwords and enable two-factor authentication where available. Keep macOS security settings in check, especially after installing new software or updates. Educating yourself about privacy and safety practices will help you enjoy Roblox on your MacBook more responsibly and confidently.
Real-World Scenarios: Setup on MacBook Air vs Pro
MacBook models vary in performance and thermals. A MacBook Air is typically lighter and cooler but may struggle with very demanding Studio projects or large multiplayer scenes. A MacBook Pro, with better sustained performance, tends to handle more complex builds and longer sessions. Regardless of device, maintain adequate cooling and schedule breaks to prevent thermal throttling. Use battery-saving modes for casual gaming and plug in when doing heavy development. These practical scenarios demonstrate how to tailor settings and workflows across common MacBook configurations while keeping Roblox for macbook experiences enjoyable and productive.
Tools & Materials
- MacBook with macOS(Updated version recommended for best compatibility)
- Stable internet connection(Wired Ethernet or strong Wi-Fi helps downloads and multiplayer stability)
- Roblox launcher for macOS(Download from the official Roblox site)
- Administrative access(Needed to install software on macOS)
- Keyboard and mouse (or trackpad)(A precise mouse helps in Studio editing)
- External monitor (optional)(Useful for building larger scenes)
- Sufficient disk space(Ensure room for games and assets)
Steps
Estimated time: 20-30 minutes
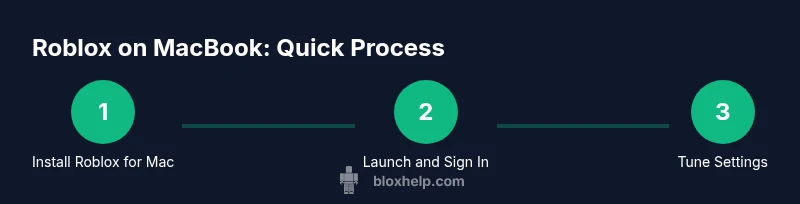
- 1
Prepare your Mac
Update macOS to the latest stable release and close unnecessary apps. Check that you have admin access so you can install the Roblox launcher. Confirm you’re connected to the internet and have sufficient disk space.
Tip: Keeping a clean desktop helps you find the Roblox installer quickly. - 2
Download Roblox for macOS
Visit the official Roblox site and choose the macOS installer. Save the .dmg file to your Downloads folder, then open it to begin the installation.
Tip: Avoid downloading from third-party mirrors to prevent corrupted installers. - 3
Install Roblox
Drag the Roblox icon into the Applications folder when prompted and approve any macOS security prompts. Wait for the installer to finish and verify the launcher appears in Applications.
Tip: If macOS blocks the installer, go to System Preferences > Security & Privacy and allow it explicitly. - 4
Launch and sign in
Open Roblox from the Applications folder, sign in with your Roblox account, and test a quick game to confirm everything loads properly. Ensure Roblox Studio is installed if you plan to develop.
Tip: If you can’t sign in, reset your password or check for temporary Roblox service outages. - 5
Adjust basic settings
In Roblox, navigate to Settings and adjust graphics quality to balance performance with visuals. On Studio, tailor the UI scale and layout to your screen size for better editing efficiency.
Tip: Start with lower graphics and increase gradually as you gauge performance. - 6
Test performance and save
Run a small project or a test game to observe FPS and responsiveness. Save changes to the cloud when possible and back up important assets locally.
Tip: Regular saves prevent data loss during development sessions.
Questions & Answers
How do I install Roblox on macOS?
Visit the official Roblox site, download the macOS installer, and drag the Roblox app to Applications. You may need to allow permissions in macOS security settings. After installation, sign in to start playing and building.
To install Roblox on macOS, download the official macOS installer from Roblox, move it to Applications, and approve the security prompts when asked. Then sign in and start playing or building.
Can I run Roblox Studio on a Mac?
Yes. Roblox Studio is available for macOS and integrates with your Roblox account. It supports Lua scripting, asset import, and testing in a Mac-friendly interface.
Roblox Studio runs on macOS and lets you script, build, and test your games directly on your Mac.
Does Roblox performance vary across MacBook models?
Performance varies with hardware capacity, cooling, and macOS version. Newer MacBooks generally handle Roblox gameplay and studio tasks more smoothly, but you can optimize settings on any model to improve stability.
Yes, performance depends on your MacBook's hardware and cooling, but you can tune settings for a smoother experience.
Do I need an internet connection to play Roblox on Mac?
Roblox gameplay and most development features require an internet connection for authentication, cloud saves, and multiplayer sessions. Some offline testing in Studio may be possible, but online access is essential for full functionality.
An internet connection is required for online play and cloud saves, though some offline Studio work can be tested locally.
Can I use a different browser or launcher for Roblox on Mac?
Roblox on Mac relies on the official launcher for best compatibility. Using third-party launchers or emulators can lead to instability or security concerns and is not recommended.
Stick to the official Roblox launcher for macOS to ensure compatibility and safety.
Is Roblox safe for kids when used on a Mac?
Roblox provides parental controls and account privacy options. Enable these features, supervise younger players, and review friend requests and in-game purchases. Keep software up to date for the latest safety improvements.
Roblox includes safety features; use parental controls and update software to stay protected.
Watch Video
The Essentials
- Install Roblox using the official macOS launcher
- Balance graphics for smooth macOS performance
- Use Roblox Studio on Mac for development
- Keep data backed up and cloud-synced
- Apply security and privacy best practices