How to Make a Roblox Decal: A Practical Guide
Learn how to make a Roblox decal from concept to upload. This beginner-friendly guide covers design principles, export formats, and testing in Roblox Studio, with practical tips from the Blox Help Editorial Team.

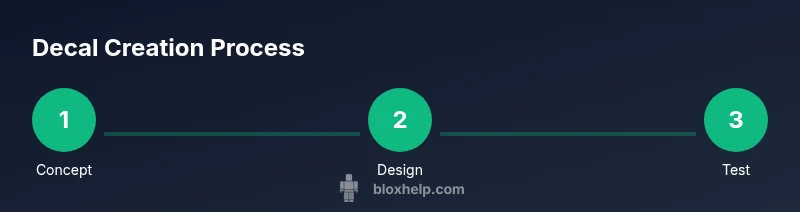
Learn how to make a Roblox decal by designing a clean, square image, exporting it as PNG, and uploading it to Roblox for testing in Studio. According to Blox Help, you should start with a simple silhouette and iterate. You’ll need a graphics app, a Roblox account, and a decal template to guide your design. Follow this step-by-step approach to create a compliant, shareable decal.
What is a Roblox decal and why make one
Decals in Roblox are image textures that you can apply to surfaces in a scene. They let you add logos, emblems, or decorative details without scripting. If you’re exploring how to make a roblox decal, this guide walks you from concept to upload. The process combines design skills with Roblox's asset pipeline, so you get clean, readable graphics that stay crisp when viewed from different angles. According to Blox Help, start with a clear silhouette and keep details minimal to ensure legibility at in-game scales. A well-made decal can boost branding, player recognition, and customization opportunities across your games.
Design principles for Roblox decals
A successful Roblox decal balances readability with personality. Use high-contrast color combos that pop against typical in-game environments, and avoid intricate textures that blur at smaller sizes. Aim for bold shapes and a simple focal point so your decal remains recognizable when applied to walls, signs, or props. Consider accessibility: ensure text (if used) is legible with bold, sans-serif typography and adequate spacing. The Blox Help Editorial Team emphasizes testing across multiple models and lighting conditions to verify consistent appearance.
Preparing your artwork for Roblox: canvas, transparency, and export tips
Start with a square canvas and a transparent background whenever possible. Clean edges and a clear subject help decals look sharp on all surfaces. Use vector-inspired shapes where available, and rasterize at high resolution to preserve edge clarity. When you’re ready to export, PNG is the most common choice due to alpha transparency; JPEGs won’t support transparency, which can cause unwanted seams. Name your file descriptively so it’s easy to manage later. Remember to maintain consistent color profiles and avoid prohibited imagery to comply with Roblox guidelines.
Uploading decals to Roblox and testing in Studio
Upload your decal through Roblox’s decal uploader, then provide a clear name and description to help players find it. After upload, open Roblox Studio and apply the decal to a model to check scale, contrast, and readability within game lighting. Testing in Studio helps you catch issues before publishing, such as edges that shimmer against certain textures or colors that wash out under ambient light. Iterate on design choices based on these tests.
Troubleshooting common issues when creating decals
If your decal won’t upload, double-check file format, size, and transparency. Small artifacts around the edges often indicate insufficient antialiasing or a non-transparent background. If the decal looks muddy, adjust contrast and simplify shapes. In-game visibility problems may come from lighting, surface color, or decal size; test across different surfaces and distances. Always ensure content complies with Roblox policies to avoid rejection.
Creative ideas for standout decals
Experiment with bold silhouettes, limited color palettes, and negative space to convey more with less. Consider branding elements like logos or mascots, but keep the design friendly and appropriate for all audiences. Adding a subtle highlight or drop shadow can help your decal pop against varied backgrounds, while keeping file sizes reasonable. Use consistent margins and padding so the decal reads well on walls, signs, and props alike.
Best practices for sharing decals with the Roblox community
Document your design process and save alternate versions to support iteration. Add helpful metadata (description and tags) so players understand the decal’s purpose. If you collaborate with others, maintain version control and clear attribution. When possible, invite feedback from players and other creators to refine your decal for future updates. This approach helps you build a reliable portfolio of decals that enthusiasts can reuse in their projects.
Authority sources and further reading
For foundational guidance on image formats and web graphics, consult authoritative sources such as: MIT (edu) for educational content on digital design, NIST (gov) for standards on digital imaging, and the W3C PNG specification for transparency handling. These sources help you understand best practices beyond Roblox-specific steps and ensure your decals are built on solid, interoperable fundamentals.
Tools & Materials
- Graphic design software (e.g., Photoshop, GIMP, Krita)(Create decal artwork with transparent background if possible.)
- Roblox decal reference/template(Use Roblox's official decal template as a guide to correct shape and safe content.)
- PNG export option(Export at high quality with an alpha channel for transparency.)
- Web browser or Roblox Studio(Used to upload and manage your decal in Roblox.)
- Quality check assets (color samples, fonts)(Optional assets to ensure readability and consistency.)
Steps
Estimated time: 30-60 minutes
- 1
Define your decal concept
Outline the subject, style, color palette, and how it will appear on game models. Sketch rough ideas and select your focal point. This helps prevent feature creep and keeps the final decal readable.
Tip: Start with a simple silhouette to maximize legibility at distance. - 2
Set up your canvas
Create a square canvas with a transparent background. Establish a safe workspace by enabling grid lines and alignment guides to keep elements centered. Decide on a primary color and ensure it contrasts well with likely background surfaces.
Tip: Use a high-resolution base and plan for downscaling during export. - 3
Draft base shapes and colors
Block in bold shapes that define the decal’s silhouette. Add color blocks and avoid overstuffing with tiny details. Keep the design bold enough to read on walls and props in games.
Tip: Limit the color palette to 3-4 main tones for clarity. - 4
Add details and typography
Introduce essential details and any text, ensuring legibility at small scales. Use thick strokes for text and avoid long sentences. Test readability on a sample in Studio.
Tip: Choose a bold, sans-serif font for maximum legibility. - 5
Check transparency and edge quality
Zoom in to verify clean edges and ensure alpha channel is intact. Remove stray pixels and ensure the subject stands out against diverse backgrounds.
Tip: Antialias edges where possible to reduce jagged outlines. - 6
Export as PNG with alpha
Export the design as a PNG file to preserve transparency. Name the file descriptively to identify the subject and version later.
Tip: Test different transparency levels to see what reads well in-game. - 7
Upload decal to Roblox
Upload through Roblox’s decal uploader, fill in the name and description, and note your intended usage. Keep the file name and metadata clear for later updates.
Tip: Descriptive metadata helps others find and reuse your decal. - 8
Test decal in Roblox Studio
Apply the decal to a model in Studio to evaluate scale, lighting, and visibility. Check on different surfaces and lighting conditions.
Tip: If something looks off, revisit steps 3–5 to adjust shapes or color. - 9
Iterate and refine
Gather feedback from players and other creators, then revise the decal design accordingly. Version control helps you track changes over time.
Tip: Keep a few alternate variants for A/B testing.
Questions & Answers
What formats does Roblox support for decals?
Roblox decals are typically uploaded as image files with transparency. PNG is preferred because it supports an alpha channel, which preserves transparent areas. JPEGs do not support transparency, so they may require a solid background.
Decals usually use PNG to keep transparent areas intact, which helps the decal blend with different surfaces.
Do decals need transparent backgrounds?
Transparent backgrounds are highly recommended to prevent unsightly edges on surfaces. If transparency isn’t possible, use a solid color background that matches most surfaces in your scene.
Yes, transparency keeps decals clean on varied Roblox surfaces.
Why can't I upload my decal?
Upload issues are usually caused by incorrect file format, size, or transparency. Double-check the PNG export, ensure the file isn’t oversized, and confirm you’re using a compliant image.
Check format and transparency if uploads fail.
Can I edit a decal after uploading?
Yes. After uploading, you can replace or rename the decal image, update its description, and reupload a revised version. Keep versioning to track changes.
You can update the decal by reuploading a refined version.
How do I test a decal in-game?
Open Roblox Studio, apply the decal to a model, and preview it under different lighting and angles. This helps ensure the decal remains legible and visually appealing in play.
Test in Studio on various surfaces and lighting.
Watch Video
The Essentials
- Plan silhouette and color for readability.
- Export as PNG with transparency.
- Test early in Roblox Studio before publishing.
- Follow Roblox guidelines to avoid takedowns.