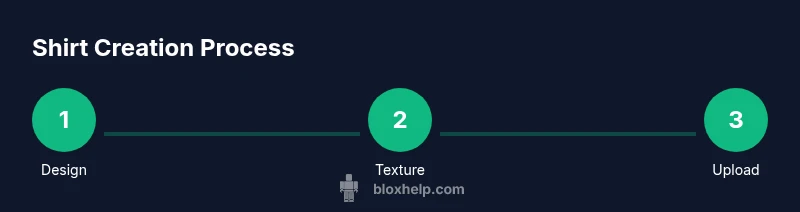
How to Make Roblox Shirts: A Practical Guide
Learn how to make Roblox shirts from concept to upload. This beginner-friendly guide covers design planning, templates, texture creation, testing, and publishing to help you create wearable Roblox clothes.

By the end, you will be able to design, texture, and publish your own Roblox shirt. You’ll need a graphics program, the official shirt template, and a Roblox account with clothing upload permissions. According to Blox Help, start with a simple, high-contrast design, keep seams aligned across panels, test on multiple avatar styles, and preview before submitting to the catalog.
What is a Roblox shirt and why you might want one
Roblox shirts are a way to customize a player’s look with a distinct upper-body garment. They rely on a mapped texture that wraps around the avatar’s torso, so alignment and seam placement matter a lot. Shirts are a fantastic entry point for aspiring creators who want to showcase art skills, practice texture work, and contribute to the Roblox community. According to Blox Help, starting from a simple concept helps you learn the texture workflow, alignment, and upload process without getting overwhelmed. A clean, readable design that respects scale tends to perform better across avatars and skin tones.
Planning your shirt design
Before opening your editor, define the concept, target audience, and mood of your shirt. Sketch thumbnails to iterate quickly and decide on a color palette with strong contrast so the design reads well from distance. Consider the context in which players will wear the shirt—bold logos may be popular for event-themed skins, while minimalist patterns suit everyday wear. Document your design goals, list allowed content boundaries, and plan how the texture will align across seams to avoid mismatches when mapped to the 3D model.
Understanding the official template and guidelines
Roblox requires using the official shirt template to ensure proper seam alignment and texture mapping on the avatar model. The template provides the exact panels and orientation your texture must fit. You will map color and artwork to each panel transparently, making sure nothing critical sits on the seams. Always review Roblox’s current guidelines for clothing uploads, as policy changes can affect what is permitted or how textures are interpreted by the engine. Following the template helps prevent rejection during submission.
Tools and templates you’ll need
To create a Roblox shirt, you’ll need a few essentials. A capable design program (such as Photoshop, GIMP, or a comparable editor) lets you paint with layers and export in a compatible format. Access to the official shirt template is crucial; download it and keep a copy for reference. A reliable web browser and a Roblox account with clothing upload rights are also necessary. Optional assets like brushes, textures, and font packs can speed up workflow but aren’t required for a basic shirt.
Designing the texture: best practices
Begin with a clean canvas and a limited color palette to ensure readability. Keep important design elements away from the center seam to prevent distortion. Use vector-like shapes or crisp raster edges to minimize blurring when scaled. Test color contrast on various backgrounds (dark and light) to ensure visibility in different environments. Name your layers clearly and use non-destructive editing techniques so you can adjust details without redoing everything.
Testing textures on avatars before uploading
Preview your texture on multiple avatar types to see how it reads from different angles. Look for stretched lines, misaligned edges, or color bleeding at seams. If you notice wobble or blur, consider simplifying details or adjusting edge alignments on the template. Gather feedback from friends or the Roblox community to catch issues you might miss. Testing early saves time and reduces the risk of rejection.
Uploading and publishing your shirt (high-level overview)
Upload typically involves selecting your shirt texture, providing a recognizable name and description, and choosing visibility options. Roblox’s uploader checks that the texture adheres to the template and community guidelines. After submission, monitor feedback and be prepared to revise if needed. Keeping a version history of your texture helps you iterate quickly based on user feedback.
Common pitfalls and troubleshooting
Avoid using copyrighted logos or textures that violate Roblox guidelines. Ensure the texture’s seams line up with the template; minor misalignment can cause the garment to look broken in-game. Don’t rely on tiny text or details that won’t read well at in-game sizes. If your shirt is rejected, review the reason, adjust the design, and re-upload with a clear, improved iteration. Maintain backups of your working files to prevent data loss.
Next steps and growing your clothing catalog
Once you’ve successfully published a shirt, consider expanding your line with complementary designs or variations (colorways, seasonal themes, or team apparel). Engage with players to gather feedback and showcase new drops in your portfolio. Regular releases help you build recognition as a creator on Roblox and can become a stepping stone toward more advanced clothing items or in-game asset design.
Tools & Materials
- Design software (e.g., Photoshop, GIMP, or equivalent)(Export textures as PNG/JPG; use layers for non-destructive edits)
- Official Roblox shirt template(Download from Roblox Developer Hub or creator resources)
- Web browser and Roblox account with clothing upload rights(Ensure two-factor authentication is set for security)
- High-contrast artwork assets (optional)(Helpful for fast iterations and testing readability)
Steps
Estimated time: 45-90 minutes
- 1
Open the official shirt template
Download the template and open it in your design software. This gives you the exact panels and orientation you’ll paint on. Saving a backup copy at this stage prevents accidental data loss.
Tip: Label the template layers clearly (e.g., Front-Upper, Back-Upper) to track each panel. - 2
Set up your canvas and reference guides
Create a new document tied to the template dimensions. Create guides that align with critical seams so your artwork doesn’t wrap awkwardly when applied to the 3D model.
Tip: Keep important design elements away from seam lines for readability. - 3
Create the shirt texture with clean edges
Paint on the template panels, focusing on bold shapes and clear silhouettes. Use crisp edges and avoid over-detailed textures that blur when scaled in-game.
Tip: Work with vector-like shapes or high-resolution textures to preserve sharpness. - 4
Export the texture as PNG
Export your artwork as PNG with transparent background if required by the template. This preserves color and edge integrity for Roblox imports.
Tip: Double-check that there are no stray alpha artifacts before uploading. - 5
Prepare your asset metadata
Draft a friendly, descriptive name and a short description highlighting the design concept and any special features. This helps players find and understand your shirt.
Tip: Keep names concise and avoid spammy keywords that harm discoverability. - 6
Upload the texture as a Shirt
Use the Roblox uploader to submit your PNG texture as a Shirt item. Follow the prompts to attach the texture to the garment model and configure basic settings.
Tip: Verify the upload integrity by re-opening the shirt in the viewer after submission. - 7
Preview on avatars and refine
Test the shirt on different avatar shapes to ensure the design reads well from all angles. Adjust color balance or line thickness if needed.
Tip: Ask a friend to review your shirt on multiple body types for objective feedback. - 8
Publish and monitor feedback
Publish the shirt and monitor player comments. Note which aspects are praised and which could be improved for future designs.
Tip: Keep a changelog of iterations to show progress and build a designer portfolio.
Questions & Answers
What is the simplest way to start making Roblox shirts?
Begin with a simple concept and the official shirt template. Use a basic color palette and test the texture on different avatars before uploading. This reduces the chance of misalignment and rejection.
Start with the official template and a simple design. Test on different avatars before uploading.
Do I need advanced drawing skills to create shirts?
Basic drawing and editing skills are enough to begin. Focus on clean shapes, strong contrast, and readable details. You can improve with practice and feedback from the Roblox community.
You don’t need advanced drawing skills; start simple and improve with practice.
Can I reuse textures from other designers?
Only use textures you own or have rights to. Do not copy others’ work. Create original textures or obtain proper permission before using any third-party assets.
Only use textures you own or have permission to use.
What should I do if my shirt is rejected by Roblox?
Review the rejection reason, adjust the design to align with guidelines, and re-upload. Keep a record of the changes you make to streamline future submissions.
If rejected, fix the issue per guidelines and re-upload with a clear improvement.
Is there a specific file format required for uploads?
Roblox typically requires a standard image format (like PNG) for shirt textures. Ensure the file exports with proper transparency and no artifacts.
Use a standard image format like PNG and export cleanly.
The Essentials
- Plan your design before touching the template
- Use the official shirt template to ensure correct mapping
- Test readability on multiple avatars and refine
- Publish and iterate based on player feedback