Roblox Shirt Template: Step-by-Step Guide
Learn how to design and publish a Roblox shirt template with practical, beginner-friendly steps. This guide covers textures, templates, seams, export, upload, and testing for Roblox apparel.

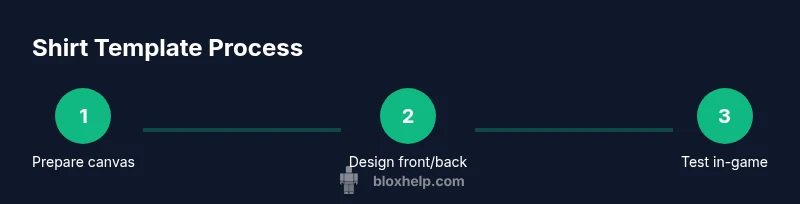
You will learn how to design and apply a Roblox shirt template that works across avatars. Start with a compliant PNG texture, set the correct template size, create layers for front/back/sleeves, and upload to Roblox. After uploading, test in-game and adjust alignment. This guide also covers safety guidelines and best-practices for V2 apparel.
What is a Roblox shirt template and why it matters
A Roblox shirt template is a square texture map that wraps around a shirt model on your avatar. The term roblox shirt template refers to the layout designers use so that the design aligns with the seams, sleeves, and body of the avatar. When you work with the template, you create a single texture that Roblox translates into a wearable shirt, ensuring consistency across different avatars. The Blox Help team emphasizes that templates reduce guesswork and help beginners avoid common misalignment issues. Embracing a template approach also makes it simpler to reuse a design across multiple assets, which speeds up iteration. If you’re just starting out, think of the template as the canvas that keeps all front, back, and sleeve elements perfectly aligned as you test in-game.
For Roblox shirt template design, you’ll need a few basics: a graphics editor, a test account, and a clear plan for how the texture maps onto the garment. In this guide, we’ll walk you through the essential steps, from concept to upload, with practical tips that apply to both beginners and intermediate designers. A well-made template ensures your creative vision translates cleanly into the game world, increasing the chances your work gets noticed by players. In short, the template is where design meets reliability, and that reliability matters when you want to showcase your Roblox shirt template on public and private servers alike.
noteParametricMisalignmentNeeded
null
Tools & Materials
- Graphic design software (e.g., Photoshop, GIMP)(Use layers to separate front, back, sleeves; keep a transparent background when needed.)
- Roblox account(You’ll need to upload and test textures on an avatar.)
- Reference template file or guide(Have a starting template or layout that defines the mapping areas.)
- High-quality PNG export(Export with transparent areas preserved; avoid lossy compression for textures.)
- Color palette and style brief(Helpful for consistency across multiple shirts.)
Steps
Estimated time: 60-90 minutes
- 1
Prepare your canvas
Open your graphics editor and create a new file using a template that maps to the Roblox shirt layout. Set up separate layers for front, back, sleeves, and any accents. Keep a transparent background unless your design requires a solid area. This step ensures you won’t waste time redoing parts of the texture later.
Tip: Label each layer clearly (Front, Back, Left Sleeve, Right Sleeve) to avoid confusion during later steps. - 2
Design the front view
Begin with the central panel that will appear on the torso. Build your pattern with symmetry in mind, and consider how seams align when the shirt is worn. Use guides to keep important design elements within the safe zone of the template. Save incremental versions so you can revert if needed.
Tip: Check alignment by mirroring the front/design on the back layer to visualize how it will appear on the avatar. - 3
Design the back and sleeves
Switch to the back layer and craft a complementary design that balances the front. Then add sleeves that feel natural when wrapped around the arm. Keep seam areas clean and avoid placing critical elements too close to the edge where they might be cropped.
Tip: Test on a mirrored avatar preview if your editor supports it, to catch asymmetry early. - 4
Export the texture
Save your final texture as a PNG with transparent background where appropriate. Ensure no stray marks or compression artifacts remain, as these can show up as blocks on in-game rendering. Name the file consistently (e.g., MyShirtTemplate_v1.png) for easy version control.
Tip: Use names that reflect the design and version to avoid confusion later. - 5
Upload and test on Roblox
Upload the PNG to Roblox as a Shirt asset and attach it to a test avatar. Verify alignment in different poses and poses that show the torso from multiple angles. If something is off, revise the texture, re-export, and re-upload until the fit looks correct across body types.
Tip: Always re-check seams in both static and animated poses to catch drift.
Questions & Answers
What is the correct Roblox shirt template format I should start with?
Start with a PNG texture designed to map onto the shirt model. Use layers to separate front, back, and sleeves, and keep the template aligned with Roblox’ texture coordinates. Always refer to Roblox’s official guidelines in their developer docs for the current template layout.
Begin with a PNG texture mapped to the shirt layout; use separate layers for front, back, and sleeves, and verify it matches Roblox’ current guidelines.
Should I design for all views (front, back, sleeves)?
Yes. A good shirt template accounts for front, back, and both sleeves. Designing across all views helps ensure consistent appearance when worn by various avatars. Visualize alignment as you switch between views in your editor and confirm the seams stay clean.
Yes, design for all views and confirm seams line up when you switch to different avatar angles.
Can I test the shirt template before uploading to Roblox?
You can preview how textures map onto the model in your editor if it supports UV overlays, or by using Roblox Studio’s preview features. This pre-check helps catch issues before you commit to a full upload.
Yes, preview the texture in your editor or Roblox Studio to catch alignment issues early.
What should I do if the shirt template looks misaligned in-game?
Reopen the template, adjust the front/back/sleeve layers, and re-export. Then re-upload and re-test. Small shifts are common, so iterating a few times is normal.
If it looks off, tweak the layers, re-export, and test again until the alignment matches in-game.
Are there color or content restrictions I should follow?
Yes. Follow Roblox’s community guidelines and avoid copyrighted patterns unless you have rights. Keep the design appropriate for all ages and ensure it doesn’t misrepresent brands or mislead players.
Follow Roblox’s rules and use original or properly licensed designs that are appropriate for all players.
Can I reuse a template for multiple shirt designs?
Yes. A well-structured template can be reused across multiple shirt designs. Create a naming convention and versioning system to keep designs organized and to track changes.
Absolutely—reuse the structure, just save each new design with a distinct name and version.
Watch Video
The Essentials
- Design with a clear front-back-sleeve map
- Keep layers organized and named
- Test frequently in-game for proper alignment
- Export as a clean PNG with transparent areas
- Rework and re-upload when seams misalign