How to Roblox Animate: Step-by-Step Studio Guide Essential
Learn how to animate Roblox characters in Roblox Studio with practical steps, tips, and common mistakes to avoid. Ideal for beginners and aspiring developers.

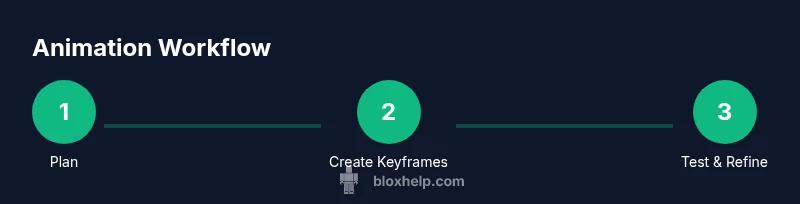
You will learn how to roblox animate by creating a simple animation in Roblox Studio: design a move, rig the model, set keyframes, and test the sequence. This quick guide covers essential steps, recommended tools, and common pitfalls to avoid for smooth, export-ready results. Follow the steps in the body blocks for best results, and check compatibility with your target Roblox game.
Why Roblox Animation Matters
Animation matters in Roblox for delivering responsive, believable characters and immersive gameplay. If you’re curious about how to roblox animate, you’re learning the core idea: movement that conveys intention, emotion, and rhythm. In Roblox Studio, animation is not just cosmetic—it guides player feedback, signals who’s in control, and helps tell your game’s story. Well-planned animations reduce player confusion, support game mechanics (like combat or traversal), and create consistency across avatars and NPCs. By mastering timing, easing, and pose design, you’ll craft experiences that feel polished rather than staged. This section outlines why animation matters, what skill-building looks like, and how animation ties into broader development goals like character fidelity, performance, and asset reuse across multiple projects.
Core Concepts: Humanoid, Rig, and Keyframes
To begin, understand the building blocks: a Humanoid model, a rig, and keyframes. The Humanoid object defines typical Roblox body parts and animations for bipedal characters. A Rig refers to how the model’s joints are connected (for example, a standard R6 or newer R15 rig). Keyframes mark specific poses at particular moments in time; the engine interpolates between them to create motion. Animation assets are created in the Animation Editor and saved as animation objects; they’re then loaded and played by the character’s Animator. Grasping these concepts helps you plan what you want to animate, whether a simple idle cycle or a complex combat sequence. In practice, you’ll map each limb’s movement to a timeline, keeping arcs smooth and consistent with the game’s pacing.
Preparing Your Project: Setup and Tools
Before you start animating, prepare your project in Roblox Studio. Install Roblox Studio on your computer and sign in with your Roblox account. Enable the Animation Editor plugin or use the built-in tools to access the Animator and Rig. Create a test character or import a model you control; a simple humanoid rig is enough for practice. Organize your assets into clear folders: Animations, Models, and Tests. If you’re aiming for a reusable workflow, sketch a quick storyboard of the motion you want. Finally, ensure your project has a stable project file size and that you’ve saved a checkpoint, so you can revert if a pose doesn’t feel right. This groundwork reduces backtracking later during keyframe creation.
Starting a Simple Animation: Step-by-Step Overview
A practical way to learn how to roblox animate is by building a short movement, such as a character waving. Start by selecting the humanoid model and opening the Animation Editor. Create a new animation asset, name it clearly (for example WaveIdle), and set the timeline to your preferred frame rate. Pose the right arm in the starting position, insert a keyframe, then gradually move to a waving pose and insert additional keyframes. Remember to save frequently and scrub the timeline to verify the motion plays smoothly. This overview gives you a concrete target you can expand later with more frames and easing curves.
Creating Keyframes: Timing and Poses
Keyframes are the backbone of animation timing. For natural motion, pair pose changes with pacing that matches your game’s tempo. Start with primary positions (idle, action, return) and fill in secondary poses for subtlety (breathing, weight shift). Use easing curves to soften starts and stops; too-steady motion often feels mechanical. As you set each keyframe, verify that the limb arcs stay within realistic ranges and avoid snapping joints. A good trick is to alternate between exaggerated poses for clarity and subtle refinements for polish. Keep the animation length short at first; you can always extend it later.
Using the Animation Editor: Practical Tips
The Animation Editor in Roblox Studio is your friend for visualizing motion. Enable grid snapping to keep frames aligned, and use onion-skinning to compare neighboring frames simultaneously. Label keyframes clearly and regularly scrub the timeline to check progression. If a motion seems off, isolate the affected limb and test with a single-axis constraint to fine-tune rotation or translation. Take advantage of playback controls to loop the motion and observe its behavior in-game. Pro tip: save iterative versions as separate assets so you can revert to a working state if you over-tweak.
Scripting Animations: Basic Lua Integration
Animations in Roblox often require a bit of Lua to bring them into your gameplay. The typical flow is to create an Animation object, set its AnimationId, obtain an Animator from the character, load the animation, and play it. Example steps include: create an Animation with a valid asset id; get the character’s Animator; call LoadAnimation and start playback; monitor animation states to trigger other actions. You can also blend multiple animations using AnimationTrack or priority settings to avoid abrupt cuts. For more complex scenes, consider coordinating with a script that responds to user input or game events.
Looping, Blending, and Easing
To achieve professional results, you’ll need to master looping, blending, and easing. Looping lets an idle or walk cycle repeat seamlessly; set the animation to loop and adjust transition times to prevent jolts. Blending combines animations smoothly, such as transitioning from walking to jumping. In Roblox, you can blend using multiple animation tracks or tweening for accessory motions. Easing shapes—linear, cubic, or elastic—control how motion accelerates and decelerates, producing natural movement. Test different curves and durations, then apply the choice consistently across related actions to maintain cohesive animation language.
Debugging Animation Issues
Animation work often encounters small issues. If the pose snaps or limbs clip through the model, re-check joint limits and ensure keyframes are anchored to the correct bones. Timing problems can be resolved by adjusting frame counts or frame rate. If an animation fails to play, verify the asset id is valid and the Animator exists on the target character. Use print statements or a debugging overlay to track when scripts trigger playback and transitions. Regularly test in-game to see how the animation interacts with physics, collisions, and other animations. Patience and systematic checks prevent frustration.
Exporting and Reusing Animations
Once you’ve perfected an animation, you’ll want to export and reuse it across your projects. In Roblox, animations are saved as assets with unique IDs; you can publish them to your inventory and reference them in other games. Maintain a library of animations with standardized naming to simplify asset management. When reusing, ensure compatibility with target rigs (R6 vs R15) and adjust scale or root motion if necessary. Consider documenting each animation’s purpose, duration, and keyframes so teammates can understand its behavior without watching every frame.
Real-World Scenarios: Animations in Games
Animations power many real-world Roblox experiences, from idle characters in hub areas to action sequences during battles. In practice, you’ll align animation pacing with game loops, audio cues, and user input. For example, an attack animation should synchronize with hit detections and camera shakes, while an ambience idle should be subtle and readable with small idle cycles. By planning with the game’s tempo in mind, you can avoid overpowering the frame rate or causing motion sickness. Real-world projects often reuse a handful of core animations with respectful variation across characters.
Common Mistakes and How to Avoid Them
Even seasoned creators fall into common traps when learning how to roblox animate. Avoid overlong animations that stretch the frame budget; keep loops tight and legible. Don’t neglect testing on different devices; performance can vary widely. Always backup before major tweaks, and label assets clearly for teammates. Avoid inconsistent easing, which makes motion feel robotic; aim for cohesive timing across related actions. Finally, don’t skip the planning stage—sketch your motion before you touch the timeline to reduce backtracking and revisions.
Tools & Materials
- Roblox Studio installed(Download from Roblox and sign in with your account)
- Animation Editor tool(Enable via Plugins or built-in UI for Animator access)
- Humanoid rig (R6 or R15)(Base model with joints suitable for animation)
- Test character/model(Use a simple humanoid to practice posing and timing)
- Animation assets (optional)(Bring your own or borrow from Roblox library for practice)
Steps
Estimated time: 60-120 minutes
- 1
Open Roblox Studio and load your model
Launch Roblox Studio, sign in, and open your humanoid model in a suitable scene. Ensure the model is selected so you can access the Animator and prepare for keyframe placement. This step sets the stage for clean, trackable animation work.
Tip: Use a clean workspace and enable grid snapping to keep poses aligned. - 2
Create a new Animation asset
In the Animation Editor, create a new asset and give it a descriptive name such as WaveIdle or JumpBounce. This creates the container where you’ll store your keyframes and timing data. Save frequently to avoid losing small adjustments.
Tip: Name assets consistently to ease reuse across projects. - 3
Set the starting pose and insert the first keyframe
Pose the joints in the initial position and insert a keyframe at frame 0. This establishes the baseline for your motion. Verify the orientation of limbs stays within reasonable limits before proceeding.
Tip: Check that the root bone remains balanced to prevent drift. - 4
Add intermediate keyframes for the motion
Move each joint toward the intended pose and insert subsequent keyframes at regular intervals. Build the motion in small increments to keep changes manageable and readable in the timeline.
Tip: Avoid large, abrupt twists; small, incremental changes read better. - 5
Scrub, test, and refine the motion
Play the animation within the Editor and scrub the timeline to review the motion. Adjust frame spacing, angles, and peaking poses until the motion feels natural and matches your game tempo.
Tip: Loop the sequence to identify timing issues over multiple cycles. - 6
Add easing curves for natural movement
Apply easing to transitions between keyframes to simulate acceleration and deceleration. Use a mix of linear and curve-based easing to convey weight and momentum.
Tip: Keep easing consistent across related joints to maintain cohesion. - 7
Integrate Lua scripting for playback
Create a small script that loads and plays the animation when triggered by an event. This connects your animation to game logic and user actions.
Tip: Test state transitions to avoid abrupt cuts between animations. - 8
Test in-game and iterate
Run a full game test to observe how the animation interacts with physics, collisions, and other actions. Iterate based on feedback from testers and your own observations.
Tip: Document changes and create incremental saves for easy rollback.
Questions & Answers
What is the first step to begin animating in Roblox?
Start by opening Roblox Studio, loading a humanoid model, and creating a new Animation asset in the Animation Editor. This gives you a dedicated container for your keyframes and timing. Then you can begin posing the model and inserting keyframes.
Open Roblox Studio, load a humanoid, create a new Animation in the Editor, and start posing to add keyframes.
Can I animate without scripting or programming?
Yes. The Animation Editor lets you create and preview animations visually. Scripting becomes useful when you want the animation to play in response to gameplay events, but it is not required for basic animation creation.
You can animate visually with the Editor; scripting helps trigger animations during gameplay.
Do I need Roblox Premium to animate in Roblox Studio?
No. Animating in Roblox Studio does not require Roblox Premium. You may publish and reuse animations, but Premium offers additional benefits for game access and monetization, which are separate from the animation workflow.
Premium isn’t required to animate; it mainly affects other platform features.
How can I reuse animations across multiple games?
Publish your animation as a reusable asset with a unique ID. When you build new games, reference that ID in your scripts and ensure rig compatibility (R6 vs R15). Keep a library and documentation for easy retrieval.
Publish the animation as an asset and reference it by ID in other games.
What are common timing issues to watch for?
Common timing issues include abrupt transitions, jittery loops, and inconsistent pacing. Solve them by refining keyframes, adjusting frame counts, and applying consistent easing curves across related motions.
Look for abrupt transitions and adjust keyframes and easing to smooth out timing.
Watch Video
The Essentials
- Master keyframes for precise motion
- Use easing for natural movement
- Test in-game to validate performance
- Name assets clearly for reuse
- Document animation decisions for teammates