Roblox Building Mastery: From Beginner to Pro in 10 Steps
Master Roblox building with a practical, step-by-step guide. Learn terrain, structures, lighting, and scripting basics to craft polished experiences in Roblox Studio.

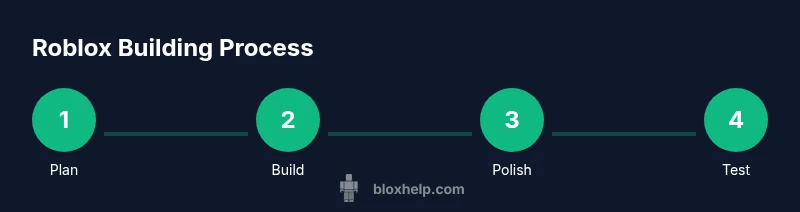
By the end, you will build a complete Roblox scene: terrain, structures, and interactive props, plus basic lighting and camera setup. You'll master essential tools, learn safe editing practices, and follow a clear, step-by-step plan to move from concept to a polished prototype suitable for sharing.
What Roblox Building Lets You Do
Roblox building is the bridge between imagination and interactive play. In the simplest terms, it’s about turning ideas into a lived, explorable space where players can walk, climb, or interact with objects. The craft blends creative design with practical constraints: performance limits, platform safety, and the need for engaging mechanics. The more you practice Roblox building, the better you’ll become at visual storytelling, pacing, and player feedback. According to Blox Help, beginners who focus on a clear plan and repeatable techniques learn faster and stay motivated. This guide focuses on practical steps you can apply today, whether you’re making a tiny obstacle course or a full-fledged adventure map. The core goal is to produce something playable in Roblox Studio that others can explore and enjoy, while building a durable skill set for future projects.
Core Concepts: World, Terrain, and Assets
A solid Roblox building foundation starts with understanding three core concepts: the World (the space where your game happens), Terrain (the ground and natural features), and Assets (buildings, props, and decorative elements). World layout defines the flow—where players start, how they move, and where they look. Terrain shapes the environment’s mood and difficulty. Assets bring character and purpose, whether a rustic cabin or a sci‑fi tower. You don’t need to be an expert scripter to begin; you can prototype with simple shapes and gradually swap in custom models. As you grow, you’ll learn to combine terrain tools with modular assets to keep your scene cohesive and performant.
Essential Tools in Roblox Studio
Roblox Studio is the hub for building worlds. Key panels include the Explorer (scene hierarchy), Properties (object settings), and the Asset Library (models and textures). Use the 3D Viewport to shape objects, the Terrain Editor to sculpt landscapes, and the Material/Texture tools to apply surfaces. Beginners should start with a Baseplate project and a few basic shapes (blocks, wedges, cylinders) to understand alignment and grouping. Plugins can speed common tasks, such as snapping, grid toggles, or automatic collision repair. Remember to save frequently and organize your project with a clear folder structure for models, textures, and scripts. This discipline pays off as scenes grow.
Designing for Play: Layout, Flow, and Visuals
Design for the player’s journey. Start with a simple path that guides visitors from the starting area to key destinations, ensuring sightlines and attention cues lead attention naturally. Use lighting and color to convey mood and readability, balancing contrast against performance. Keep asset counts reasonable; excessive clutter harms both FPS and clarity. Prototyping early lets you test navigation, pacing, and feedback loops—sounds when collecting coins, and haptics or UI hints when players complete tasks. A well-planned layout reduces player confusion and elevates the sense of discovery, which is critical for repeat play. As you iterate, seek feedback from friends or the Roblox community to refine balance and aesthetics.
Optimizing Performance and Safety
Performance matters from the first draft. Optimize by batching objects, keeping poly counts reasonable, and avoiding overdraw. Use efficient textures and LOD (level of detail) when possible, and test on target devices to confirm smooth framerates. Safety means structuring scripts to prevent exploitable gaps and ensuring players cannot accidentally crash a server with excessive requests. Always incorporate basic accessibility; include clear labels, contrasting colors for UI, and straightforward navigation. Practicing safe editing methods, like using local scripts during early test builds, helps protect your game and your teammates’ work. This approach keeps development focused and sustainable.
Common Mistakes and Fixes
Common mistakes include underplanning the layout, overusing complex assets, and neglecting testing on multiple devices. Fixes start with a quick sketch or wireframe, followed by incremental builds using modular components. Regularly test your scene in Play Solo and Team Create to catch issues early, such as missing collisions or lighting that creates glare. Document your changes and maintain consistent naming conventions for assets and scripts. Finally, avoid copy-paste templates without understanding why they work in one project but fail in another. Iteration beats perfection; small, repeatable improvements compound into stronger builds.
Scripting Basics and Next Steps
Scripting brings interactivity to Roblox building. Start with Roblox Lua basics: how to create a Script, how to reference objects, and how to respond to events. A simple object‑interaction pattern is to place a Script inside a part that responds to .Touched or a ClickDetector; this enables players to trigger actions such as doors opening or rewards appearing. As you progress, you’ll learn to organize code with modules, test in isolation, and profile performance. The goal at this stage isn’t to become a master coder overnight, but to add meaningful, safe interactivity to your builds. With each small script, you’ll gain confidence and a clearer sense of what scripting can do for your Roblox building projects.
Real-World Projects to Practice
Begin with small, repeatable projects to build confidence: a parkour staircase with checkpoints, a treasure hunt room, or a simple obstacle course. Each project teaches core skills—terrain shaping, object placement, lighting, and basic interactivity—without overwhelming you. As you complete projects, collect assets you enjoy and refactor your builds for performance. Maintain a project journal to track changes, outcomes, and ideas for future iterations. Over time, you’ll assemble a personal portfolio of playable scenes that showcase your Roblox building talents.
Tools & Materials
- Roblox Studio(Primary editor for Roblox building; install from Roblox site.)
- Computer with internet access(Recommended minimum specs: modern CPU, 8 GB RAM, stable connection.)
- Basic reference images or concept sketches(Helps with layout and thematic consistency.)
- Notepad or code editor(Useful for jotting down script ideas outside Studio.)
- Mouse with good precision(Precise placement matters for terrain and props.)
Steps
Estimated time: 1.5-2 hours
- 1
Open Roblox Studio and Create a New Project
Launch Roblox Studio, sign in, and start a new Baseplate project. Name your project clearly and create a dedicated folder structure for models, textures, and scripts. Save early to prevent loss and set up basic project preferences.
Tip: Name conventions matter: use prefixes like Proj_GameName_Stage to stay organized. - 2
Block Out Your World Layout
Use simple blocks to outline the main areas: starting zone, path, and key destinations. Align objects to a grid for consistency and snap-to-grid to speed placement. Leave space for player movement and future expansions.
Tip: Keep a simple sketch or layout map handy to guide placement when you add details. - 3
Add Structures and Core Assets
Place basic structures using primitive shapes, then replace with more detailed models as you refine. Group related parts into folders for easier management. Check collisions and ensure accessible entry points for players.
Tip: Start with low-poly blocks; you can optimize later without changing gameplay. - 4
Texture, Materials, and Lighting
Apply textures or colors to blocks, then adjust lighting to achieve mood and readability. Use a consistent palette and test lighting under different times of day. Ensure strong contrast for important UI elements.
Tip: Use baked lighting for performance when possible and avoid excessive glow. - 5
Add Basic Interactivity
Insert a Script or a ClickDetector to enable simple interactions like doors, doors, or collectible items. Keep scripts tidy and minimal at first; test each interaction in Play Solo after adding it.
Tip: Comment your first scripts to remember intent and logic. - 6
Test, Iterate, and Publish
Playtest with friends to identify issues, then iterate on layout, performance, and interactivity. When you’re satisfied, publish the build locally or export a playable prototype for sharing with the community.
Tip: Test on multiple devices if possible; what runs well on one device may be slower on another.
Questions & Answers
How long does Roblox building take to learn?
Progress depends on practice consistency. Start with a daily 20–30 minute routine and build small, repeatable projects to reinforce concepts. Expect a solid baseline after a few weeks of steady effort.
With a regular, short practice routine, you'll build foundational skills in a few weeks.
Do I need coding to start Roblox building?
No. You can begin with terrain, layout, and basic interactive props using built-in tools. Coding becomes important as you want richer interactivity and custom mechanics.
You can start building with no coding, and add scripts later when you’re ready.
Can I use free assets in Roblox Studio?
Yes. Roblox provides a library of free assets, and you can import your own if you have rights to them. Always respect asset licensing and avoid heavy, copyrighted material without permission.
Yes, you can use free assets, just mind the licensing.
What is Roblox Studio and how do I access it?
Roblox Studio is the official editor for building experiences. Access it by downloading Roblox Studio from the Roblox site and signing in with your Roblox account.
Roblox Studio is the editor for building; download it from Roblox and sign in.
Is Roblox building suitable for kids?
Yes. Roblox building teaches problem solving, design thinking, and teamwork. Supervise younger developers and use safety settings to control sharing and collaboration.
Absolutely, with proper supervision and safety settings.
How do I publish my build to a game?
Finish your scene, test thoroughly, then publish as a Roblox game. Share your project link with friends for feedback and iterate based on responses.
Finish, test, publish, and collect feedback for improvements.
Watch Video
The Essentials
- Plan before you build to guide your layout.
- Use Roblox Studio tools to iterate quickly.
- Keep assets modular for easier updates.
- Test on real devices and optimize for performance.
- Add simple interactivity to bring your world to life.