How to Publish a Roblox Game: A Practical Guide
Learn how to publish a Roblox game with a practical, beginner-friendly approach. This guide covers planning, Studio setup, publishing steps, privacy, monetization, and post-launch updates for aspiring Roblox developers.

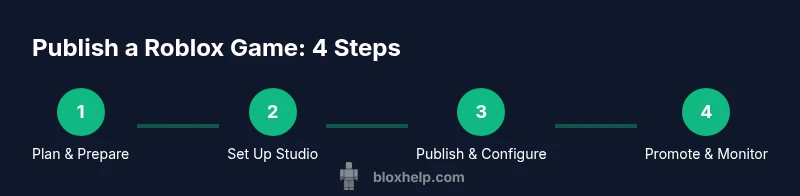
This guide shows you how to publish a Roblox game from planning to live release. You’ll need a Roblox account, Roblox Studio, a ready-to-publish project, and a plan for privacy, monetization, and player support. Follow these steps to publish your game and start inviting players to join the experience.
Planning the Publish: answering the core questions and aligning with your goals
If you’re asking how do i publish a game on roblox, the successful path starts with clear planning. Define your game concept, target audience, and monetization strategy before touching code. Create a checklist that covers asset readiness, technical requirements, and post-launch support. According to Blox Help, developers who publish with a detailed plan reduce back-and-forth and streamline the review process. Include milestones for testing, feedback collection, and regular updates to keep players engaged. A well-scoped plan also helps you communicate expectations to collaborators or testers, which speeds up approval and reduces scope creep. As you craft your plan, consider accessibility features, performance targets, and moderation needs to protect younger audiences while still delivering a compelling game.
Why this matters for beginners
For new Roblox developers, publishing is not just about releasing code; it’s about delivering a stable, enjoyable experience. Build a minimum viable product (MVP) first, then layer in features based on player feedback. This approach minimizes risks and makes it easier to iterate after launch. Remember to document decisions so teammates can stay aligned, and keep a changelog that tracks updates over time.
Setting realistic milestones and success metrics
Define success metrics that matter to your game, such as daily active users, average session length, or retention over the first week. Set up a simple analytics plan using Roblox Studio’s telemetry and any external tools you trust. Define a timeline with milestones for beta testing, soft launch (if applicable), and official release. Having concrete targets makes it easier to evaluate progress and adjust the plan if results aren’t meeting expectations.
Brand strategy and community alignment
Think about how you want players to discover your game. Consider your branding, thumbnail design, and description copy. A clear, appealing presentation helps your game stand out in search results and recommended lists. Plan your in-game chat rules and moderation flow to keep communities safe while enabling enthusiastic fans to engage. A strong onboarding flow reduces drop-off and accelerates retention, which in turn improves visibility in Roblox's recommendation systems.
Accessibility and inclusivity considerations
Publish with accessibility in mind: include keyboard navigation where possible, descriptive UI labels, and adjustable text sizes. Offer color-blind friendly palettes and subtitles for dialogues. An accessible game reaches a wider audience and can improve long-term engagement, which matters for retention and growth.
Final check before publishing
Run a last full test pass across devices (PC, mobile) if possible. Verify that the game loads, menus work, and monetization elements are correctly wired. Confirm that privacy settings reflect your intended audience, and ensure your thumbnail, description, and tags accurately represent the game. A thorough pre-publish check reduces the chance of post-launch hotfixes and negative reviews.
Tools & Materials
- Roblox account with developer access(An active account in good standing, with access to Roblox Studio where you’ll publish.)
- Roblox Studio(Installed and updated to the latest version for compatibility with publishing features.)
- Working Roblox game project(Project ready for publish: functioning build, tested flows, and assets bundled.)
- Stable internet connection(Reliable connectivity is essential for uploading assets and updating live settings.)
- Asset library and approved assets(Use properly licensed assets; prepare placeholders if needed for testing.)
- Monetization plan (optional)(If you plan to monetize, have an outline for game passes or developer products.)
Steps
Estimated time: 1-2 hours
- 1
Prepare your game for publish
Audit your project to ensure core gameplay is solid, assets are organized, and the build is stable. Resolve obvious bugs and document features. Having a clean, tested build reduces last-minute issues during publishing.
Tip: Create a minimal viable version first; you can add polish after you publish. - 2
Sign in to Roblox and access your project
Open Roblox Studio and log in with your developer account. Navigate to the Experience you’ll publish, and ensure you have editor permissions to update settings and publish new versions.
Tip: Use a secondary tester account to simulate a first-time player experience. - 3
Load the project and run a final test
Load the game in Studio, run through critical paths (menus, gameplay loop, monetization gates) and confirm there are no runtime errors. Validate asset loading times and frame rates to avoid post-launch surprises.
Tip: Enable Studio's diagnostics to catch memory leaks or slow-loading assets. - 4
Configure Basic Info and Settings
Open the game’s Basic Info panel to set the title, description, thumbnail, and tags. Choose the appropriate privacy level and audience, and configure monetization options if applicable.
Tip: Craft a clear, concise description and a compelling thumbnail to improve click-through rates. - 5
Publish to Roblox as a new experience
Use the Publish to Roblox option to create or update the experience. Confirm the version you’re publishing is the one tested and ready for players.
Tip: Keep a local changelog of what’s included in this publish for reference after launch. - 6
Set visibility, permissions, and monetization
Choose whether the game is Public, Friends Only, or Private. If monetizing, configure Game Passes or Developer Products and ensure they are testable in live mode.
Tip: Double-check privacy settings to prevent unintended access during early testing. - 7
Publish, test live, and collect feedback
After publishing, verify the live build loads correctly and that player reporting and analytics are functioning. Collect feedback from testers and early players to guide the next update.
Tip: Set up a simple feedback channel (in-game or via a community page) to encourage constructive input. - 8
Plan post-launch updates
Outline a roadmap for bug fixes, content updates, and new features. Regular updates improve retention and help your game appear in recommended lists.
Tip: Schedule updates and communicate progress to your community to keep interest high.
Questions & Answers
Do I need Roblox Premium to publish a game?
No. Publishing a Roblox game does not require Roblox Premium. Premium can enhance monetization options, but most developers publish with a standard account. You’ll still access Studio publishing features and game settings.
No, you don’t need Roblox Premium to publish. It’s optional for monetization, but not required for the publish process.
How long does the publishing process take?
Publish times vary based on your game’s complexity and the platform’s current load. Plan for a publish window that includes testing, verification of settings, and potential revisions after a review.
Publish times vary; expect a window that includes testing and possible revisions after a review.
Can I publish a game privately or with restricted access?
Yes. Roblox allows you to set privacy levels during setup. You can publish privately or with restricted access and switch to public later after testing and approvals.
Yes, you can publish privately and switch to public later after testing.
What should I configure for monetization after publishing?
If you monetize, configure Game Passes or Developer Products and ensure they are discoverable in your game. Test purchase flows in a controlled environment before making them live.
Configure game passes or developer products and test purchases before going live.
What assets or information are required to publish?
You’ll need a descriptive title, engaging thumbnail, and a compelling game description. Ensure assets comply with licensing and community standards, and verify your game loads smoothly.
Provide a clear title, thumbnail, and description, and ensure assets are licensed and load well.
How can I improve my game’s visibility after publish?
Focus on onboarding quality, accurate tags, and frequent updates. Engage with players in communities, and use in-game events to drive word-of-mouth and retention.
Improve onboarding, tags, and updates; engage with players to boost visibility.
Watch Video
The Essentials
- Plan before publishing to minimize back-and-forth.
- Test comprehensively to avoid post-launch issues.
- Configure privacy and monetization settings clearly.
- Publish with a post-launch update plan to sustain growth.
- Engage your community to improve retention.