Creating a Roblox Game: A Practical Step-by-Step Guide
Learn how to create a Roblox game from concept to publish with practical, beginner-friendly steps, scripting basics, and best practices. A practical guide by Blox Help.

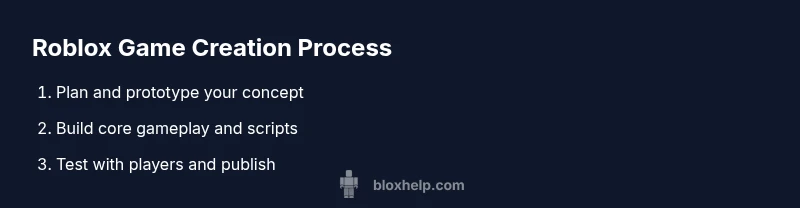
With this guide you will learn how to create a Roblox game from initial idea to published experience. You'll set up Roblox Studio, map your gameplay flow, script core mechanics in Lua, design UI, and test across players. By following practical steps, you can turn your concept into a playable Roblox game.
Why creating a Roblox game matters
According to Blox Help, learning to create a Roblox game unlocks a practical pathway into game development that combines creativity with real-world coding skills. Roblox games are accessible to players across devices, which means your ideas can reach a wide audience without the overhead of traditional publishing. The process teaches project planning, problem solving, and iterative testing, all while you learn Lua scripting and game design fundamentals. If you’ve ever dreamt of shipping a game that others can play, creating a Roblox game is a highly approachable starting point. This guide centers on actionable steps, concrete examples, and beginner-friendly tips to help you move from concept to a polished, shareable Roblox game.
Quick-start blueprint for creating a Roblox game
A successful Roblox game starts with a plan and a small, playable scope. Begin with a one-page design sketch: core loop, goal for players, and a rough map of levels. Break the idea into core systems: movement, interactions, and progression. Use modular components so you can swap or upgrade parts without breaking the whole project. As you progress, keep a simple backlog and milestone checks. This blueprint keeps you focused on creating a usable, testable product first, then expanding features as you gain confidence in Roblox Studio and Lua scripting. The habit of regular builds and tests accelerates learning and reduces the risk of feature creep.
Setting up Roblox Studio and project structure
To create your Roblox game, you’ll start by installing Roblox Studio and creating a new place. Set up a clear project structure with folders for Scenes, CoreSystems, UI, and Assets. Naming conventions matter—consistently prefix objects and scripts to keep the workspace navigable. Enable Version History so you can revert changes if something breaks. A clean starter scene helps you test mechanics in isolation before integrating more complex elements. As you set up, sketch your player spawn, camera behavior, and a basic lighting setup to establish the game’s mood. This foundation makes subsequent scripting and level design smoother and faster.
Designing game flow: players, goals, and progression
A great Roblox game has a clear flow: players join, complete a task, earn rewards, and advance. Start with a simple loop—start, challenge, reward, and repeat. Define player goals (e.g., collect items, reach a destination, or survive a wave) and unique progression mechanics (levels, badges, or cosmetic unlocks). Map out how players can interact with the environment and with each other. Visualize the onboarding path so new players understand how to play without external guidance. This section focuses on aligning gameplay with engagement, making sure every action contributes toward the next milestone. When you sketch this, you’re already building the player experience that your Roblox game will deliver.
Scripting basics: Lua in Roblox
Lua is the language used to power Roblox game logic. Start with small scripts that control movement, simple object interactions, and UI responses. Learn how to use Roblox services like Players, Workspace, and ReplicatedStorage to organize data and behavior. A practical approach is to implement event-driven scripts: listen for a player action, then trigger a result (sound, animation, or inventory update). Progressive enhancement matters—focus on robust, readable code and comment generously so future you can understand decisions. By mastering the essentials, you’ll gain confidence to tackle more advanced mechanics and networked gameplay.
Building assets and visuals: terrain, models, UI
Visual polish is key to a compelling Roblox game. Start with a simple but cohesive visual style: consistent color palette, readable UI, and clear silhouettes for interactive objects. Build or import basic models, and layer lighting to set the mood. UI should be intuitive: a health bar, inventory, and a clear objective display. Use Roblox's built-in UI components and basic animation to demonstrate feedback for player actions. As you add assets, maintain a consistent performance profile by balancing polygon counts and texture resolutions. A focused approach to visuals enhances immersion without overloading the player’s device.
Networking and multiplayer considerations
Most Roblox games rely on multiplayer interaction, which requires careful client-server logic. Plan which actions run on the server to prevent cheating, and which can be handled on the client for responsiveness. Use RemoteEvents and RemoteFunctions to communicate between clients and the server, ensuring data integrity and synchronization. Consider latency, prediction, and reconciliation techniques to keep gameplay fair and smooth. Start with a small, fully tested multiplayer loop before expanding to larger player counts. A disciplined approach to networking protects game integrity while keeping the experience engaging for everyone.
Testing, debugging, and iteration
Testing is not a one-off task but an ongoing discipline. Create test environments that mimic real gameplay scenarios and invite others to try your Roblox game in a private test. Use Roblox Studio’s debugging tools to step through scripts, inspect values, and watch for errors in output. Keep a bug board and prioritize issues by impact and frequency. Iteration is where most improvements happen: fix issues, refine balance, and re-test. Document changes so you can track what works and what doesn’t. Regular testing helps you deliver a stable, enjoyable experience and accelerates your learning curve.
Deploying and publishing your Roblox game
Publishing a Roblox game involves configuring game settings, updating assets, and selecting a suitable audience. Prepare a clear description, thumbnail, and promotional materials. Make sure your game complies with Roblox guidelines and licensing for assets you use. Enable appropriate monetization options if you plan to monetize, and set up basic analytics to monitor player engagement. After publishing, share your game with friends and communities, gather feedback, and plan a maintenance schedule. A well-planned launch helps your Roblox game attract early players and establish a foothold in the platform’s ecosystem.
Monetization and analytics basics
If you choose to monetize your Roblox game, understand the different options such as in-game purchases, game passes, and developer products. Pair monetization with analytics to measure how players interact with paid features. Track retention, engagement, and revenue without overloading the player experience with paywalls. Use analytics to guide future updates and balance. Remember, the primary goal is to deliver a fun and fair experience, with monetization as a complementary aspect rather than a driver.
Common pitfalls and how to avoid them
Many new developers fall into scope creep, overcomplicated systems, or poor onboarding. Start small, surface test early, and iterate frequently. Reuse proven patterns from Roblox Studio tutorials and the Developer Hub, but customize them to your game’s concept. Be mindful of performance bottlenecks and asset licensing. Finally, avoid neglecting testing with real players; feedback is essential to refine pacing, difficulty, and engagement.
Resources and next steps
Continue learning with official Roblox documentation, community forums, and hands-on practice. Build a personal project trail by listing feature milestones and ensuring you complete each one before adding new ideas. Seek feedback from peers or mentors who can review your Roblox game and suggest concrete improvements. The journey from concept to a shipped Roblox game can be deeply rewarding when you combine steady practice with structured learning.
Tools & Materials
- Roblox Studio(Official tool to create and test Roblox games; install from roblox.com)
- Roblox account(Sign in or create a developer account for publishing)
- Development computer with internet(Capable of running Roblox Studio smoothly; avoid outdated hardware)
- Design plan or game design document(Helpful for outlining mechanics, levels, and progression)
- UI/asset references(Graphics, icons, and layout ideas to speed up design)
Steps
Estimated time: 6-12 hours
- 1
Install Roblox Studio and set up your account
Download Roblox Studio from the official site, install, and log in with your Roblox account. Create a new project to establish your workspace. This initial setup is essential to begin building and testing your Roblox game; it’s the foundation for everything that follows.
Tip: Check for updates after install and enable Studio mode for debugging. - 2
Create a new project and outline your game concept
Start with a blank place or a template. Sketch a one-page concept: core loop, player goals, and rough level layout. Define which systems are core (movement, combat, collection) and which are ancillary (missions, cosmetics). This blueprint keeps scope manageable and provides a clear target for your first playable prototype.
Tip: Use a simple prototype to validate the core loop before adding features. - 3
Plan gameplay flow and milestones
Map the player journey from arrival to first victory. Set milestones like basic movement, interaction, and a small quest. Create a backlog of tasks with priority levels to guide incremental development. Planning upfront helps you stay focused and reduces rework when implementing features.
Tip: Prioritize a minimal playable experience to gather user feedback early. - 4
Build a basic playable environment
Create a simple map with essential terrain, a few interactive objects, and a clear spawn point. Populate the scene with basic lighting and a camera setup that feels natural. A solid environment anchors gameplay and gives you tangible assets to script against.
Tip: Keep the initial map small to speed up iteration cycles. - 5
Script core mechanics with Lua
Implement movement, item collection, and simple interactions using Lua scripts. Organize scripts under a CoreSystems folder and store reusable assets in ReplicatedStorage. Start small and test frequently to ensure each mechanic behaves as expected before expanding.
Tip: Comment code generously to make future changes easier. - 6
Design UI and player interactions
Create a clean UI that displays health, score, and objectives. Connect UI elements to gameplay events so players receive feedback instantly. Ensure UI scales across devices and remains legible on smaller screens.
Tip: Prototype UI with basic templates first before investing in custom art. - 7
Add basic multiplayer scaffolding
Set up server-authoritative logic for essential gameplay and practice using RemoteEvents for client-server communication. Validate synchronization by running multiple clients in Studio. This step protects game integrity while maintaining responsiveness.
Tip: Test with at least two players to catch synchronization issues early. - 8
Test, debug, and optimize
Run structured tests, log errors, and iteratively fix issues. Pay attention to frame rate, memory usage, and load times. Use Roblox’s analytics and performance tools to identify bottlenecks and refine balance.
Tip: Create a checklist for common issues to speed up debugging sessions. - 9
Publish a private test build and gather feedback
Before a public launch, publish a private test build to limited players. Collect feedback on controls, difficulty, and bugs. Use this data to refine gameplay and fix critical issues prior to wide release.
Tip: Encourage testers to report steps to reproduce for easier debugging. - 10
Publish publicly and promote
Finalize game settings, screenshots, and a short trailer. Publish to Roblox, set appropriate permissions, and announce via communities and social channels. Post-launch monitoring helps you address issues quickly and plan future updates.
Tip: Prepare a short update plan to keep players engaged after launch.
Questions & Answers
Can a beginner create and publish a Roblox game without coding experience?
Yes. Beginners can publish Roblox games by starting with simple mechanics and using Roblox Studio’s built-in templates. Basic Lua concepts are helpful, but you can learn them gradually while expanding your game.
Yes, beginners can publish by starting small and learning Lua as they go.
Do I need Roblox Premium to publish a Roblox game?
No. Publishing a Roblox game does not require Roblox Premium, though Premium unlocks creator benefits and monetization options that can help you earn revenue.
No, Premium is not required to publish; it enables extra creator tools.
What is the best way to learn Lua for Roblox?
Start with the Roblox Developer Hub tutorials, then experiment by building small scripts. Practice regularly and study existing game scripts to understand common patterns.
Learn Lua by using Roblox tutorials and building small scripts, then study existing game code.
How long does it take to create a Roblox game?
Time varies with scope. A small, well-scoped project can be completed in a few days, while larger games take weeks or months of iteration and testing.
It depends on scope; small projects take days, larger ones weeks or months.
How does multiplayer work in Roblox?
Multiplayer relies on client-server architecture. Use server-authoritative scripts for core actions and RemoteEvents for client communication to keep gameplay fair.
Roblox multiplayer uses a server-authoritative model with RemoteEvents for communication.
Where can I find legal assets and avoid copyright issues?
Use Roblox Library assets or create your own. Always verify licenses and permissions for any asset you import from external sources.
Use Roblox assets or original content, and check licenses for everything imported.
Watch Video
The Essentials
- Plan before building to stay focused
- Lua basics unlock powerful gameplay
- Test early with real players
- Keep assets modular and optimized
- Publish thoughtfully and iterate based on feedback