Building Roblox: A Practical Guide for Aspiring Developers
Master building Roblox games from plan to publish. This guide covers planning, Lua scripting, Studio workflows, testing, and best practices for new developers.

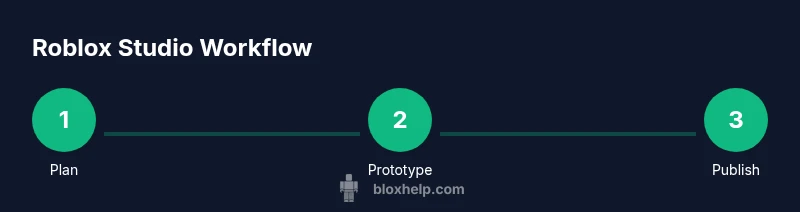
You will learn how to plan, scaffold, and publish a Roblox game using Roblox Studio. This quick guide outlines the essential steps, required tools, and common pitfalls to avoid when building Roblox experiences. From concept to publish, you’ll explore prototyping, scripting, assets, testing, and iteration, plus practical checklists to stay organized and on a steady path.
What building Roblox means
Building Roblox games is the process of designing, scripting, and publishing interactive experiences inside the Roblox ecosystem. It blends creativity, logic, and collaboration. At its core, building Roblox means turning ideas into playable prototypes using Roblox Studio and Lua scripting. The platform provides a visual editor for environments, characters, UI, and mechanics, plus a powerful scripting language to control behavior. In practice, most successful Roblox titles begin with a solid concept, a defined scope, and a plan for replayability. According to Blox Help, building Roblox projects starts with a clear plan and a good grasp of Roblox Studio. This holistic view helps you avoid common pitfalls such as feature creep and unmanageable asset requirements. In the wide Roblox universe, you are limited only by your design decisions, time, and willingness to iterate. You will learn to balance aesthetics, gameplay, and performance so players stay engaged. The following sections walk through planning, setup, scripting, testing, and publishing.
Planning your Roblox project
Before touching a line of code, create a design document that outlines the game's core loop, target audience, and progression milestones. Break the project into modules: world layout, player mechanics, UI, and audio. Establish a minimum viable product (MVP) and a clear release plan with milestones. A good design process for Roblox includes rapid prototyping, player feedback loops, and a lightweight asset plan to avoid bloated files. As you map the journey, consider performance constraints on a wide range of devices, since Roblox players use PCs, tablets, and consoles. Use data-driven decisions whenever possible; keep a simple spreadsheet of features, estimates, and risks. The goal is to have a playable, testable concept within a few days, then expand iteratively. In this section, you’ll see concrete examples of how to translate ideas into a concrete plan and a realistic timeline that keeps scope under control. This approach saves time and builds momentum.
Getting started: Roblox Studio and tools
Roblox Studio is the primary workspace for creating games on Roblox. Start by installing Studio, creating a new place, and exploring the default templates. Set up a clean project structure with folders for images, models, scripts, and UI elements. Familiarize yourself with the Explorer and Properties panels, which let you organize assets, adjust properties, and script behaviors. Add basic terrain, a few pieces of geometry, and a simple lighting setup to establish the mood. As you work, enable Studio’s built-in team features if you plan collaboration, and use version history to track changes. The goal is to build a dependable baseline that you can expand later, not to launch with every feature at once.
Scripting in Roblox with Lua
Lua is Roblox's scripting language and is essential for defining game logic, interactions, and flow. Start with a small, self-contained script that reacts to a basic event, such as a player touching a trigger to start a timer. Learn key concepts: events, functions, variables, and basic data structures. Keep scripts short and modular, with clear comments that explain intent. Use Roblox’s official API reference and sample projects to see idiomatic Lua patterns in action. As you grow, introduce local scripts for client-side UI and server scripts for core gameplay logic. Debug incrementally by printing values and testing each change in a controlled environment to isolate issues quickly.
Designing assets and environments
Assets shape the player experience. Begin with simple, reusable assets rather than bespoke, high-pidelity models. Create a modular kit: base environment pieces, NPCs, weapons, and UI components that can be swapped or upgraded. Focus on consistent color palettes, scale, and spacing to maintain visual coherence. Use lightweight textures and avoid overloading scenes with high-poly models that cause performance drops across devices. Keep a small asset library organized with naming conventions and folders. As you design, test how assets load and render to minimize loading times and jitter during gameplay. Planning asset pipelines early saves time during iteration.
Testing, iteration, and debugging
Loop: test, gather feedback, refine, retest. Start with a minimal playable prototype and gradually add features. Use Roblox Studio’s Play mode to simulate both server and client perspectives, and involve friends to identify edge cases. Track issues with a simple bug log and assign severity. Pay attention to performance metrics such as framerate, load times, and memory usage; optimize assets and scripts accordingly. Frequent in-game testing helps catch bugs early, while structured iteration prevents scope creep. Keep a habit of documenting fixes and rationale so future changes don’t reintroduce old problems.
Publishing your game and post-launch tips
Publish once you have a stable MVP that demonstrates core gameplay. Create a compelling game page with screenshots, a clear description, and a short trailer or gameplay clip. After publishing, monitor player feedback and telemetry to guide updates. Plan post-launch sprints focused on improving balance, adding requested features, and repairing bugs quickly. Maintain a change log and communicate progress with your community to foster trust. Use Roblox’s monetization options judiciously and iterate on the features players engage with most. A successful launch often leads to ongoing updates, new events, and sustained player interest.
Common pitfalls and how to avoid them
Many beginners stall because they underestimate planning or overestimate what they can finish in a single session. Avoid building in a vacuum—regularly test with real players, not just a couple of friends, and solicit constructive feedback. Don’t neglect documentation; keep a simple log of decisions, asset sources, and script functionalities. Another frequent trap is ignoring performance; optimize early by testing on multiple devices and reducing asset sizes. Finally, resist the urge to ship a feature-complete title before polishing core gameplay. Focus on a satisfying loop that keeps players returning, then expand with deliberate updates.
Tools & Materials
- Roblox Studio(Install latest version from roblox.com and sign in with a Roblox account)
- A computer (Windows/macOS)(Stable internet connection; recommended 8GB RAM for larger scenes)
- Design brief or game concept(One-page outline detailing core loop, audience, and MVP)
- Asset placeholders or reference assets(Use simple shapes or free assets to prototype quickly)
- Code editor (optional for scripting tutorials)(Not required for basic builds; Lua snippets can be edited in Studio)
Steps
Estimated time: 12-16 hours
- 1
Define concept and scope
Begin with a one-page design brief outlining core gameplay, target audience, and success criteria. Establish a realistic scope to avoid feature creep. Define a rough milestone plan that keeps your project manageable.
Tip: Write a concise design brief and review it weekly. - 2
Create a new Roblox Studio project
Open Roblox Studio, create a new place from a template, and set a descriptive name. Organize folders for assets, scripts, and UI. Save early with version history enabled.
Tip: Use a clean, modular folder structure from day one. - 3
Build the core gameplay area
Lay out the playable space using simple blocks to establish levels, paths, and objectives. Keep scale consistent to ensure predictable player movement and interaction.
Tip: Start with a minimal viable environment and expand later. - 4
Script core mechanics
Create small, testable scripts that control core gameplay, like player spawn, collectables, or timers. Keep logic modular with clear function names and comments.
Tip: Test each script in isolation before integrating with others. - 5
Design UI and menus
Develop a lightweight UI for health, score, and pause menus. Use client-server separation to keep UI responsive while maintaining game logic on the server.
Tip: Keep UI clean and readable across devices. - 6
Test locally and iterate
Run Play mode to simulate real players, fix bugs, and adjust balance. Gather feedback from friends and iterate on the MVP.
Tip: Maintain a bug log and prioritize issues by impact. - 7
Publish and monitor
Publish the game with a clear page description and trailer. After launch, monitor feedback and performance metrics to guide updates.
Tip: Set up a simple post-launch update plan.
Questions & Answers
What is Roblox Studio and why do I need it?
Roblox Studio is the official development environment for Roblox games. It lets you design environments, build gameplay, and script behaviors. It’s the primary tool for turning ideas into playable experiences.
Roblox Studio is Roblox's official game creator tools—the place to design, script, and publish games.
Do I need to know how to code to build Roblox games?
No, you can start with templates and drag-and-drop elements. Learning Lua scripts will unlock deeper gameplay and customization, but you can publish a simple game without heavy coding as you begin.
You can start with templates and basic models, then learn Lua to unlock more features.
How long does it take to learn Roblox scripting?
Time varies by effort and goals. Start with small scripts, practice regularly, and gradually tackle more complex systems as you gain confidence.
It depends on how much you practice, but steady, small steps lead to steady progress.
Can I publish a Roblox game without scripting?
Yes, you can publish using pre-made modules and assets, though scripting greatly enhances gameplay and player engagement.
Yes, you can publish without scripting, but scripting makes your game much more compelling.
What are common beginner mistakes in Roblox development?
Common mistakes include over-scoping, skipping testing, ignoring optimization, and neglecting user feedback. Start small and iterate based on playtester insights.
Beginners often overreach, skip testing, and ignore performance; start small and improve from feedback.
How do I plan post-launch updates?
Create a simple roadmap for updates, prioritize player-requested features, and schedule regular patches to maintain momentum.
Make a simple update plan and listen to players to guide future patches.
Watch Video
The Essentials
- Plan with a design brief and MVP in mind
- Structure projects modularly for easier iteration
- Test early and often with real players
- Keep performance in mind across devices
- Publish with a clear page and plan for updates