How to Get Started with Roblox Animation
Learn how to start Roblox animation—from Studio setup to your first keyframes. This beginner-friendly guide covers rigs, the Animation Editor, testing, and practical tips to help you create polished Roblox animations.

You’ll learn how to start Roblox animation by installing Roblox Studio, opening the Animation Editor, and creating your first keyframes on a Humanoid rig. You’ll need a PC or Mac, stable internet, and basic motion principles. This step-by-step approach covers setup, basics, and practical tips.
The Animation Workflow in Roblox
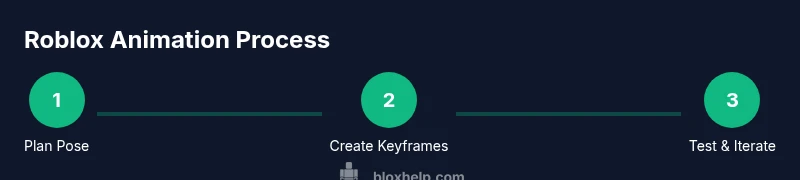
Roblox animation follows a simple, repeatable workflow that turns a pose into a living movement. Start with a plan: what motion should the character perform? Choose a rig (R6 or R15) and confirm the target game or scene. In Roblox Studio, access the Animation Editor and create an Animation object. Record keyframes for the main poses, then refine timing using the timeline and easing curves. Once you have a smooth sequence, you can test it in Play mode, adjust weight or blending, and publish the animation asset for reuse in games. This loop—plan, create, refine, test—keeps animation outcomes predictable and scalable. Consistent practice with small, repeatable motions accelerates learning and helps you build a solid foundation for more complex character performances.
Essential Tools and Setup
To get started, gather a few core tools. You’ll need Roblox Studio installed on a PC or Mac, with the built-in Animation Editor accessible via the Plugins panel. A Humanoid rig (R6 or R15) is essential for posing and keyframe work. A reliable keyboard and mouse provide precise control, and a stable internet connection helps with asset browsing and publishing. Optional references, such as pose sheets or motion studies, can speed up your learning curve. Keep your workspace organized by creating a dedicated folder for animation projects and naming each file clearly.
Understanding the Roblox Animation Editor
The Animation Editor is where you’ll build and refine motion. Key areas include the bone hierarchy on the left, the timeline at the bottom, and properties on the right. To create motion, select bones and insert keyframes at specific frames. Use the play button to preview your work, and adjust timing by dragging keyframes on the timeline. Onion skinning, when available, lets you see previous and next poses to ensure smooth transitions. Remember to save versions frequently and annotate changes so you can revert if something goes off-model.
Picking the Right Rig for Your Animation Goals
Choosing between R6 (simpler, fewer joints) and R15 (more joints, higher fidelity) sets the ceiling for your animation. Beginners often start with the R6 rig to learn essential poses and transitions without overwhelming complexity. As you grow, migrate toward the R15 rig to add finger and detailed limb motion. Consider your game’s art style and performance requirements; smaller projects may benefit from R6 for reliability, while more ambitious titles can justify R15’s finer control.
Recording and Editing Keyframes
Start with a few core poses: idle, walking, and a simple action like jumping. Record keyframes for these poses at logical frames (e.g., 0, 15, 30). Then scrub the timeline and refine: adjust bone rotations, tweak positions, and ensure the motion flows naturally. Use the onion skin feature (when available) to keep poses consistent across frames. Periodically test in Play mode to see how the animation feels in real-time and note any awkward pivots or jitter.
Timing, Easing Curves, and Motion Principles
Timing and easing give life to your animation. Use slower easing for weighty motions and quicker easing for snappier actions. Smooth out abrupt transitions by adjusting the easing curves between keyframes; a common approach is EaseIn at the start and EaseOut at the end of a move. Consider the arc of motion, anticipation before a move, and follow-through after key poses. Practicing with simple cycles—breathe, step, or wave—helps internalize these principles.
Adding Facial Expressions and Secondary Motion
Facial expressions and secondary motion (like hair or cape sway) add realism. In Roblox, you can animate the head and facial bones or substitute decals for expressions, depending on your rig and assets. For secondary motion, simulate natural sway by adding gentle secondary bones or adjusting pose offsets on hair, clothing, or accessories. Start with subtle changes and increase complexity as you gain confidence.
Layering Animations and Blending
Advanced animators blend multiple motions by layering animations and controlling their influence. In Roblox Studio, you can run multiple AnimationTracks on a character and adjust their weight to blend between actions (e.g., walking while waving). Plan your layers to minimize conflicts: keep base motion (walk) on one track and add expressive gestures on a secondary track. Practice transitions between layers to avoid abrupt jumps.
Testing, Debugging, and Performance Tips
Test frequently in Play mode across different devices if possible. Look for jitter, clipping, or animation drift and adjust timing or bone constraints accordingly. Keep your keyframes minimal but expressive; too many keyframes can cause performance issues and complicate blending. Optimize by reusing assets, avoiding overly complex rigs in performance-critical games, and keeping animation files organized in project folders. Document changes so you can revert or iterate efficiently.
Next Steps: Expanding Your Roblox Animation Skillset
After mastering basics, tackle more complex shots: character interactions, multi-actor scenes, and lip-sync where appropriate. Explore Roblox community tutorials to learn about common pipelines, asset pipelines, and best practices for sharing animations in games. Build a small showreel of your progress to track improvement, and seek feedback from peers in the Roblox developer community. Consistency and curiosity are your best guides on this journey.
Tools & Materials
- Roblox Studio installed(Download from the Roblox website and sign in)
- Animation Editor access (built-in)(Enable from Plugins if not visible)
- Rigid Humanoid Rig (R6 or R15)(Start with R6 for simplicity)
- Keyboard and mouse or equivalent(Precise control for keyframes)
- Stable internet connection(For asset browsing and publishing)
- Reference materials (pose sheets, videos)(Helpful but optional)
Steps
Estimated time: 45-90 minutes
- 1
Install Roblox Studio
Download and install Roblox Studio, then sign in with your Roblox account. Verify you have the latest version to access the built-in Animation Editor. This step sets up your workspace and ensures compatibility with rigs.
Tip: Check for updates before starting to prevent missing features. - 2
Open Animation Editor and load a Humanoid Rig
In Studio, open the Animation Editor and select a Humanoid rig (R6 or R15). This creates the skeleton you’ll pose frame-by-frame. You can switch rigs later, but starting with a simple option reduces complexity.
Tip: Use a starter pose as your first keyframe baseline. - 3
Create a New Animation Project
Create a new animation asset and name it clearly (e.g., 'WalkCycle_A'). This keeps your projects organized and makes it easy to reference in games.
Tip: Document your animation goals in the notes field. - 4
Record Your First Keyframes
Pose the main positions (idle, walk, and a simple action). Insert keyframes at strategic frames (e.g., 0, 15, 30). Preview to confirm poses transition smoothly.
Tip: Keep the duration modest—longer cycles increase complexity. - 5
Refine Timing and Easing
Adjust frames on the timeline and apply easing curves to soften transitions. Use EaseIn for starts and EaseOut for finishes to create natural motion.
Tip: Test with short playbacks to feel the timing. - 6
Test in Play Mode
Enter Play Mode to observe real-time motion and potential clipping or jerkiness. Iterate based on what you see and adjust keyframes as needed.
Tip: Test across multiple devices if possible to check performance. - 7
Publish and Reuse
Publish the animation so you can reference its asset ID in games. This enables reuse and sharing with others in your project.
Tip: Keep a changelog when you publish updates.
Questions & Answers
What is the best rig to start with for beginners?
Begin with the R6 humanoid rig to learn core poses and transitions. You can switch to R15 later for more detailed motion as you gain experience.
For beginners, start with the R6 rig to learn the basics before moving to the more detailed R15 rig.
Can I animate facial expressions in Roblox?
Yes, you can animate facial features by rigging the head bones or using decals and face assets. This is more advanced and may require additional rig configuration.
Yes, facial animation is possible with head bones or face assets, though it’s a bit more advanced.
Do I need to code to animate in Roblox?
No. Roblox Studio's Animation Editor handles creating and editing animations. Scripting is used to control when and how animations play in-game.
No coding is required to animate in Studio, but you’ll use code to trigger animations in games.
How long does it take to learn Roblox animation?
Learning depends on practice. Regular, focused sessions help you pick up fundamentals faster, while complex motion will take longer to master.
It varies, but steady practice helps you progress steadily over time.
Watch Video
The Essentials
- Plan, then execute in small steps
- Choose R6 for basics, upgrade to R15 later
- Test often in Play Mode to catch issues early
- Learn easing to make motions feel natural
- Document iterations for future projects