How Roblox Games Are Made: A Practical Beginner's Guide
Learn how Roblox games are made—from concept to prototype, Lua scripting, assets, testing, and publishing—through a practical, beginner-friendly guide.

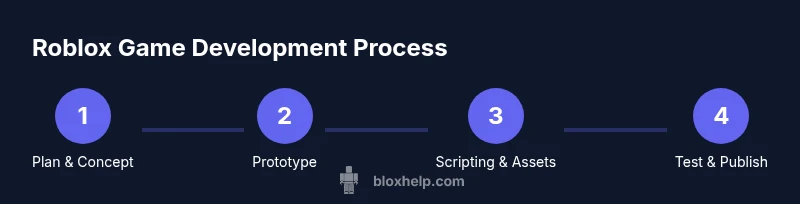
How Roblox games are made starts with a clear concept and a plan. According to Blox Help, you’ll use Roblox Studio to create a new place, script gameplay in Lua, assemble assets, and iterate through testing before publishing. This guide walks you through a practical, beginner-friendly workflow to move from idea to a playable Roblox game.
Roblox Studio: the foundation Roblox Studio is the official development environment for Roblox and the primary tool you’ll use to turn ideas into interactive experiences. It combines world-building tools with a capable code editor that runs Lua scripts, designed to be approachable for beginners yet deep enough for advanced projects. When you open a new project, you’ll see a default place with a simple terrain, lighting, and a starter camera, but the real power comes from understanding how the windows and panels work. The Studio window is organized around two main panes: the Explorer, which shows every object in your game, and the Properties panel, which defines how those objects behave. You place parts to shape the world, then attach scripts to add behavior, sounds, and interactivity. Scripts sit inside objects and can run on the server, on the client, or in both—depending on where they are placed (Scripts vs LocalScripts vs ModuleScripts). To begin, create a tiny scene: a base plate, a few blocks, and a script that prints a message when a player triggers something. Run Play mode to see how changes affect gameplay in real time. As you grow more confident, learn to structure your project with folders for assets, scripts, UI, and saved data. Roblox’s Developer Hub and API reference are invaluable as you explore object properties, event patterns, and best practices. A strong early habit is to test small changes constantly rather than waiting to complete a big feature; this saves time and prevents cascading errors. Keep your project organized with consistent naming, clear folder structure, and regular backups. By building discipline early, you’ll reduce debugging time and accelerate progress toward larger, more ambitious games.
Designing gameplay: from concept to prototype Every successful Roblox game starts with a concept and a core loop that keeps players engaged. Before touching code, outline the target audience, the genre, the primary actions players will take, and a rough progression path. Write a simple design brief that answers: What is the player trying to accomplish? How do they win or fail? What resets or challenges keep things interesting? With this blueprint, create a minimal prototype that demonstrates movement, basic interactions, scoring, and a tiny UI. The nonessential art can be placeholders; the goal is to validate the mechanic rather than achieve final polish. In Roblox Studio you can assemble a tiny level using a few blocks, a spawn point, and simple trigger areas that respond to players. Keep scope tiny at first; a focused, one-room prototype is easier to test and iterate than a sprawling demo. Use a changelog and a design diary to track changes and decisions, so you know what to revisit when you revise. After you have a working prototype, test it with friends or other players to collect feedback. Observe what players fail to understand, where they get stuck, and which moments feel fun. Loop back to adjust the core loop, tune difficulty, and iron out obvious bugs. According to Blox Help, a clear plan and disciplined iteration accelerate progress and reduce wasted time. Once the prototype feels solid, you can gradually swap placeholders for real assets, implement additional features, and expand the level while preserving the core mechanic that makes your game unique.
Scripting with Lua: best practices Roblox scripting relies on Lua, a lightweight language that integrates tightly with the Roblox API. Start with small, modular scripts: separate player logic, item interactions, and UI updates so each script has a single responsibility. Use events and callbacks to respond to actions (like Touched, ClickDetector events, or ProximityPrompts) instead of running continuous loops that waste CPU. Name objects clearly and consistently, and comment as you go to help future you and teammates understand why things work. Organize code into Modules (ModuleScript) that you can require from multiple scripts to share common functionality, such as inventory systems or health calculations. Put data that must be visible to both server and client in a shared storage area (ReplicatedStorage) and keep sensitive logic on the server side (ServerScriptService) to reduce client-side cheating risks. When building with Roblox, prefer built-in services (Players, Workspace, ReplicatedStorage, StarterGui) to access core features, and use Roblox’s built-in events and signals rather than reinventing the wheel. Start with a simple mechanic, like a collectable or a basic enemy, and implement it with a test harness that you can reuse across features. Use Roblox’s testing tools (Test Service, Play Solo) to verify behavior in isolation before integrating with other systems. Version your scripts by adding a small header with a timestamp or feature tag, so you can trace changes across major builds. Finally, read the official API reference regularly to understand deprecated features and new capabilities, and keep an eye on community best practices for performance and security.
Assets and collaboration: models, textures, and team roles A Roblox game uses a mix of built‑in assets, user-created models, and UI elements. Begin with a basic level layout and placeholder textures, then progressively swap in higher‑quality art as soon as feasible. Use the Roblox Library and Marketplace assets judiciously to save time, but evaluate each asset for performance and compatibility with your game’s scale. If you can, create a simple style guide that defines color palettes, typography for UI, and naming schemes for assets so the team remains visually coherent. Establish roles early: scripters, designers, and producers, with regular check-ins and a shared asset folder (for example, a Folder in ReplicatedStorage to hold common modules, UI templates, and sound effects). Communicate style decisions in brief documents and keep a changelog so team members know what changed between builds. Version control isn’t built into Roblox as a default feature, so adopt practical habits like consistent file naming, clear comments, and incremental commits in your own workflow. When collaborating, use Roblox’s team create or private server features to test together and avoid exposing early builds to the public. Finally, test asset performance in-game—heavy textures and high‑poly models can hurt frame rates—and optimize by reducing texture resolution or combining meshes where possible. By treating assets as an ongoing part of the iteration process, your game will feel more polished without slowing development.
Testing, publishing, and monetization basics Test the game frequently in Studio using Play and Play Solo modes; simulate multiple players with local testing and, later, public testing with friends or community testers. Early testing should focus on core mechanics, controls, and basic interactions; later stages should stress test with more players to reveal performance bottlenecks and synchronization issues. Look for performance problems (framerate dips, memory usage), collision glitches, and UI quirks that break the player experience on different devices. Before publishing, verify that your game adheres to Roblox’s guidelines and rating requirements, and decide on a simple monetization plan (such as game passes or in‑game purchases) that aligns with your core loop and progression. Draw a clear line between free and paid features to avoid pay-to-win perceptions. After release, monitor player feedback, engagement metrics, and retention to guide future updates. Schedule a follow-up patch that adds a new feature or tweak to extend the game’s life, and communicate updates to players so they feel heard. Based on Blox Help analysis, iterative testing and measured updates are central to growing a Roblox game responsibly and sustainably. If you plan to monetize, make sure to review Roblox’s policies and ensure your monetization options are clearly explained within the game UI to avoid confusion or dissatisfaction.
Common challenges and troubleshooting tips Even experienced developers face hurdles when making Roblox games. Performance problems often stem from heavy assets, excessive physics, or inefficient rendering. To maintain a smooth frame rate, keep parts simple, reduce unnecessary physics computations, and batch operations where possible. If a script errors, use the Output window in Studio and add print statements to trace values step by step. Protect your game against client-side exploits by keeping sensitive logic on the server and validating critical actions on the server side. For network issues, remember Roblox uses replication to synchronize state; design your systems so a laggy client doesn’t block the entire experience. When things go wrong, isolate the issue by reproducing the problem in a clean place, then reintroduce features gradually. Regularly back up your project and document the fixes you make so you can learn from patterns. If you’re stuck, reach out to the Roblox developer community, compare notes, and study published tutorials from reliable sources. Finally, adopt a habit of incremental improvements—build one small feature at a time, test it thoroughly, and only then move to the next improvement. The Blox Help team recommends keeping a steady pace and focusing on fundamental game feel before chasing complexity.
Tools & Materials
- Computer or laptop with internet access(Capable of running Roblox Studio; at least 4GB RAM, stable connection)
- Roblox Studio software(Free download from Roblox site)
- Roblox account(Needed to publish or test in-game)
- Access to Roblox Developer Hub / API docs(For scripting references and best practices)
- Text editor (optional)(Use for longer notes or Lua snippets)
- Asset library access(Placeholders or final assets as needed)
Steps
Estimated time: 8-12 hours
- 1
Plan your game concept
Define the genre, core loop, target audience, and success criteria. Create a brief Game Design Document to keep goals clear.
Tip: Document decisions early to avoid scope creep. - 2
Set up a Roblox Studio project
Create a new Place, organize folders (Assets, Scripts, UI), and enable Play testing to iterate quickly.
Tip: Use a clean folder structure from day one. - 3
Build a minimal prototype
Assemble a tiny level and implement core mechanics with placeholder art to validate gameplay.
Tip: Focus on the core loop before polishing visuals. - 4
Script core gameplay
Implement movement, scoring, and win/lose conditions with modular scripts.
Tip: Separate logic into small, testable modules. - 5
Add UI and feedback
Create HUD elements, menus, and sound cues that reinforce actions and progress.
Tip: Keep UI simple and readable on all devices. - 6
Test and iterate
Run frequent playtests, collect feedback, and adjust difficulty and pacing.
Tip: Test with players outside your team. - 7
Publish and monitor
Publish to Roblox, monitor analytics, and plan a follow-up update based on feedback.
Tip: Provide release notes to players. - 8
Iterate post-launch
Release improvements, fix bugs quickly, and introduce fresh content to retain players.
Tip: Keep updates frequent enough to maintain interest.
Questions & Answers
What is Roblox Studio and who can use it?
Roblox Studio is the official development tool for Roblox. It’s free and accessible to anyone who wants to learn game development, with a gentle learning curve for beginners and depth for seasoned builders.
Roblox Studio is the official tool for making Roblox games, free to use and suitable for beginners.
Do I need to know Lua to make Roblox games?
Yes. Lua is the scripting language used in Roblox. Start with basics and progressively add more complex scripts as you become comfortable.
Yes, you’ll use Lua for scripting. Start with basics and build up.
Can I monetize Roblox games?
You can monetize through in‑game purchases and game passes. Follow Roblox guidelines to implement features that players understand and value.
Yes, through in-game purchases and game passes.
How long does it take to learn Roblox game development?
Learning varies; beginner projects can be built in days, while more complex games take weeks to months of practice and iteration.
It varies; start simple and grow over time.
What are common pitfalls for beginners?
Common issues include performance bottlenecks, overly complex UI, and insufficient playtesting feedback. Start simple and test frequently.
Performance issues and lack of testing are common pitfalls.
Watch Video
The Essentials
- Plan concepts before coding and prototype early.
- Use Lua modules to keep code organized.
- Test often with real players and iterate quickly.
- Publish with a clear monetization plan and follow policy guidelines.
- Keep assets light to maintain performance on all devices.