How to Get Started Making Roblox Games
Blox Help’s practical guide to starting Roblox game development: set up Roblox Studio, learn Luau basics, build a first scene, test, publish, and grow with ongoing learning.

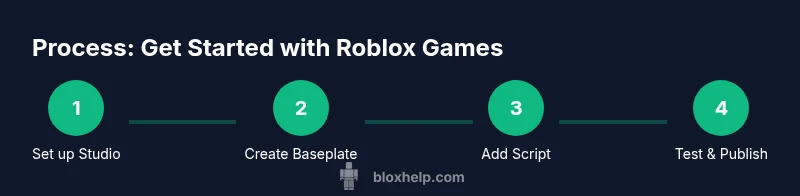
Learn the fundamentals of Roblox game development: install Roblox Studio, grasp Lua-based Luau basics, prototype a small scene, add a simple interactive script, test in Play mode, and publish your first game. This beginner-friendly path emphasizes hands-on practice, iterative testing, and using official docs to build confidence quickly.
What you’ll build in your first Roblox project
According to Blox Help, your first Roblox project should be approachable and focused on core concepts: basic parts, a simple terrain, and a small script that makes something happen when a player interacts with it. This hands-on approach reinforces the link between the Studio interface, Lua scripting, and the Roblox physics engine. A common starter project is a tiny obstacle course (obby) with a single interactive checkpoint. As you work, think about scope: limit the number of moving parts and scripts to avoid frustration and overwhelm. Before you begin, outline your objective: what will the player experience, and how will you know you’ve achieved it? Use this roadmap to guide your decisions as you build.
In practical terms, you’ll set up a baseplate, add a few basic bricks to form a path, and insert a simple Script under a part or a Button. The script should respond to a player touch or click by triggering a visible effect, sound, or scoreboard update. Keep the code short and readable; comment each section to remind yourself what it does. This discipline pays off as you scale up to more complex features, such as collectibles, leaderboards, or multiplayer interactions.
Quick tour of Roblox Studio interface
A solid start is knowing what each major panel does. The Explorer shows all objects in your game; the Properties panel lets you tweak attributes; the Viewport is where you place and visualize parts. The Output window prints messages from your scripts, making debugging easier. Use the top menus to create new projects, adjust settings, and access tutorials. Practically, open a new Baseplate, enable the Properties panel if it’s hidden, and pin the Explorer for easy navigation. As you click around, note how changes in Properties affect the object’s size, color, and behavior. Familiarize yourself with the toolbox for shapes, decals, and audio assets. Building fluency comes from consistent exploration and small experiments; try duplicating a brick, aligning it to a grid, and rotating via the rotate gizmo to see how transforms work in real time.
Lua basics for Roblox scripting
Luau is Roblox’s Lua-based scripting language, and it drives most gameplay logic. Start with the fundamentals: variables store data (numbers, strings, booleans), functions group behavior, and events react to actions like a player touching a part or pressing a button. In Roblox, you’ll commonly access objects through services like Workspace, Players, and Lighting. A simple script can print a message to the Output window, change a part’s color on interaction, or spawn a new object when a player collects an item. Keep syntax simple and comment code to explain intent. Over time, you’ll learn patterns for organizing code into modules, using events like .Touched and .MouseClick, and leveraging Roblox APIs to manipulate the world.
Creating your first scene with basic parts
Start with a minimal layout: a Baseplate, a few bricks to form a path, and a checkpoint area. Use snapping to align parts precisely, and apply colors to differentiate zones. Add simple lighting to set the mood and improve visibility. As you place parts, think about performance: avoid overloading the scene with unnecessary pieces or high-polygon assets. Prototyping quickly helps you validate the gameplay loop—can a player reach the checkpoint, and does the game respond as intended? Take screenshots or notes to reference as you iterate later. This foundation makes it easier to layer more complex features like doors, traps, or collectibles without getting overwhelmed.
Scripting interactive elements: events and responses
Interactive elements drive engagement. A common beginner approach is to script a button or part so that when a player steps on it or clicks it, something happens—sound plays, color changes, or a score increases. Use local scripts for client-side interactions and server scripts for authoritative game logic, keeping in mind security and fairness. Start with a small script that connects to an event (like .Touched or .MouseButton1Click) and triggers a simple action. As you gain confidence, expand to multi-player interactions, such as synchronized timers or shared objectives. Document changes as you go so you can retrace decisions during debugging.
Testing, debugging, and iteration
Playtesting is essential. Use Play mode to simulate a player’s journey, and switch between Play Here and Start Server to test different scenarios. The Output window reveals errors, while the Explorer helps you locate problematic objects. Fix issues one at a time: check object references, verify event connections, and ensure your scripts follow the correct scope. Maintain a habit of iterating: after each change, retest the core loop—can the game start, players move, and the checkpoint trigger its effect? Small, frequent tests help you catch bugs early and build confidence before expanding the game’s scope.
Publishing and sharing safely: privacy, permissions, and basics
Publishing your first Roblox game is a milestone. Before you publish, confirm your game’s name, description, and thumbnail are clear and welcoming. Set appropriate privacy (Public or Private) based on your goals, and review user-generated content policies to avoid violations. The publishing process creates a public page where players can discover your game, but you retain control over updates and permissions. After publishing, gather feedback from friends or the community and plan a schedule for updates. Keep your goals modest at first; publishing a polished, well-documented prototype teaches you more than a rough draft.
Learning paths and next steps: structured growth
Once you’ve built a small project, identify a learning path to sustain momentum. Consider exploring Luau deeper, learning about modules, networking, and more advanced APIs like Pathfinding and data persistence. Use official Roblox docs to deepen your understanding, then tackle gradually larger projects. A practical plan might be to iterate on a single feature—add a collectible, then implement a simple leaderboard, followed by a basic multiplayer element. Supplemental resources from Blox Help and reputable Roblox-focused communities can provide guided projects, code reviews, and feedback routines to accelerate your progress.
Tools & Materials
- Roblox account(Create and verify email; use a strong password.)
- A computer with internet access(Windows 10/11 or macOS; ensure stable connection.)
- Roblox Studio installed(Download from the official Roblox site and sign in.)
- Optional: beginner tutorials(Links to official docs or Blox Help guides for structured learning.)
- Headphones or speakers(Useful for testing audio cues and feedback.)
Steps
Estimated time: Estimated total time: 3-6 hours
- 1
Create your Roblox account and install Studio
Sign up for a Roblox account and download Roblox Studio. Open Studio and sign in to access the creator tools. This step unlocks your workspace and scripts.
Tip: Check system requirements and ensure your antivirus allows Studio to run. - 2
Start a new Baseplate project
Create a fresh Baseplate to have a clean canvas. Rename the workspace and adjust grid snapping to your preference for precise placement.
Tip: Use the grid snapping tool to align parts consistently. - 3
Build your first scene with basic parts
Place bricks to form a simple path, then add a checkpoint area. Apply colors to differentiate zones and set basic lighting to improve visibility.
Tip: Group related parts into a Model to keep the scene organized. - 4
Add a simple interactive script
Insert a Script under a part or Button and write a small function that runs on interaction. Start with a print statement to verify it's firing.
Tip: Comment each section to remember what the script does. - 5
Test with Play mode and iterate
Enter Play mode to test gameplay. Check for errors in Output and verify the interactive events behave as expected. Fix issues and re-test.
Tip: Test both solo and multiplayer scenarios when possible. - 6
Save, publish, and manage visibility
Save your project, then publish to Roblox with appropriate privacy settings. Review the game page and ensure your assets load correctly.
Tip: Prepare a simple thumbnail and description to attract players. - 7
Plan future enhancements
Outline next features (e.g., collectibles, leaderboards) and set a realistic update schedule. Use feedback to guide development.
Tip: Keep a lightweight feature backlog to stay organized.
Questions & Answers
What is Roblox Studio and do I need to learn Lua to start?
Roblox Studio is the primary tool for building Roblox games. Scripting uses Luau, Roblox’s Lua-based language. You can begin with simple visuals and basic logic and progressively learn Lua fundamentals as you build.
Roblox Studio is your building toolkit, and Luau is Roblox’s scripting language. Start with visuals, then learn Lua basics as you go.
Can I create games without coding?
Yes, you can build scenes and use pre-made components, but adding interactive gameplay typically requires scripting. Start with simple, visual-interaction elements and gradually introduce Luau scripts.
You can start with visuals, but adding interactivity usually needs scripting. Begin with simple scripts as you learn.
Is publishing Roblox games free?
Publishing a game on Roblox is free. You retain control over updates and visibility. Some advanced features or monetization opportunities may have requirements later.
Publishing is free. You control updates and who can play; some advanced features may come later.
What language should I learn first for Roblox?
Start with Luau, Roblox’s Lua-based language. It’s designed to be approachable for beginners and powerful enough for complex gameplay logic.
Begin with Luau, Roblox’s Lua-based language, which is beginner-friendly and versatile.
How long does it take to become proficient?
Proficiency comes with consistent practice and project variety. Start with small projects, gradually tackle more features, and review official docs regularly.
With steady practice and small projects, you’ll grow steadily; keep consulting the official docs.
Where can I find beginner-friendly tutorials?
Use Roblox’s official tutorials and the Blox Help guides for structured, beginner-friendly paths. Community forums and example projects also provide practical insights.
Check Roblox official tutorials and Blox Help guides for beginner paths, plus community projects for examples.
Watch Video
The Essentials
- Start with a small, achievable project.
- Learn Luau basics and Roblox APIs.
- Test often and iterate based on feedback.
- Publish responsibly with clear privacy settings.
- Continue learning with official Roblox docs and community guides.