How to Get Roblox Studio: A Step-by-Step Guide
Learn how to get Roblox Studio, install Roblox Studio, sign in, and start building. This beginner-friendly guide covers download, setup, first projects, scripting basics, and troubleshooting to kickstart your Roblox development journey.

Goal: learn how to get studio on roblox and start using Roblox Studio to build places and scripts. This quick guide covers where to download Roblox Studio, system requirements, signing in, and first steps for a beginner. By following these steps, you’ll be able to open Studio, explore the interface, and begin your first project with Lua scripting.
What Roblox Studio is and why you should learn it
According to Blox Help, Roblox Studio is the official development environment for Roblox games, enabling you to create, test, and publish places and experiences. It includes a scripting editor, an object explorer, and a properties panel that lets you customize behavior and appearance. For beginners, Studio lowers the barrier to entry by providing templates and built-in tutorials, making the journey from basic building to scripting more approachable. In this guide, you will learn how to get studio on roblox, install the software, set up your environment, and start your first project. You’ll also learn best practices for organization, versioning, and testing, so you can grow from a beginner to a capable Roblox developer.
Getting Roblox Studio: download and install basics
Roblox Studio is free to download and use, and you typically access it through the official Roblox site. The installation process is streamlined: you download the installer, run it, and log in with your Roblox account. This block explains where to begin the download, how to verify you have the correct version, and how to prevent common installation issues. The aim is to have Studio ready on your computer with a clean, organized workspace for your first projects. Remember, your Roblox account is your gateway to Studio projects, collaborations, and publishing.
System requirements and environment setup
To run Roblox Studio smoothly, ensure your computer meets basic requirements and that you have a reliable internet connection during setup. Studio benefits from a modern OS, sufficient RAM, and a stable graphics driver. This section covers choosing the right disk space, setting up a default project folder, and configuring your display preferences to maximize focus while you learn. A stable environment reduces crashes and helps you keep your project versions tidy.
Your first project: building a simple place
Starting with a simple place helps you learn the core Studio workflow: adding parts, moving them with the move tool, and applying basic properties. This section walks through creating a flat base, inserting a few basic parts, and using the Explorer to organize objects. You’ll also learn how to save versions and test your place in Studio’s Play mode. The goal is to produce a small, functional starter project that you can iterate on as you learn more advanced features.
Roblox Studio interface: panels, tools, and navigation
The Studio interface is composed of a 3D viewport, Explorer, Properties, and several toolbars. Understanding what each panel does speeds up your learning curve. This section breaks down the layout, explains how to dock panels, and shows you how to customize the workspace for easy access to essential tools like the Material Library, Asset Manager, and Output. With practice, you’ll navigate faster and focus more on building than on hunting for controls.
Basic scripting in Roblox Studio: Lua in practice
Lua is the scripting language used in Roblox. This section introduces the very basics: where scripts live, how to edit, and how to run simple commands that alter object properties. You’ll see sample scripts that move a part or change its color, then learn how to read the Output window for debugging feedback. This foundational knowledge sets you up to create interactive experiences and more complex behaviors as you grow comfortable with Lua.
Troubleshooting common issues and pitfalls
New users often encounter startup delays, missing assets, or errors in scripts. This block provides practical troubleshooting steps: verify login status, check network access, confirm Roblox Studio permissions, and review common Lua syntax mistakes. You’ll also learn how to access official support resources and community forums when you’re stuck, so problems get resolved quickly rather than derailing your learning path.
Learning path and resources: from beginner to builder
A structured learning plan accelerates progress. This section outlines a practical roadmap featuring official Roblox tutorials, beginner-friendly courses, and community guides. You’ll find recommended practice projects, milestones, and how to balance building with scripting practice. By following a curated path, you’ll steadily increase your confidence and portfolio with small, proof-of-work projects.
Next steps: build, test, and publish
Once you’re comfortable with the basics, you can expand into more ambitious projects, test across scenarios, and iterate with feedback. This closing section summarizes how to refine your projects, leverage version control practices, and prepare for publishing. The guidance emphasizes consistent practice, seeking feedback from peers, and gradually increasing project scope. The Blox Help team recommends maintaining a project log and scheduling regular playtests to sharpen your skills.
Tools & Materials
- Computer (Windows or macOS) with internet access(A modern machine helps Roblox Studio run smoothly.)
- Roblox account(Needed to sign in and publish work.)
- Web browser (Chrome/Edge/Firefox)(Used to download Studio and view resources.)
- Stable internet connection(During download, sign-in, and testing.)
- Headphones or speakers(Helpful for hearing audio cues during testing.)
- Notepad or code editor (optional)(Useful for drafting Lua snippets before pasting.)
Steps
Estimated time: 90-180 minutes
- 1
Open official Roblox site and navigate to Roblox Studio
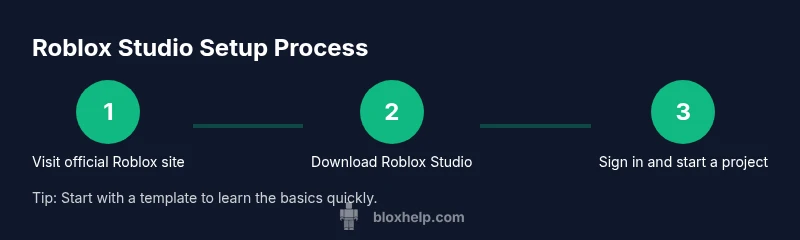
Visit the official Roblox site and locate the Roblox Studio download section. Follow the prompts to begin the download. This step ensures you’re getting the legitimate installer from Roblox, reducing risk of counterfeit software.
Tip: Verify you’re on roblox.com and not a third-party mirror. - 2
Download Roblox Studio installer
Click the download button and save the installer to your computer. Ensure your browser’s download completes without interruptions to prevent corrupted installation files.
Tip: Use a fast internet connection to reduce download time. - 3
Run the installer and sign in
Execute the downloaded installer and follow on-screen prompts to install Roblox Studio. Sign in with your Roblox account to unlock your projects and permissions for publishing.
Tip: Allow the installer to make changes if prompted by your OS. - 4
Create a new project
Launch Roblox Studio and choose 'New' to create a blank place or select a template. This creates the workspace you’ll build in, with Explorer and Properties panels ready.
Tip: Start with a template to learn quicker. - 5
Explore the Studio interface
Familiarize yourself with the 3D Viewport, Explorer, and Properties. Learn where to find the Toolbars, the Output window, and the Model/Asset libraries.
Tip: Dock panels for quick access; customize layout to your preference. - 6
Write your first script
Add a Script object to a part and write a basic Lua script to modify a property. Run the script and observe changes in the Output for debugging.
Tip: Keep functions small and test incrementally. - 7
Test in Play mode
Use Studio’s Play mode to test interactions in real-time. Check for errors in Output and refine your script accordingly.
Tip: Test often to catch issues early. - 8
Publish your project
When ready, use 'File > Publish to Roblox' to share your place. Set a descriptive name and description to help others discover your work.
Tip: Review privacy and access settings before publishing.
Questions & Answers
Is Roblox Studio free to use, and do I need a game to download it?
Yes, Roblox Studio is free to download and use. You don’t need an existing game to download the software; you can start a new project from scratch. Signing in with a Roblox account gives you access to your projects and publishing tools.
Roblox Studio is free and open for you to start a new project right away after you sign in.
What platforms support Roblox Studio?
Roblox Studio runs on Windows and macOS. Ensure your OS is up to date and meets general performance guidelines for best results.
Studio runs on Windows and macOS with typical performance needs.
Do I need a Roblox account to use Studio?
Yes. You need a Roblox account to sign in to Studio, save your work, and publish your creations to Roblox.
You’ll need a Roblox account to sign in and publish.
Can Roblox Studio run offline?
Studio requires an internet connection for downloading, signing in, and publishing. Many features still work offline, but you’ll need online access for most collaboration and publishing tasks.
You generally need internet for signing in and publishing, but some work can be done offline.
How do I publish a project to Roblox?
Prepare your place, set privacy and access options, then choose Publish to Roblox from the File menu. Provide a name, description, and thumbnail to improve discoverability.
Open the File menu and publish from there with proper details.
What should I do if Roblox Studio won’t start?
Check your internet, run the installer as admin if needed, verify your system meets requirements, and consult the official support resources or community forums for guidance.
If it won’t start, check internet and reinstall as admin, then seek help if needed.
Watch Video
The Essentials
- Install Roblox Studio from the official site
- Sign in with a Roblox account to create and publish
- Explore the interface: Viewport, Explorer, Properties
- Start with templates and simple scripts
- Test frequently and publish with clear metadata